Tailgate
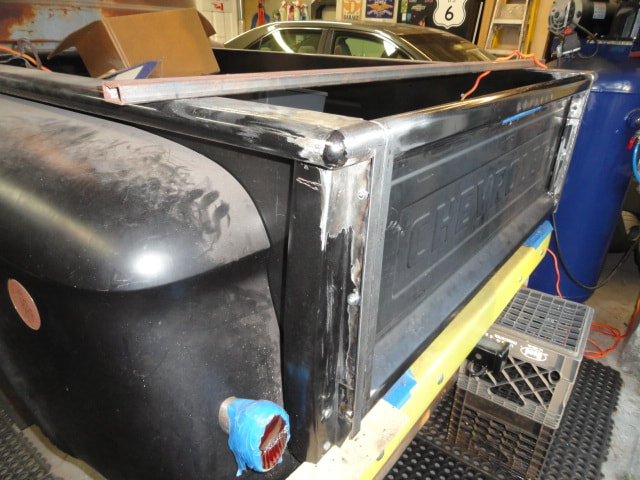
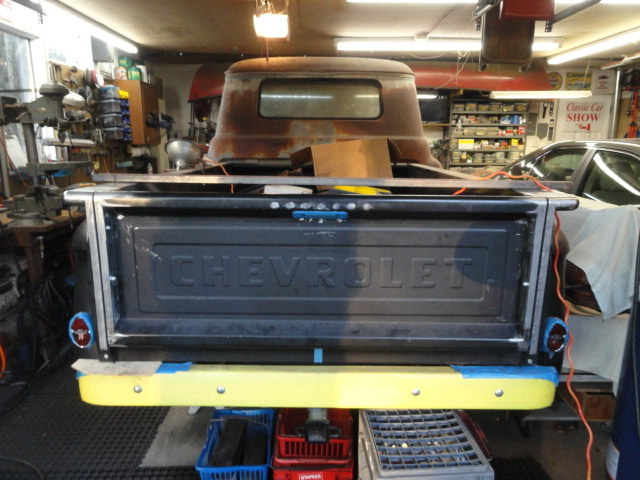
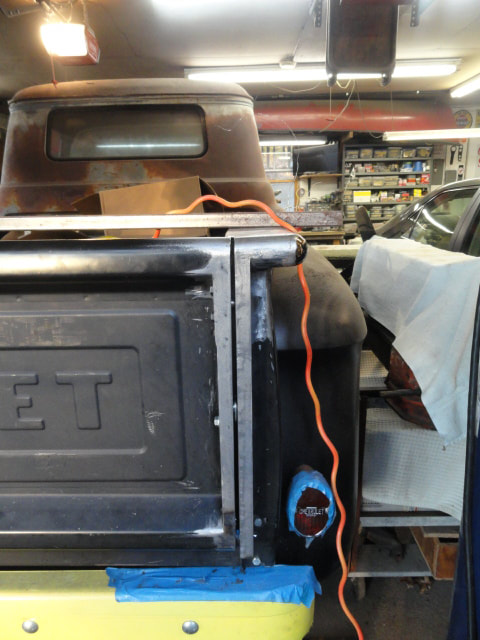
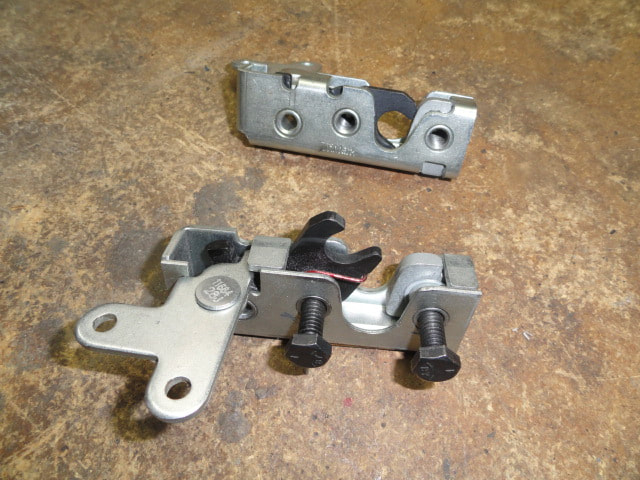
The tailgate is a standard 57 gate from LMC, but I don't like the original chain supports and how they are used to latch the gate when shut. After a bunch of looking around, I decided to try and fit in a set of Mini Bear Claw latchs and picked a set up from Speedway Motors.
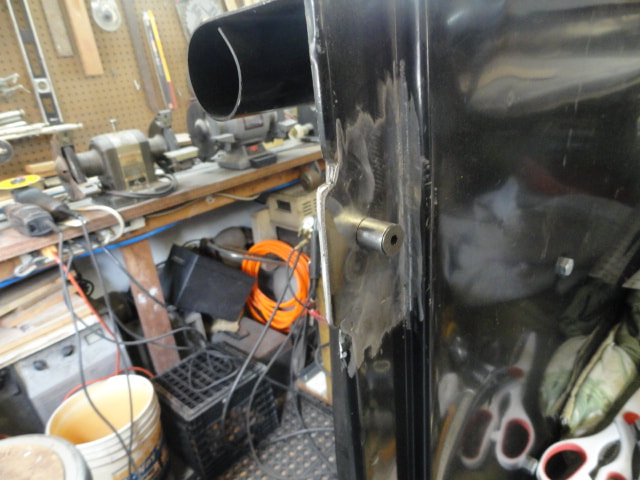
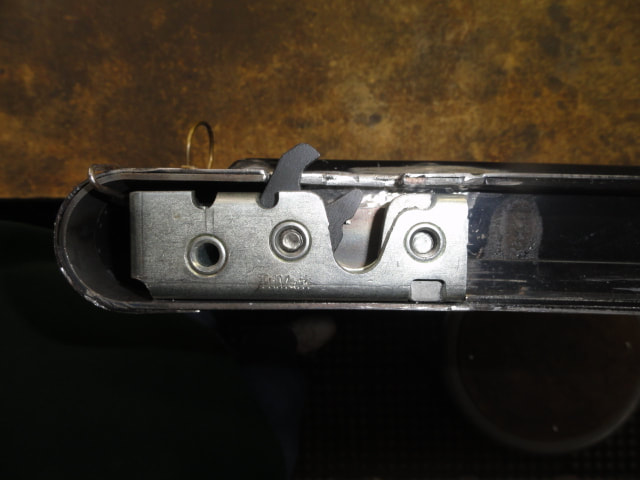
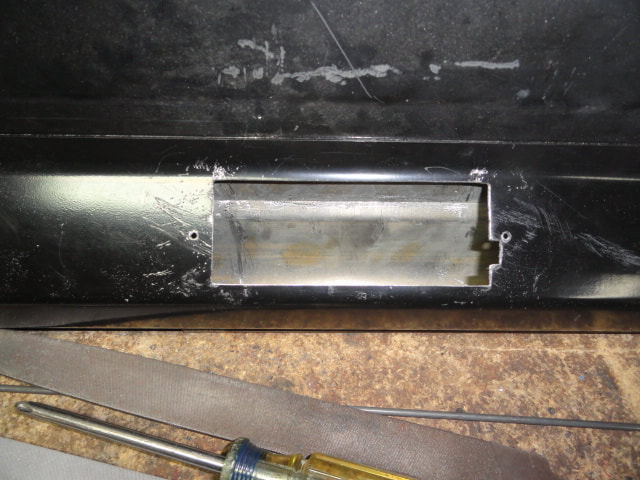
To fit in the new latches, the original latch catches were cut off from both the gate and the bed sides. To make room for the latches to fit new pockets were made to close off the ends of the gate and to hold the bear claws. These pockets were then welded into place and the latches mounted.
With the bear claws in place, the latch pins were then fitted. This was done by filling in the hole that was created when the bed side catches were cut out. For the latch pins I used countersunk 1/4 - 20 bolts and spacer tubes that could then be bolted into place.
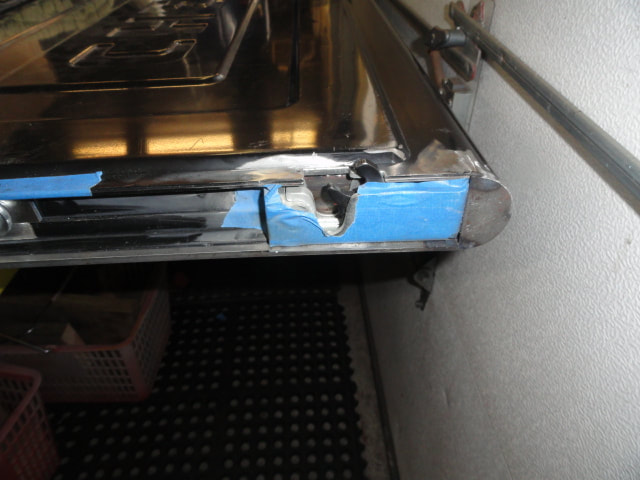
To support the tailgate when open I picked up a pair of Dorman support cables for a 2005 Toyota, part number 38545. The end of the tailgate needs to be trimmed to make room for the cable to pass through. The cable comes with only one support mount bolt, but the price of the assembly was cheap enough, I bought 4 sets to have enough bolts. I copied the Toyota tailgate layout of the mount bolt position, so that was easy.
To fit in the new latches, the original latch catches were cut off from both the gate and the bed sides. To make room for the latches to fit new pockets were made to close off the ends of the gate and to hold the bear claws. These pockets were then welded into place and the latches mounted.
With the bear claws in place, the latch pins were then fitted. This was done by filling in the hole that was created when the bed side catches were cut out. For the latch pins I used countersunk 1/4 - 20 bolts and spacer tubes that could then be bolted into place.
To support the tailgate when open I picked up a pair of Dorman support cables for a 2005 Toyota, part number 38545. The end of the tailgate needs to be trimmed to make room for the cable to pass through. The cable comes with only one support mount bolt, but the price of the assembly was cheap enough, I bought 4 sets to have enough bolts. I copied the Toyota tailgate layout of the mount bolt position, so that was easy.
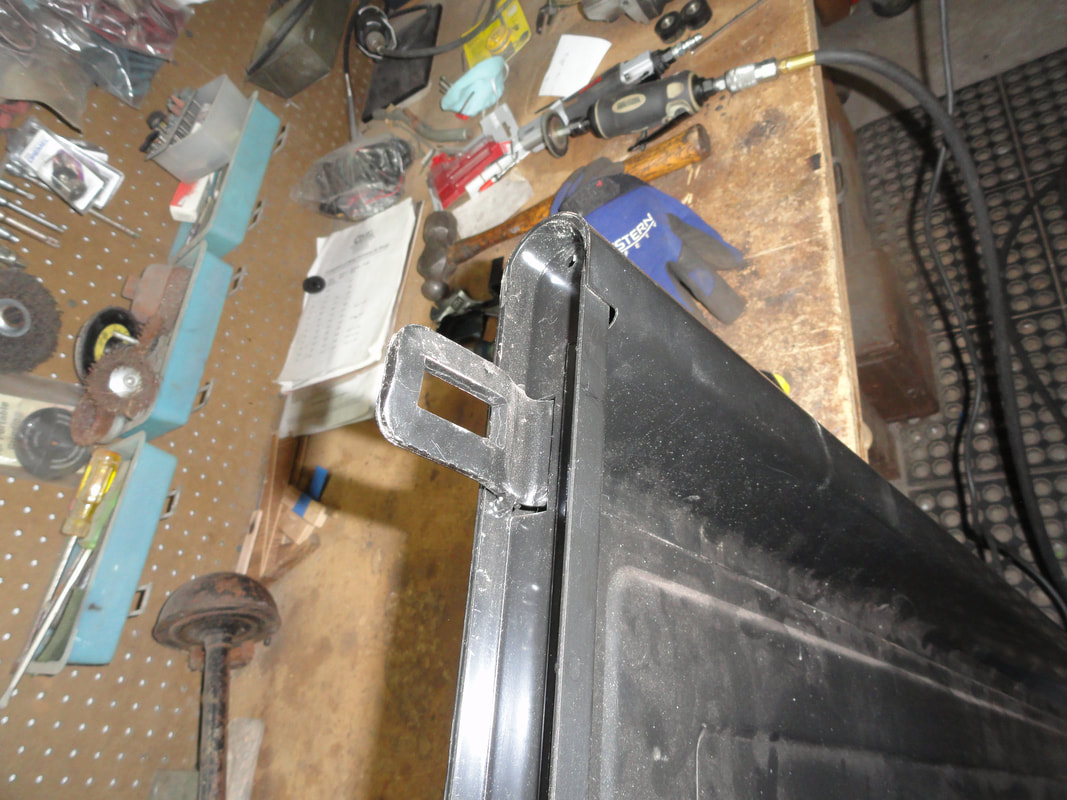

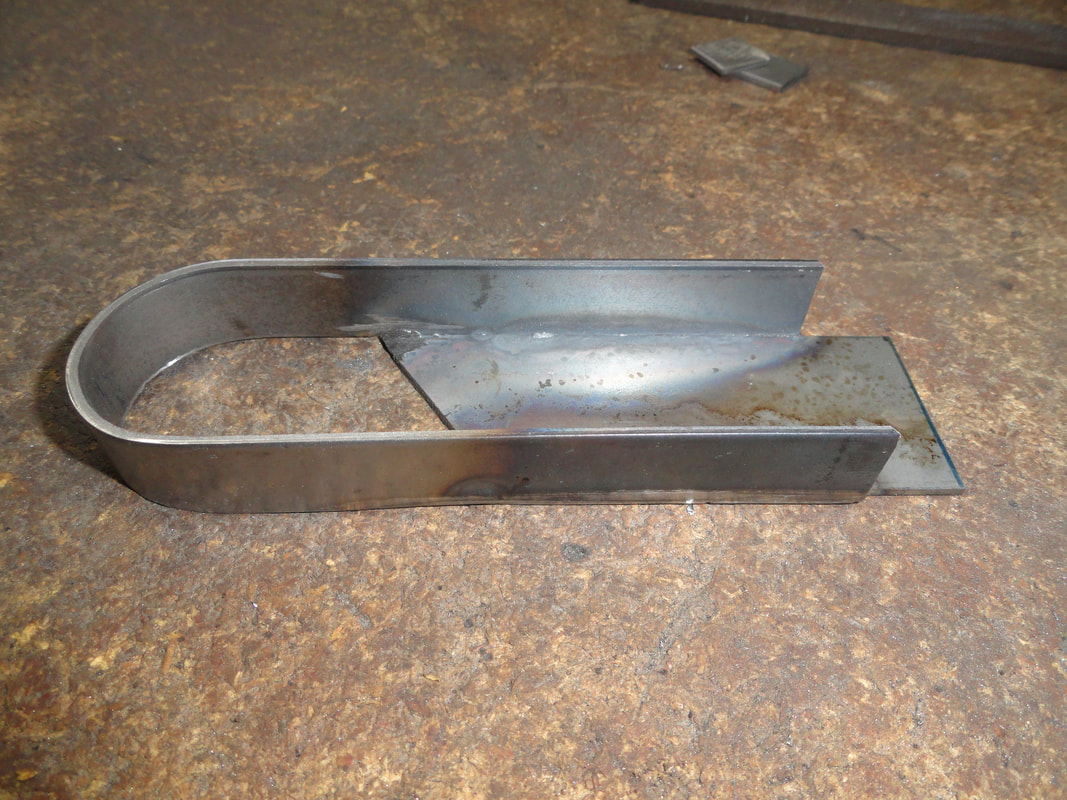


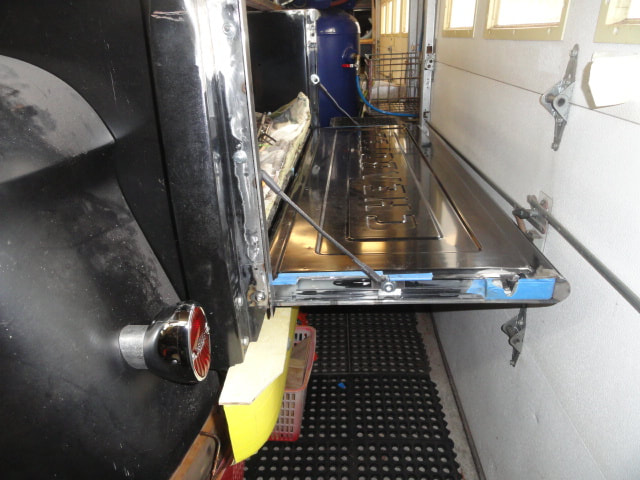
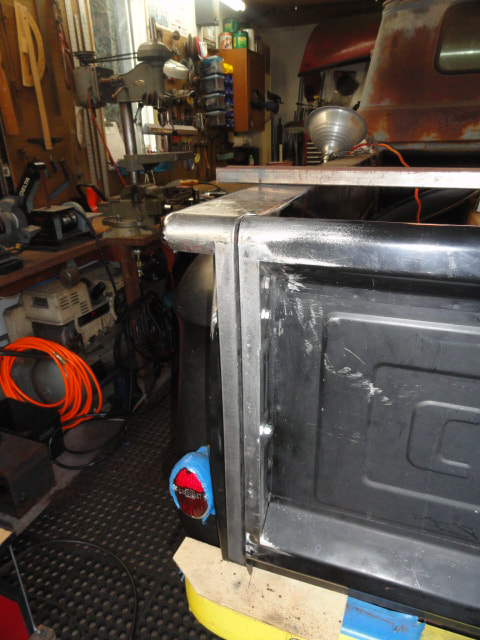
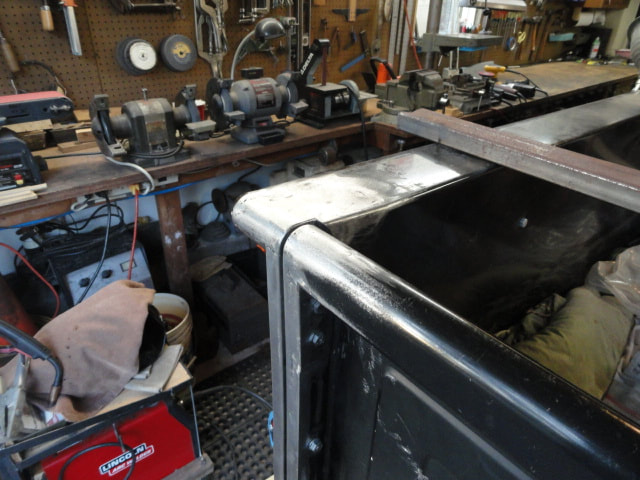
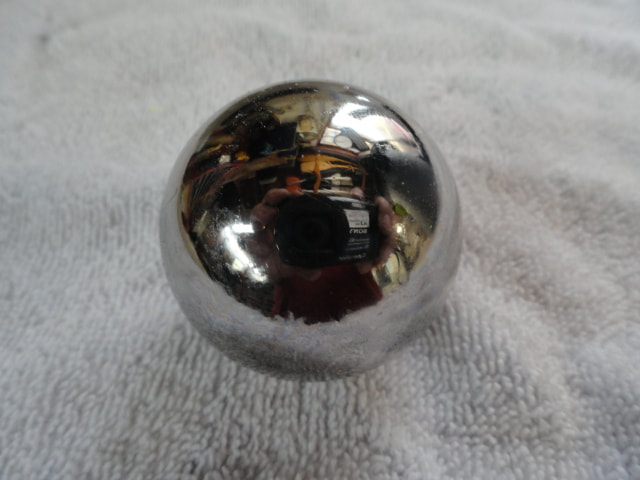
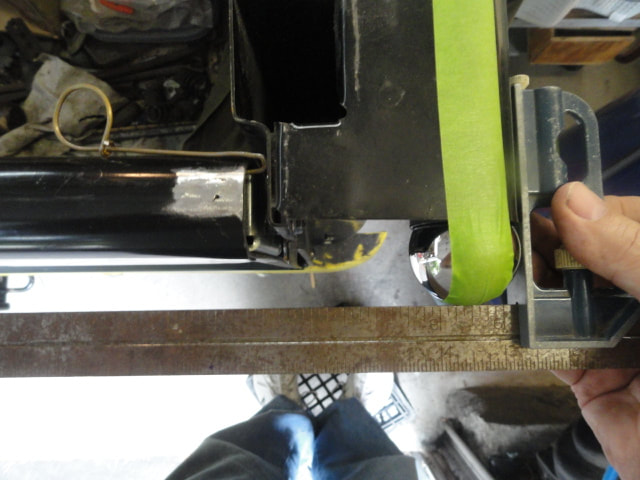
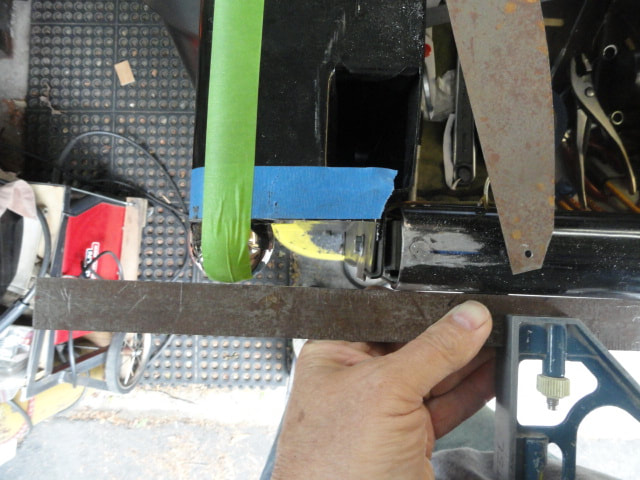
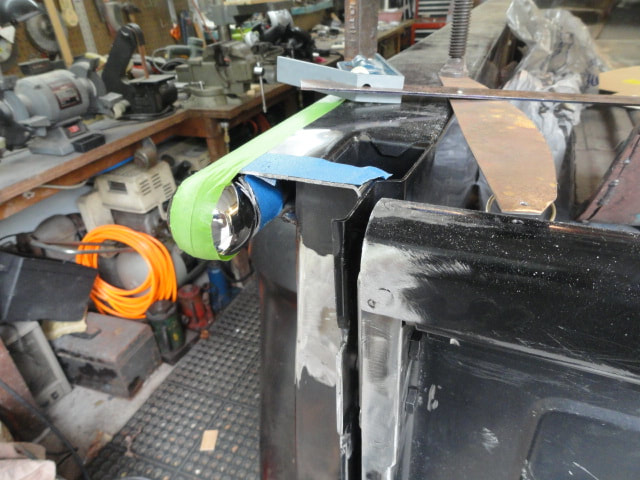
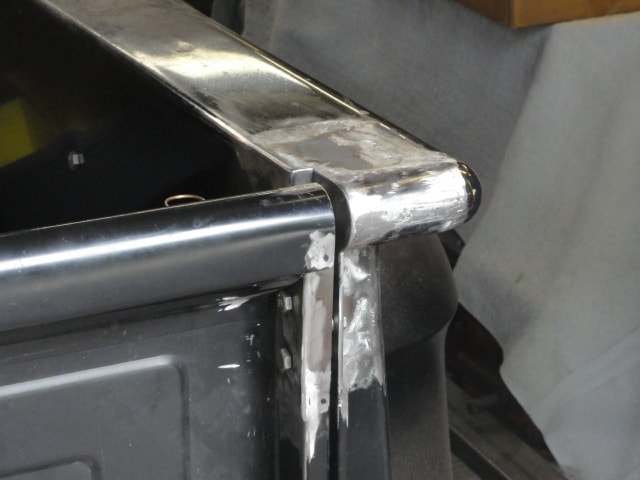
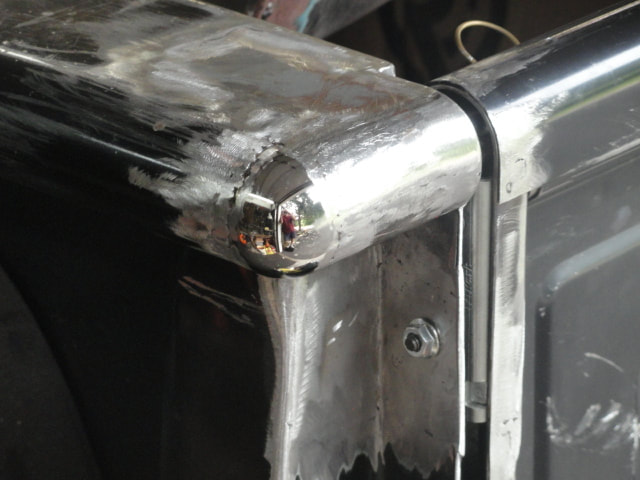
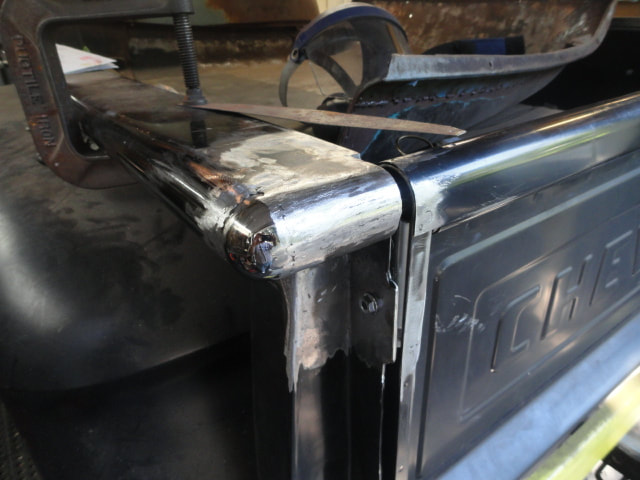
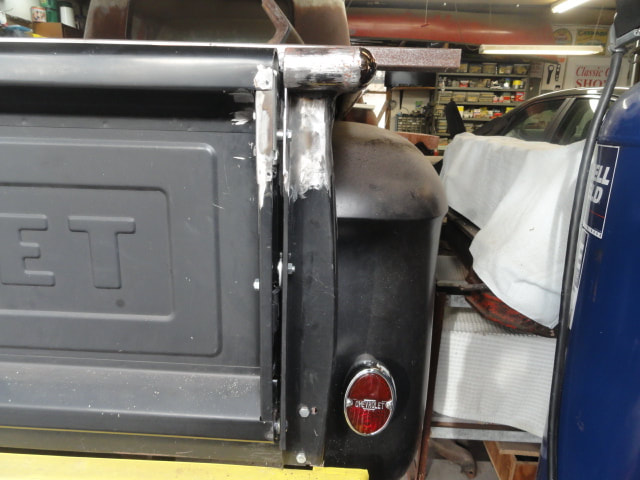
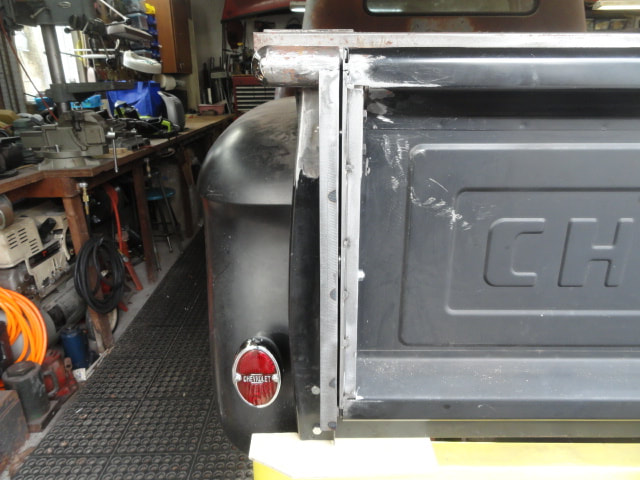
Next came the ends of the bed sides, namely the open tube ends. I have seen different mays to modify the open tube, but almost all of them have been to close it of with flat plates that don't tie in with the round tail gate top edge. I did see someone round off the corner but they used a large radius for the corner that didn't look right either. I decided to go with a corner radius that was the same as the existing tube, but didn't know how to achieve the look. After several failed attempts to make a corner from sheet metal, I hit upon using a steel ball. I found a ball in the McMaster Carr catalog that was the same diameter as the bed side tube that has worked out great.
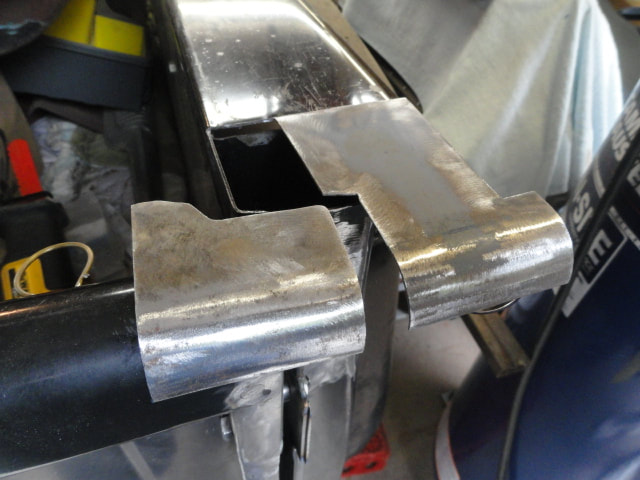
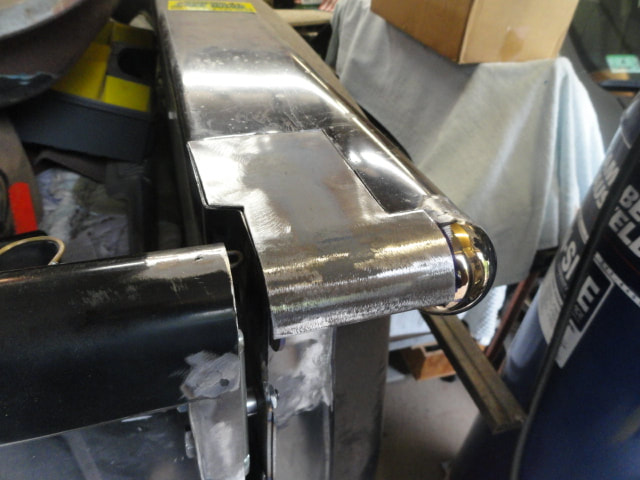
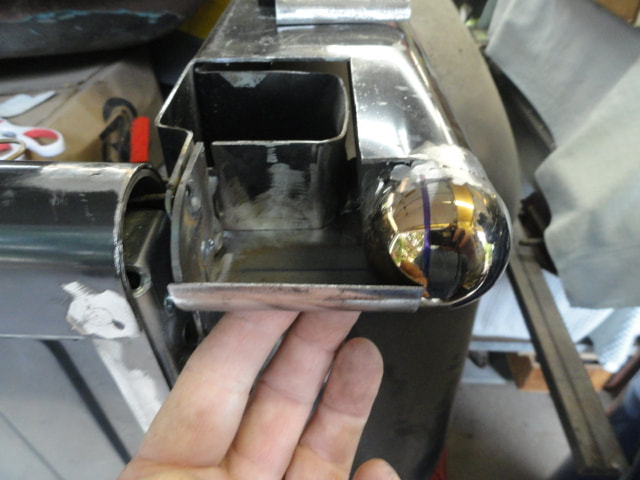
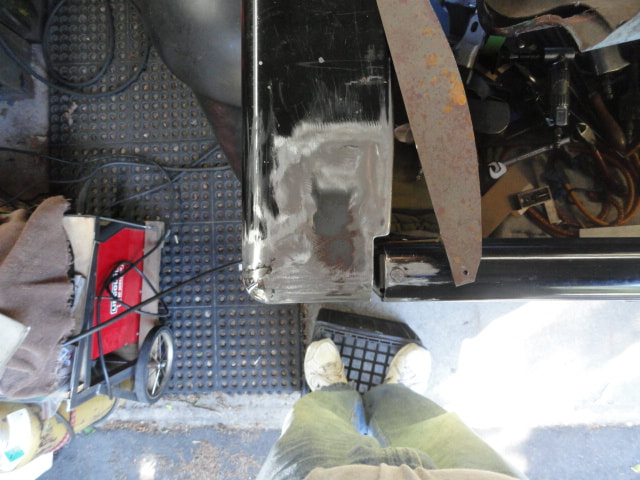
I first taped the ball in place on the end of the bed side tube and measured the distance from the tailgate to the end of the ball. I then cut that much material off the end of the tube and I also removed the sheet metal from around the rear pocket hole so it could be filed in as well. The ball was re-installed and as planed it lined up with the back edge of the gate. The ball was then welded to the bed side and I started to form sheet metal pieces to fill in the new rear of the bed side. At first I was trying to make the panel in one piece but that was proving to be a real pain in the ass, so I split the panel into two pieces, much simpler to fit up and at the end of the day, no one would know anyway.
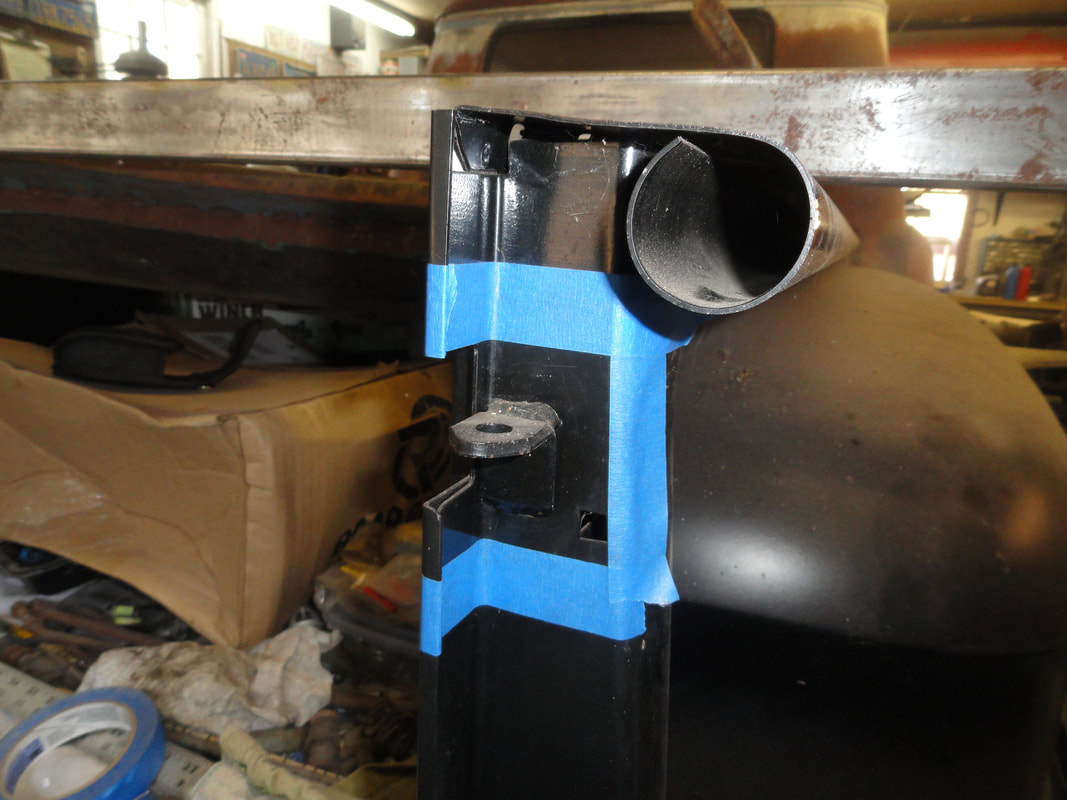
Next I worked on the ends of the tailgate and to the bed sides to close up the large gaps. I needed to extend the tailgate 3/16" on each end and decided to weld a filler strip in place. I first tried to cut a strip of 1/8" sheet 3/16" wide with my band saw, the cut came out fine, but the strip was warped badly. So I turned to my old friend McMaster-Carr and found some 3/16" square Key Way stock. The stock worked well and it was welded to the edges of the gate. I also added a filler strip of 18 gauge so that the end plate was flat with the upper and lower cross members of the gate. At the top of the gate side above the latch, I made filer plates to fill the gap and close off the end. At the bottom of the gate I will wrap a filler strip around the tailgate pivot, hoping to use more of the 3/16" square stock and bend it into shape with some heat to help.
On the bed sides I used a strip of 1/8" stock cut 7/8" wide and welded in place flush with the tailgate. When all done there will be a 1/8" gap between the tailgate and the bed side.
The next step was to make some sort of handle to actuate the bear claw latches, see the next section below.
I first taped the ball in place on the end of the bed side tube and measured the distance from the tailgate to the end of the ball. I then cut that much material off the end of the tube and I also removed the sheet metal from around the rear pocket hole so it could be filed in as well. The ball was re-installed and as planed it lined up with the back edge of the gate. The ball was then welded to the bed side and I started to form sheet metal pieces to fill in the new rear of the bed side. At first I was trying to make the panel in one piece but that was proving to be a real pain in the ass, so I split the panel into two pieces, much simpler to fit up and at the end of the day, no one would know anyway.
Next I worked on the ends of the tailgate and to the bed sides to close up the large gaps. I needed to extend the tailgate 3/16" on each end and decided to weld a filler strip in place. I first tried to cut a strip of 1/8" sheet 3/16" wide with my band saw, the cut came out fine, but the strip was warped badly. So I turned to my old friend McMaster-Carr and found some 3/16" square Key Way stock. The stock worked well and it was welded to the edges of the gate. I also added a filler strip of 18 gauge so that the end plate was flat with the upper and lower cross members of the gate. At the top of the gate side above the latch, I made filer plates to fill the gap and close off the end. At the bottom of the gate I will wrap a filler strip around the tailgate pivot, hoping to use more of the 3/16" square stock and bend it into shape with some heat to help.
On the bed sides I used a strip of 1/8" stock cut 7/8" wide and welded in place flush with the tailgate. When all done there will be a 1/8" gap between the tailgate and the bed side.
The next step was to make some sort of handle to actuate the bear claw latches, see the next section below.


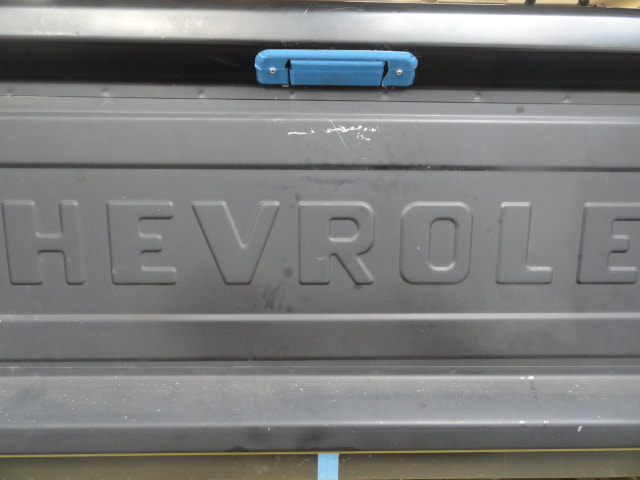
So to this point the bed corners have been modified and the bear claw latches installed, but I still couldn't settle on a clean method to actuate the latches. Like everything else I've done to the truck, I wanted the end result to look as if the factory had made it that way. The way all modern trucks are made is with a center hand release, but all modern trucks have double walled tail gates with room for a handle. I kept looking for and thinking of handles to use, that would fit the limited space on the 57 tail gate.
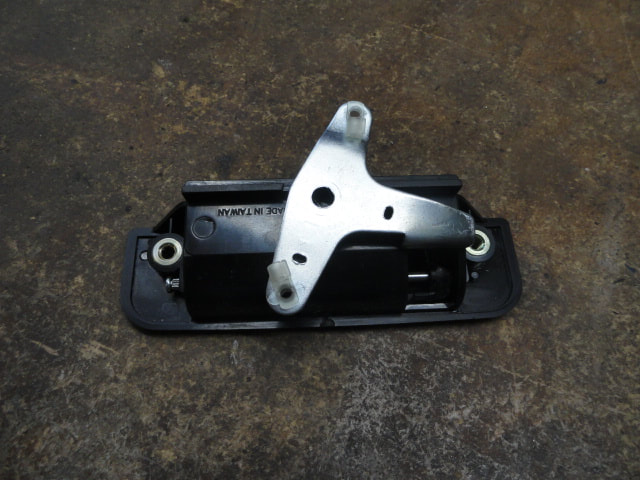
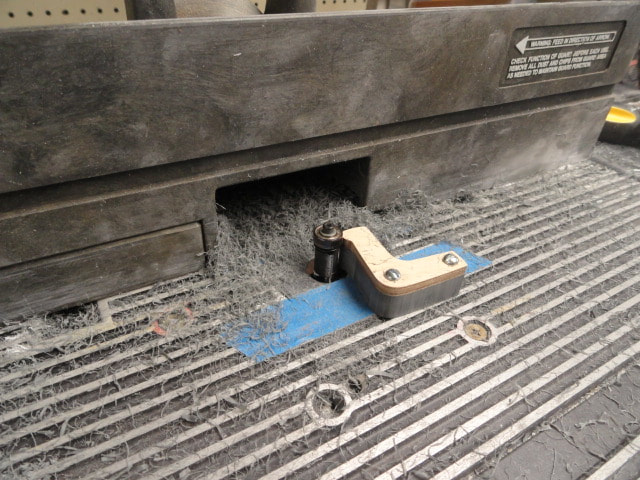
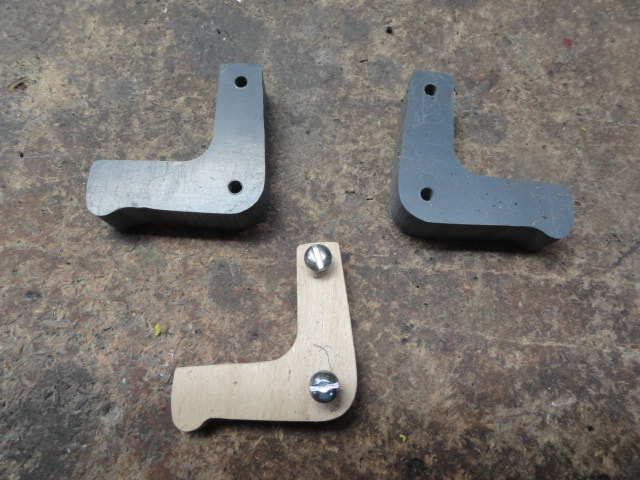
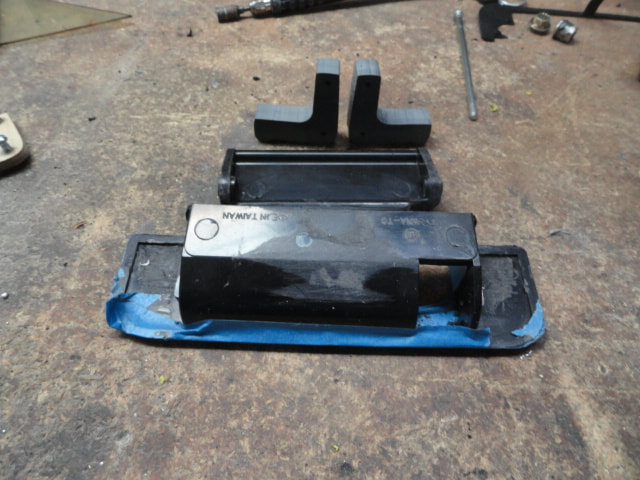
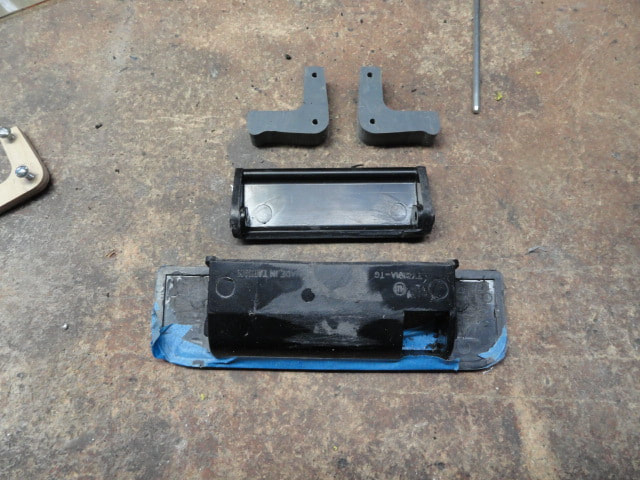
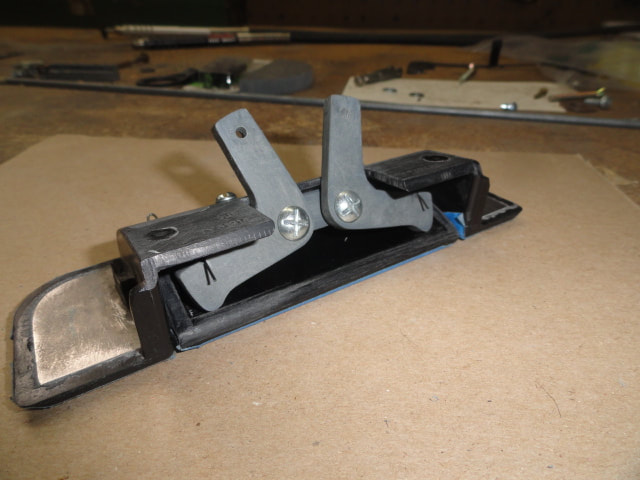
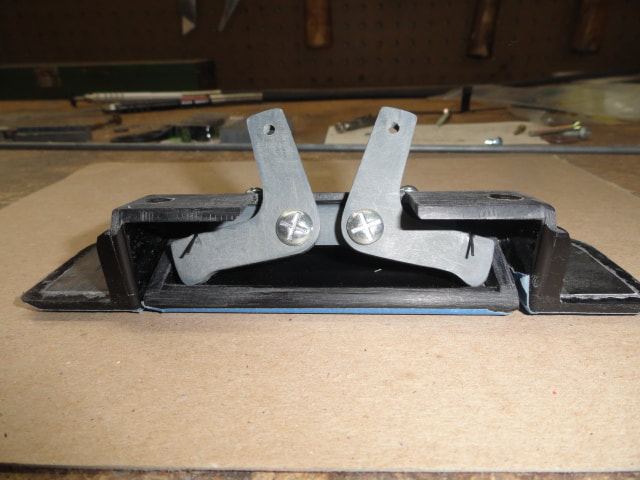
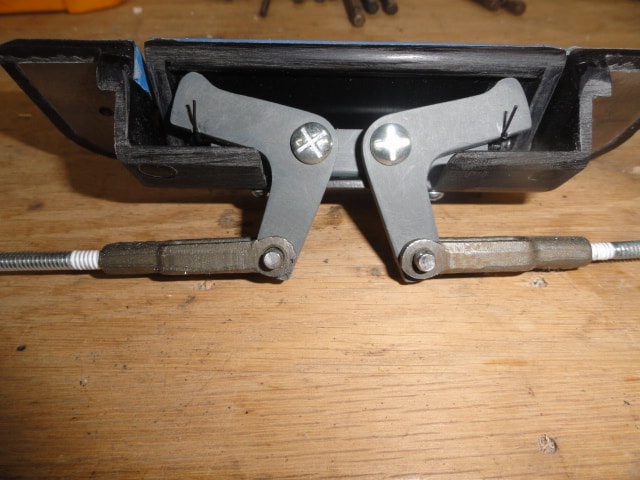
I spotted a 1989 Toyota pick up with what looked like a small enough handle and obtained one for Rock Auto, part number TO1915101. The basic handle would work but there wouldn't be enough room for the actuating mechanism. So after several nights of armchair design work I came up with a plan to make two actuating arms that would create opposing pulling motions that would trigger the latches. I made the arms and the support mount for them from some nylon impregnated plastic and my wood router. The images below show what I came up with, and I'm very happy with how it is functioning so far.
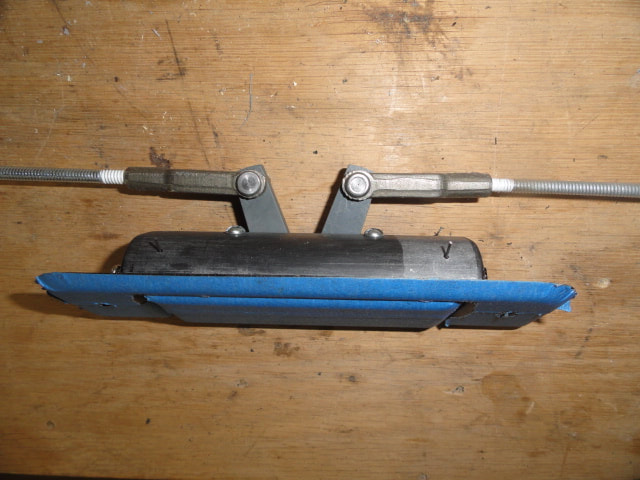
The threaded rod ends and threaded rod to make the actuator pull rods came from McMaster Carr.
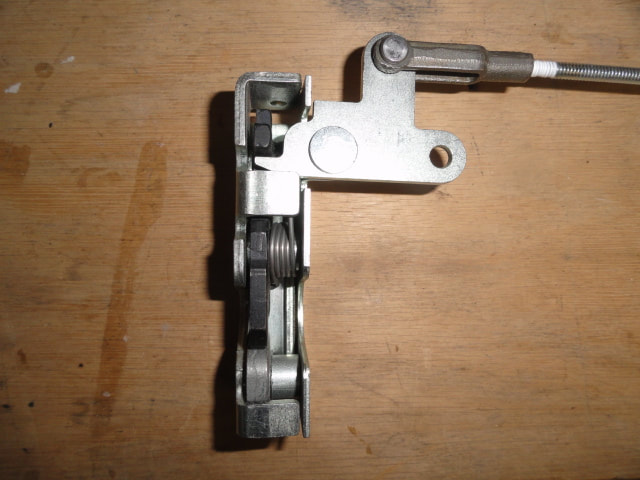
When the complete handle is installed there is absolutely no extra room anywhere, looks like it was designed that way. And yes the handle is now actuated by squeezing the handle instead of the normal pull action, this was done because of the lack of room needed to get you fingers in behind the handle to pull it. I was afraid it would be awkward to actuate, but once you know how it works, it seems natural.
I spotted a 1989 Toyota pick up with what looked like a small enough handle and obtained one for Rock Auto, part number TO1915101. The basic handle would work but there wouldn't be enough room for the actuating mechanism. So after several nights of armchair design work I came up with a plan to make two actuating arms that would create opposing pulling motions that would trigger the latches. I made the arms and the support mount for them from some nylon impregnated plastic and my wood router. The images below show what I came up with, and I'm very happy with how it is functioning so far.
The threaded rod ends and threaded rod to make the actuator pull rods came from McMaster Carr.
When the complete handle is installed there is absolutely no extra room anywhere, looks like it was designed that way. And yes the handle is now actuated by squeezing the handle instead of the normal pull action, this was done because of the lack of room needed to get you fingers in behind the handle to pull it. I was afraid it would be awkward to actuate, but once you know how it works, it seems natural.


Happy with how the latch and bear claws came out, I went back and did the finish work on the gate and adjacent bed sides by finish welding the extension strips described above. At this point the back end of the truck is fabricated so I'm going to work some other areas starting with the front stake pockets, see the New Bed page about what I did there.