Sheet Metal Repairs
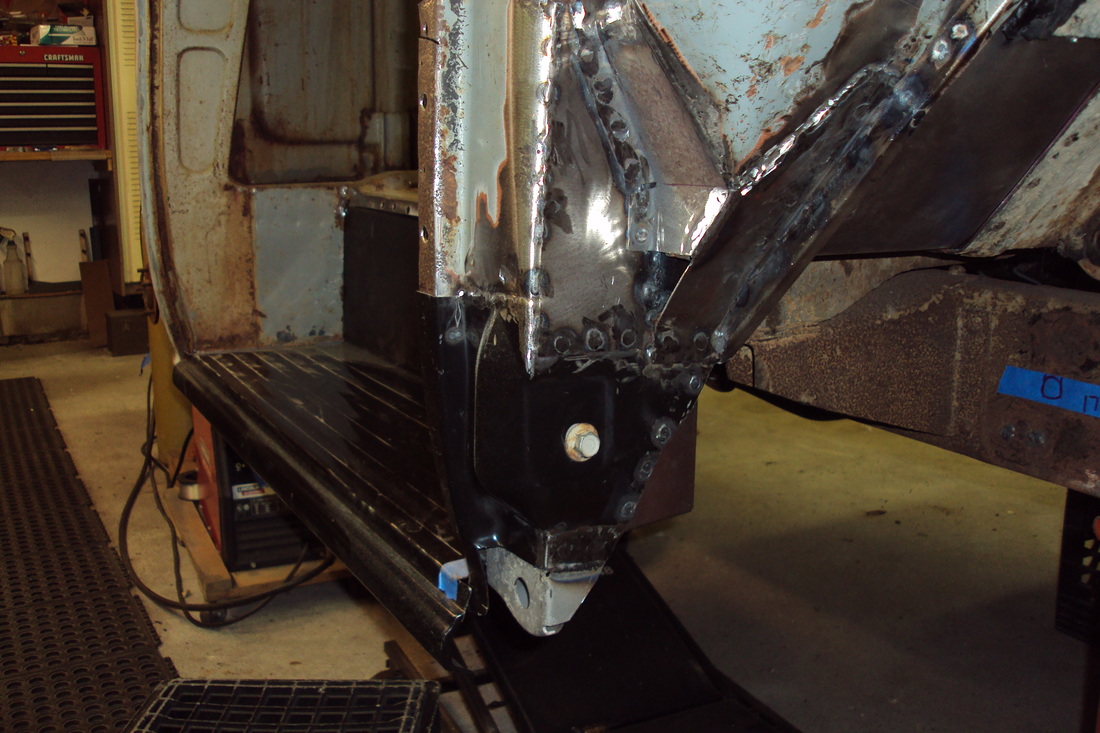
Starting on the right side door step, lower door hinge area and rear cab corner. I ordered some replacement panels and started with the door step and rocker panel. Removing the old was easy enough and the new step fitted up well. Then the rocker was next and that is when things went downhill as the replacement rocker wasn't even close to being the correct cross section shape. After looking things over, I decided that there was no way I could make the rocker work, but of course it wasn't until after cutting on the rocker and door step so they can't be returned. I found another source for a step and rocker as an assembly which worked better.
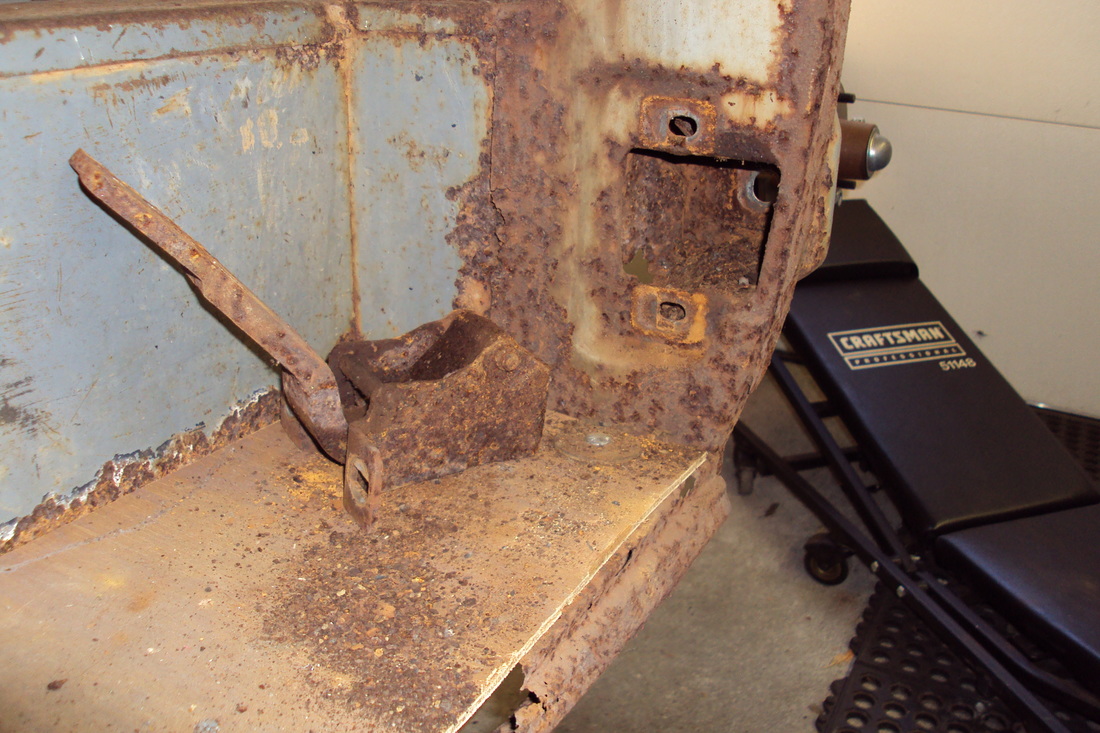
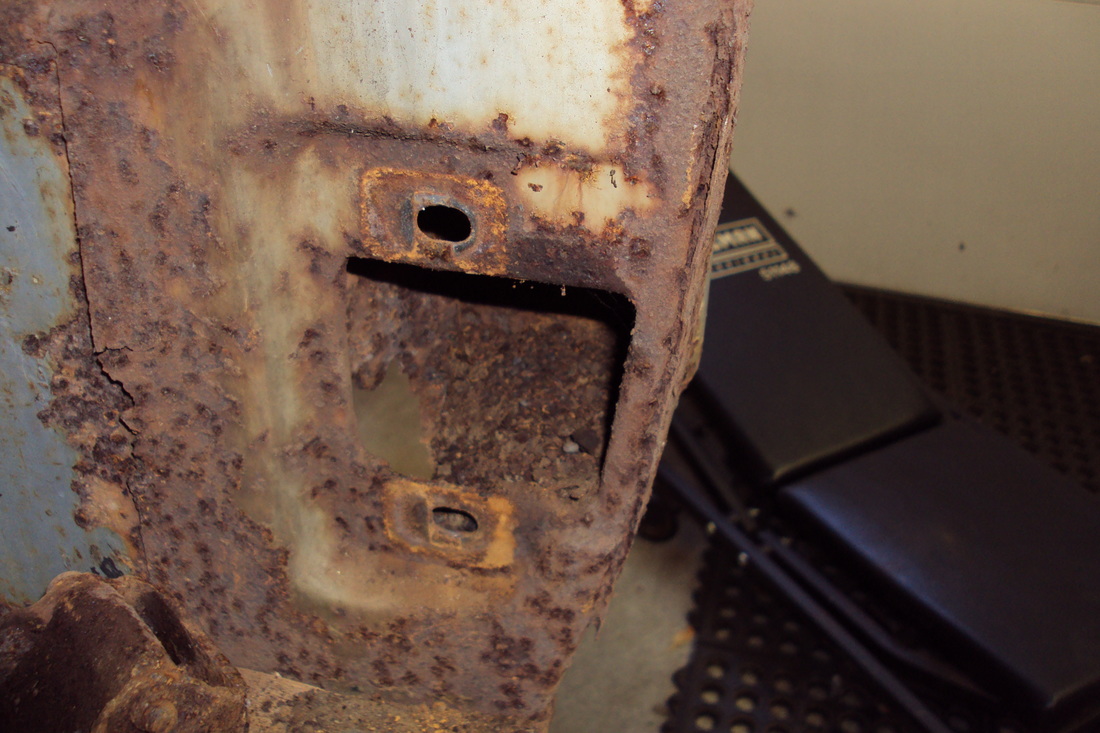
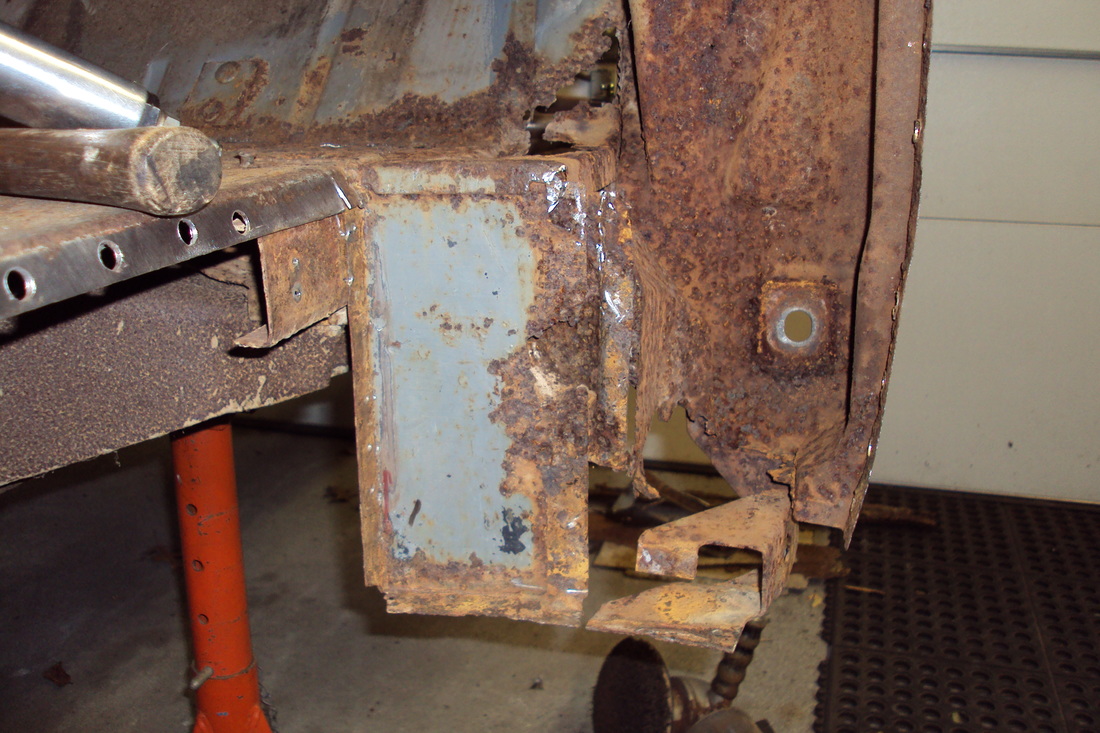
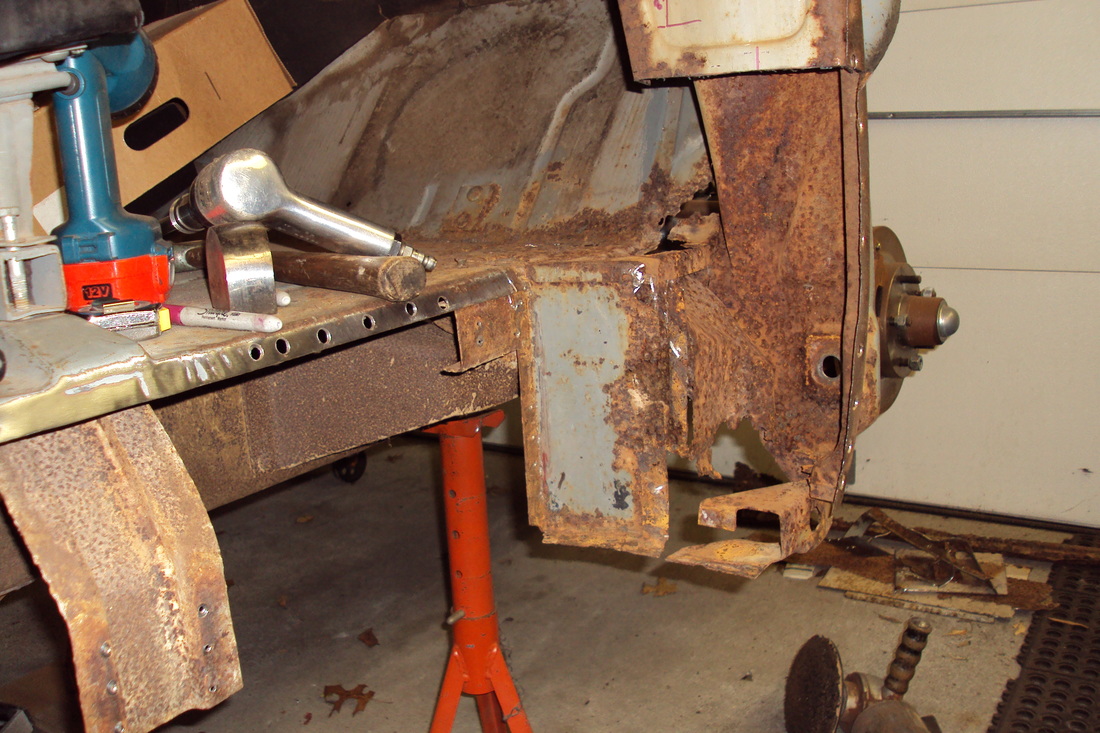
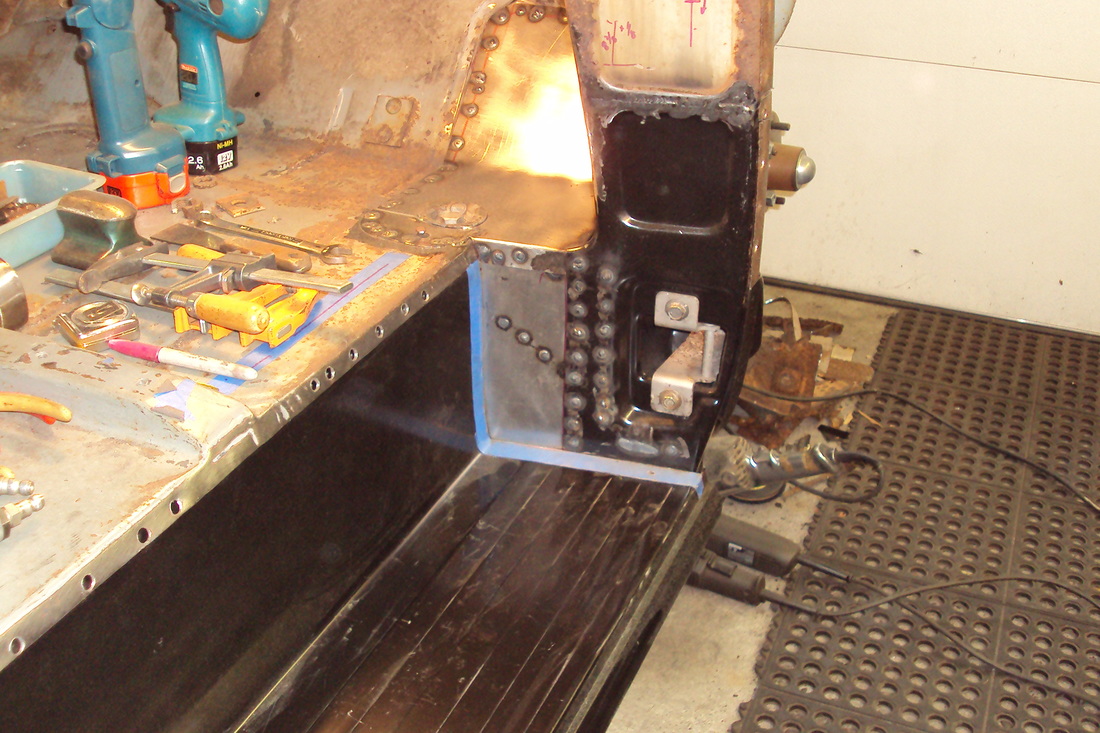
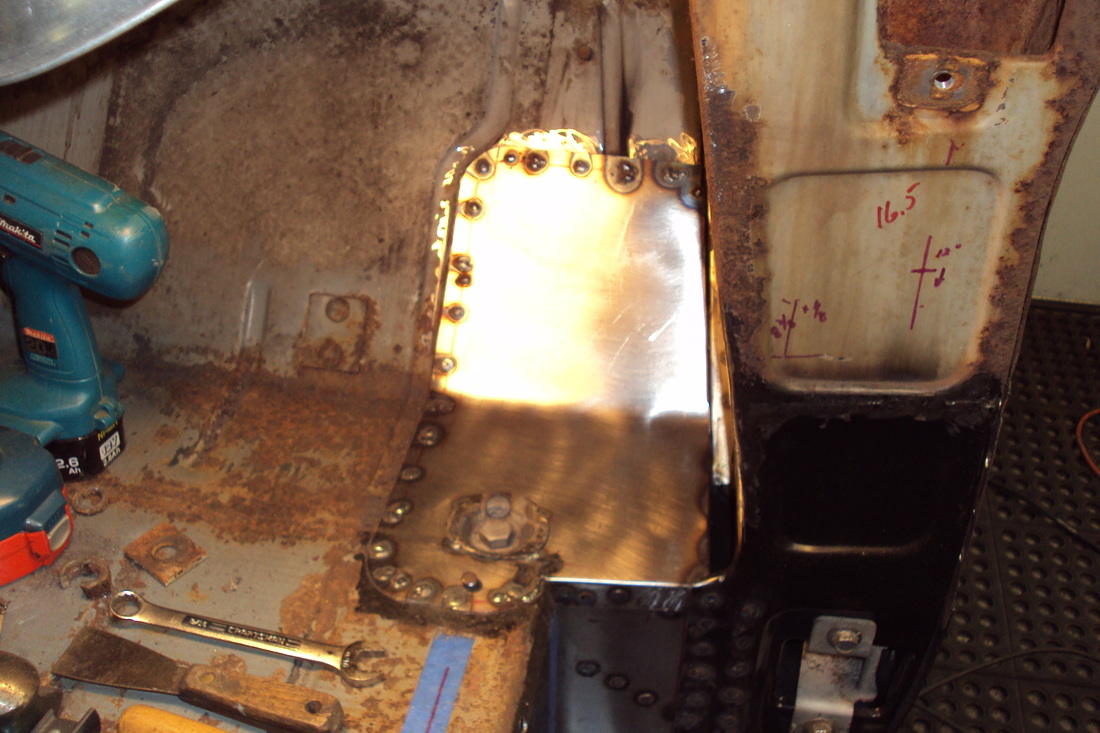
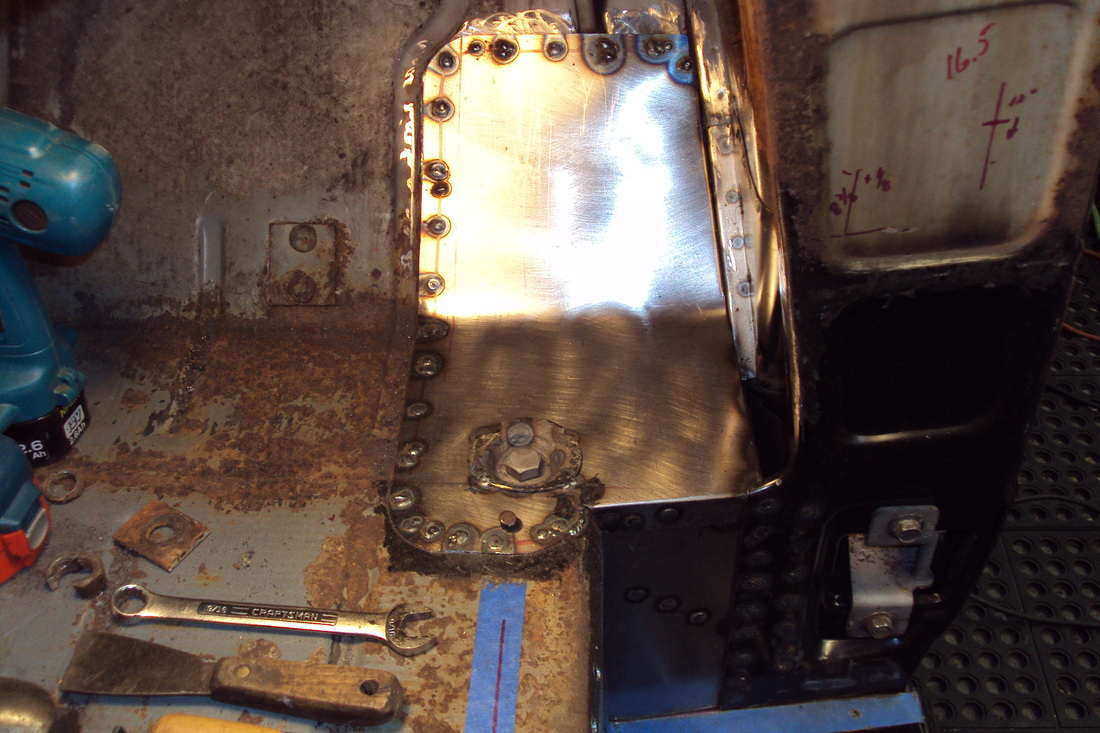
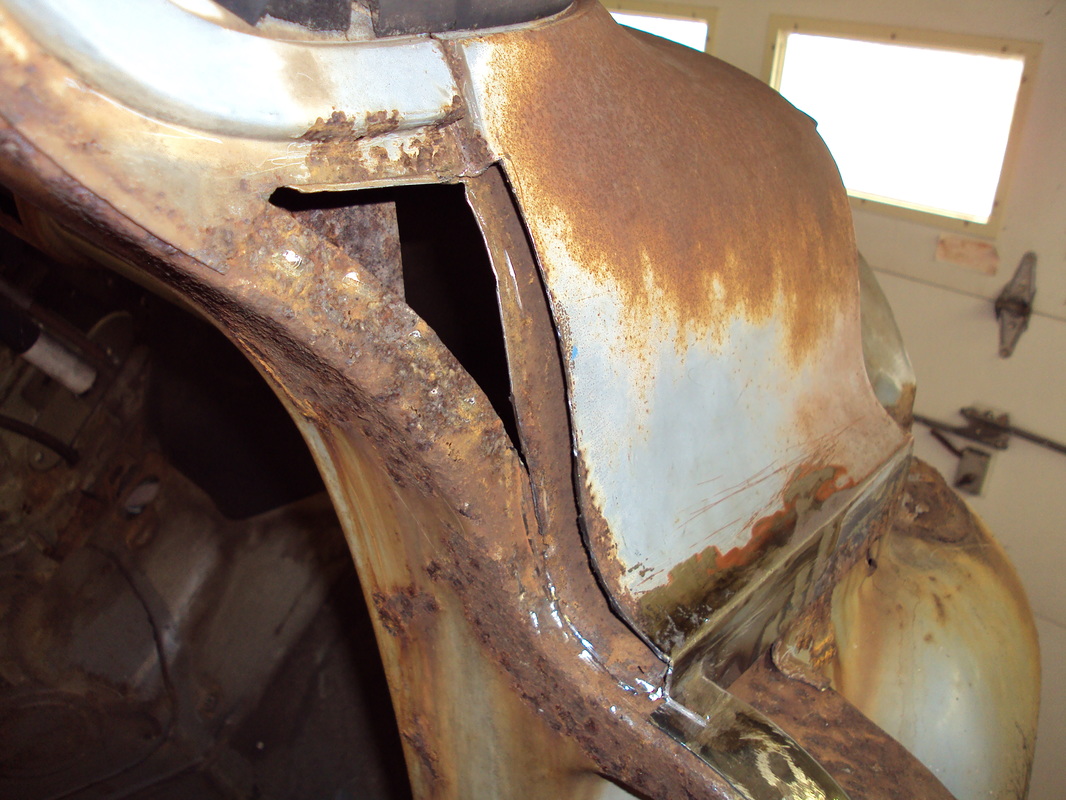
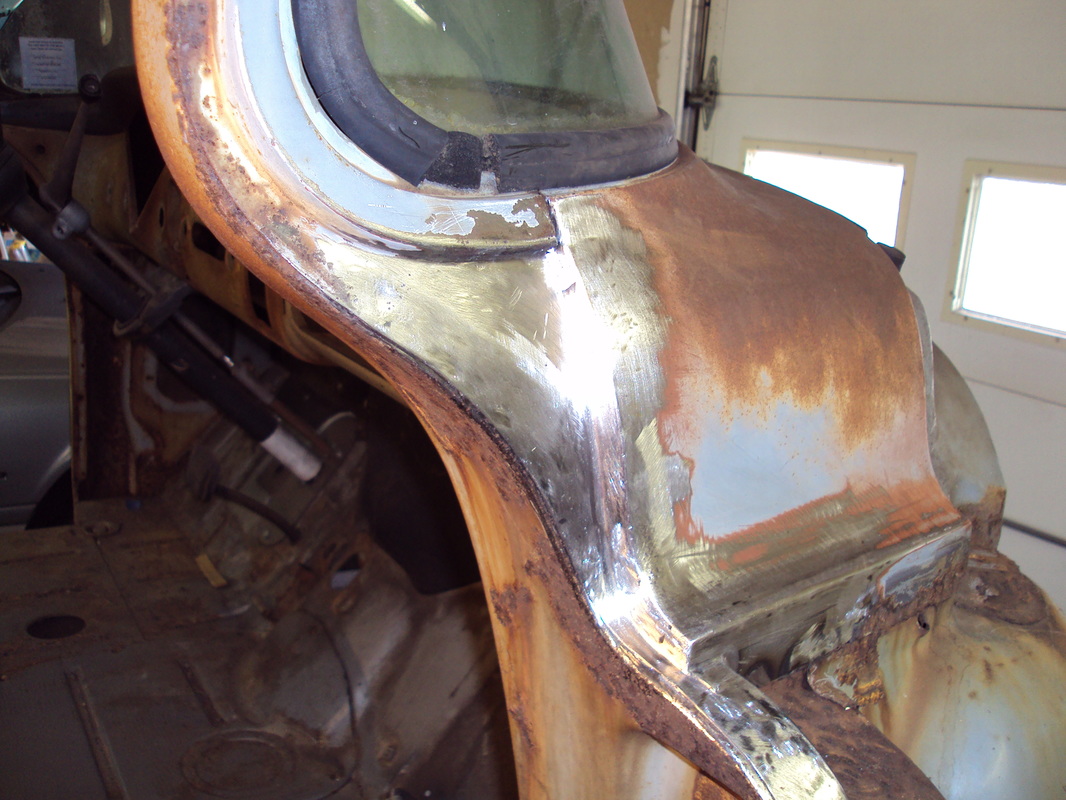
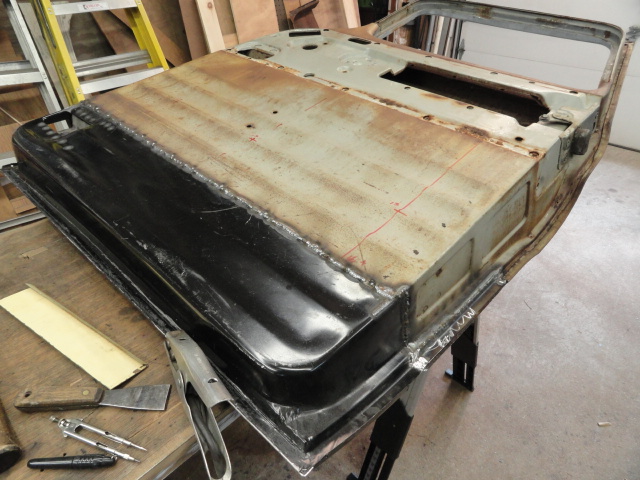
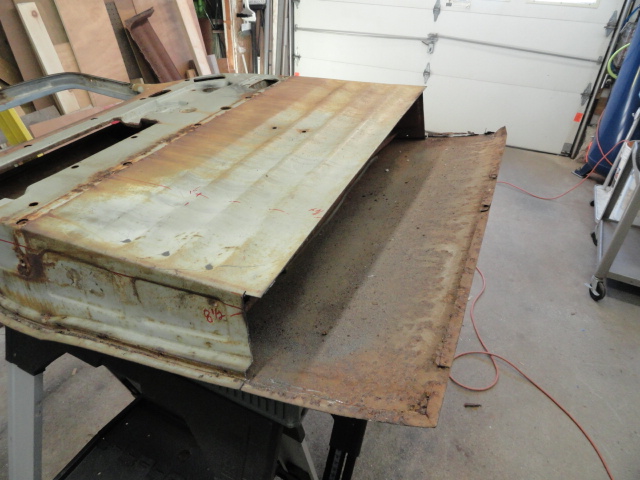
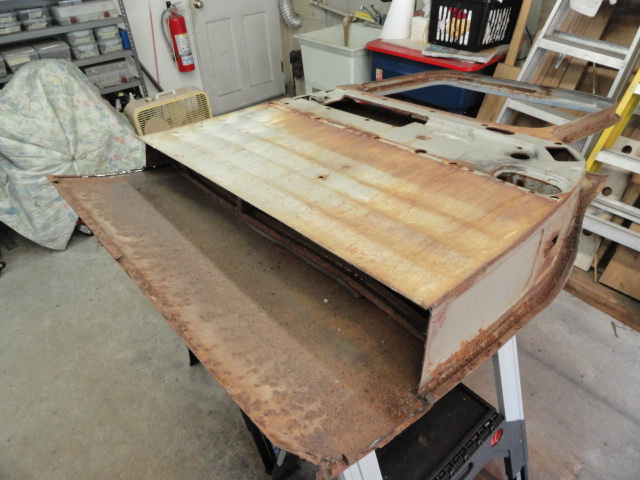
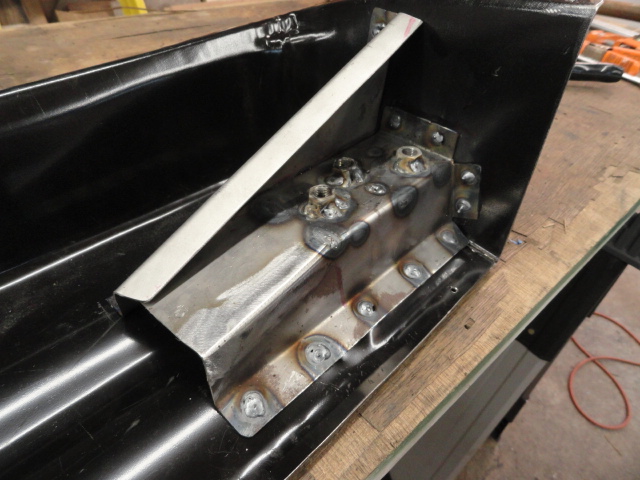
Before the step and rocker can go on, the "A" pillar will need to be repaired so the lower hinge area was removed and new parts being fitted. This process has been slow going as there are several pieces involved including the floor. The forward face of the step goes in first, then the floor board which includes the body mount, followed by the rear face of the "A" pillar. The forward "A" pillar, close off panel and finally the lower fender mounting tab. Not listed were the inner kick panel and floor support as well as the lower part of the cowl vent area. In the images, the parts that are black were purchased and the others are either repaired original or hand made. It has been 4 weekends of careful measuring, cutting, fitting, more measuring, more cutting, after everything looks good, it is all disassembled and then welded in for good.
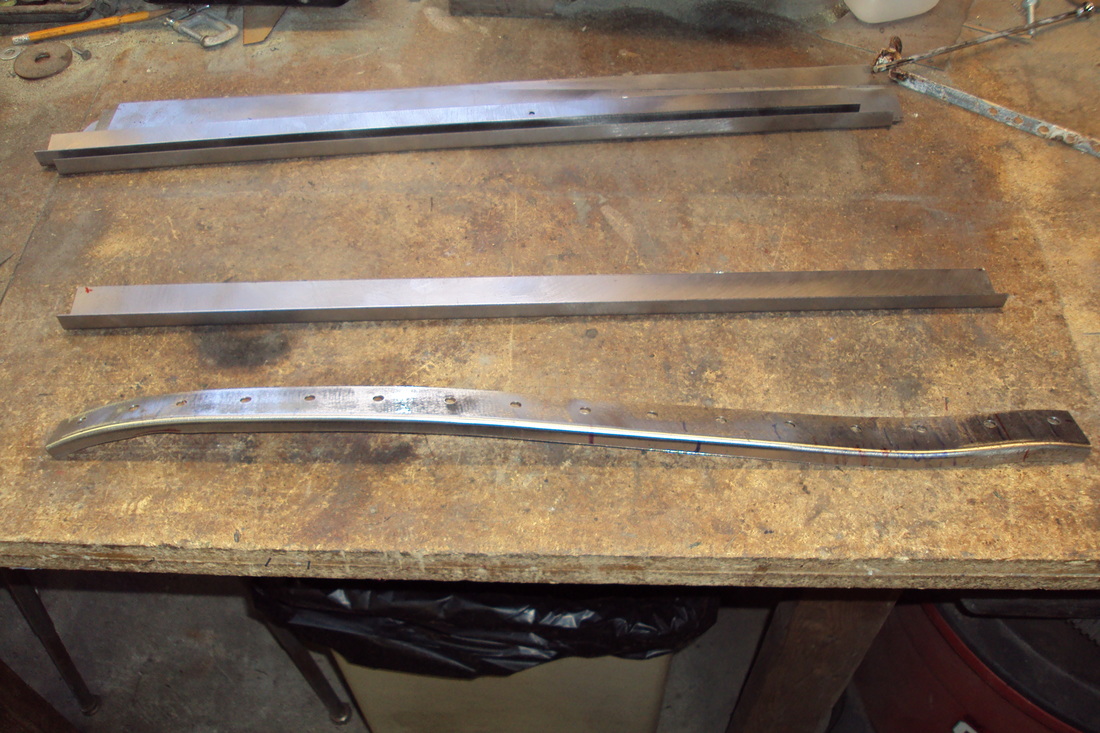
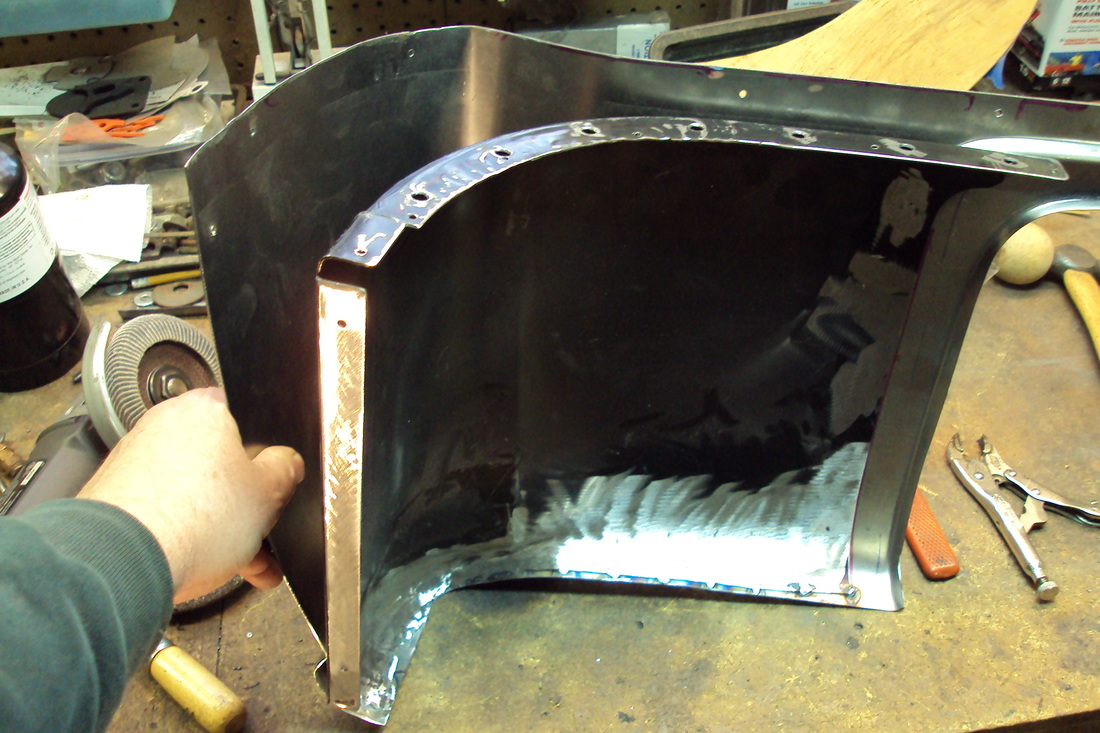
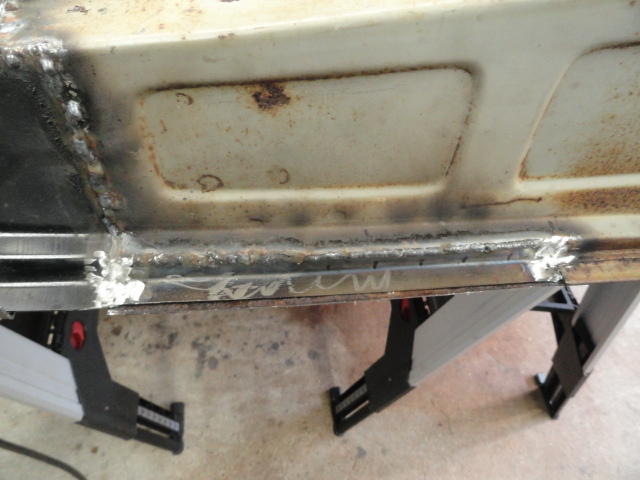
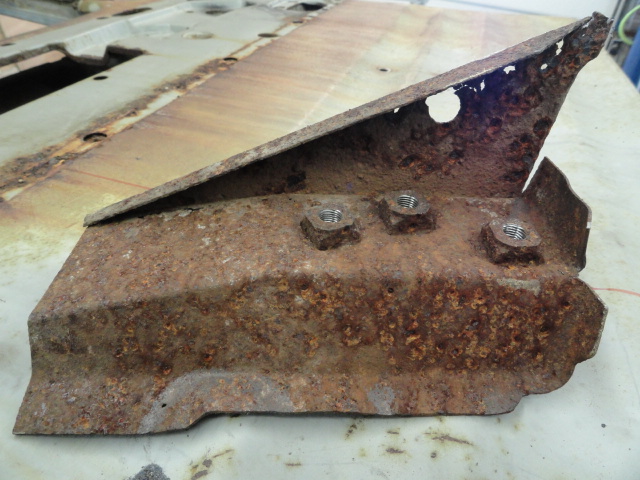
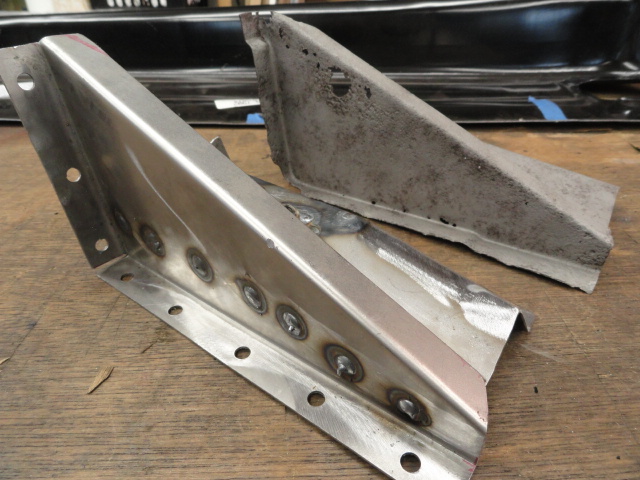
Work on the "A" pillar continued with the replacement of the flange that ties the front face of the pillar to the rear. I fabricated the flange by bending up some 90 degree stock then using the shrinker to form it to match the original pillar. Holes drilled for the rosette welds, then it was welded in place. Sounds simple and it wasn't that difficult, it only took time.
Before the step and rocker can go on, the "A" pillar will need to be repaired so the lower hinge area was removed and new parts being fitted. This process has been slow going as there are several pieces involved including the floor. The forward face of the step goes in first, then the floor board which includes the body mount, followed by the rear face of the "A" pillar. The forward "A" pillar, close off panel and finally the lower fender mounting tab. Not listed were the inner kick panel and floor support as well as the lower part of the cowl vent area. In the images, the parts that are black were purchased and the others are either repaired original or hand made. It has been 4 weekends of careful measuring, cutting, fitting, more measuring, more cutting, after everything looks good, it is all disassembled and then welded in for good.
Work on the "A" pillar continued with the replacement of the flange that ties the front face of the pillar to the rear. I fabricated the flange by bending up some 90 degree stock then using the shrinker to form it to match the original pillar. Holes drilled for the rosette welds, then it was welded in place. Sounds simple and it wasn't that difficult, it only took time.

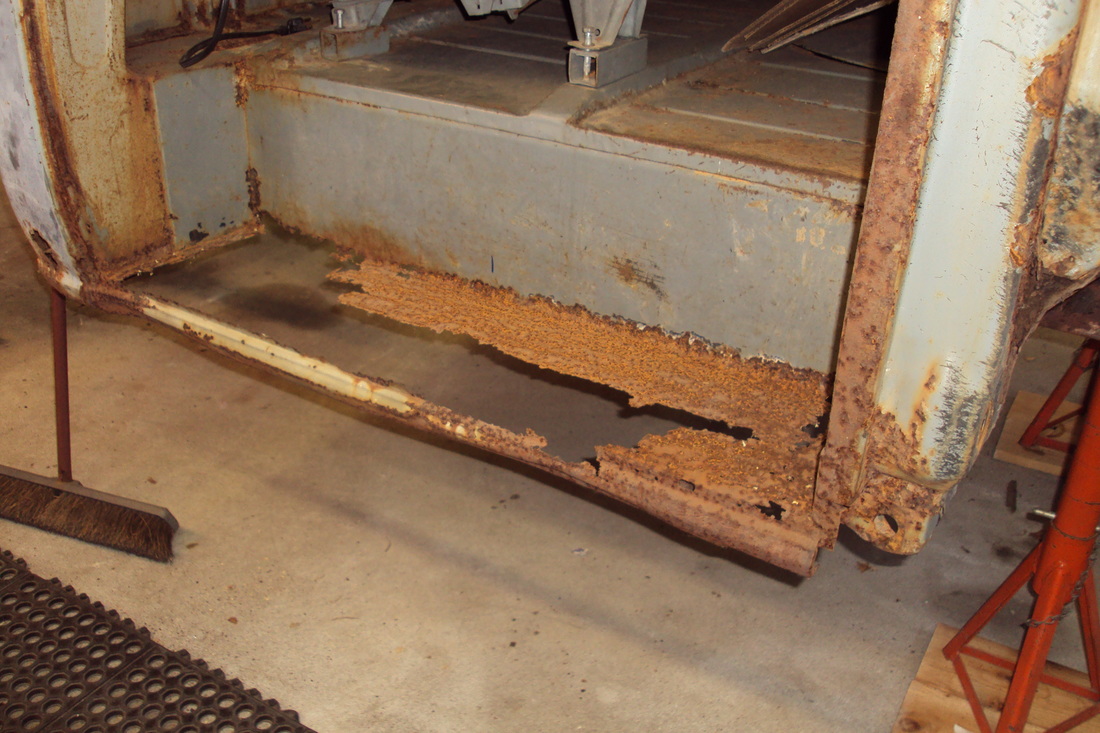

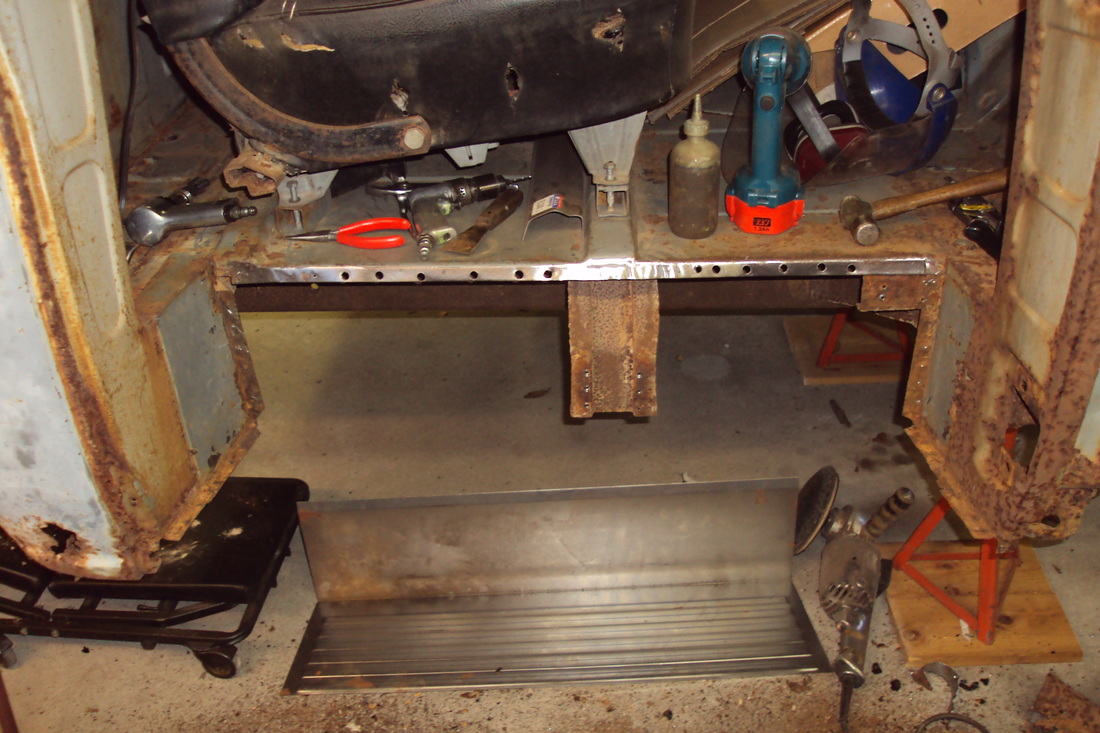


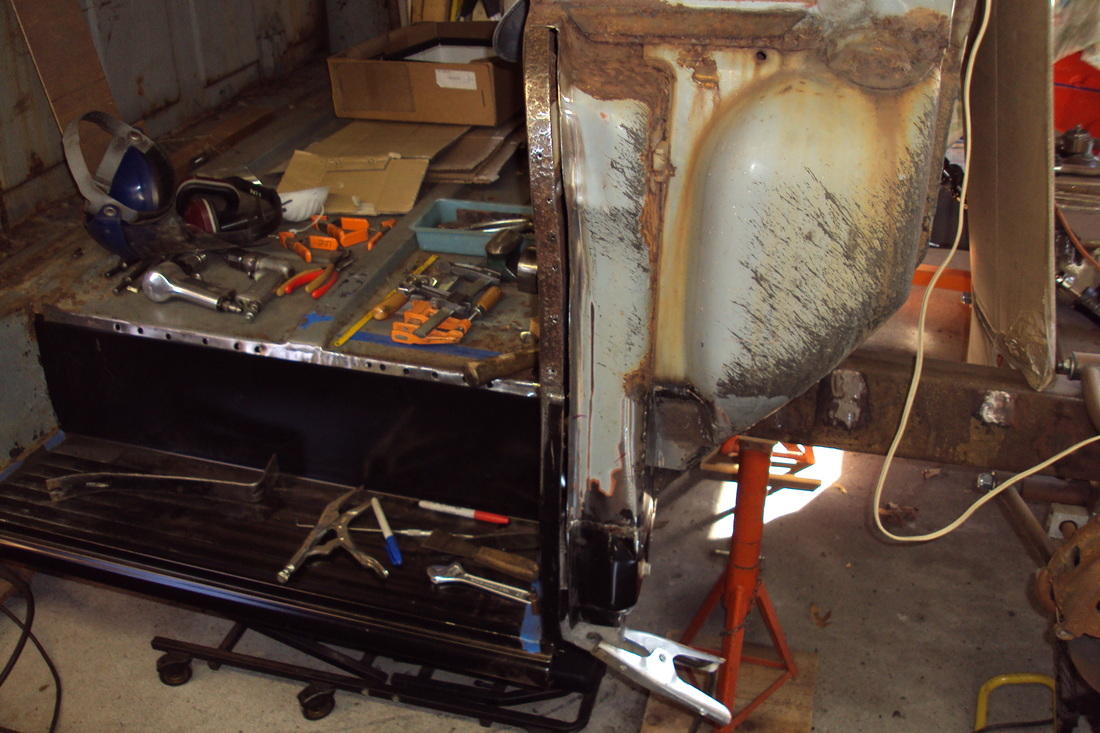
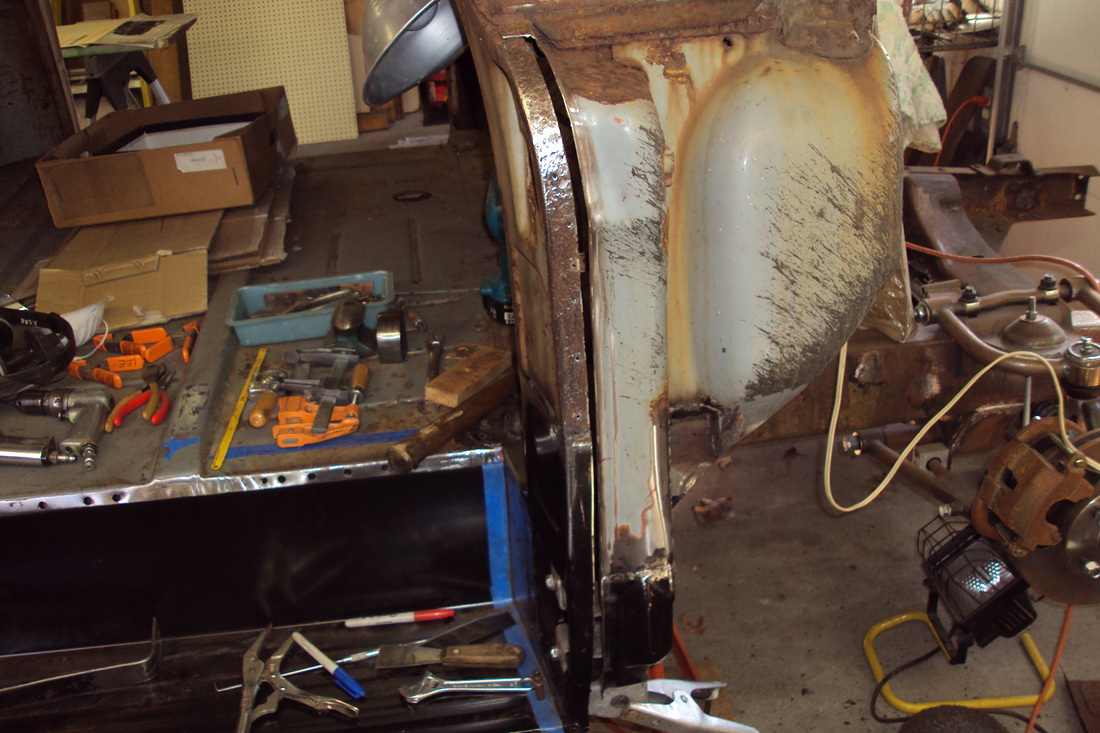

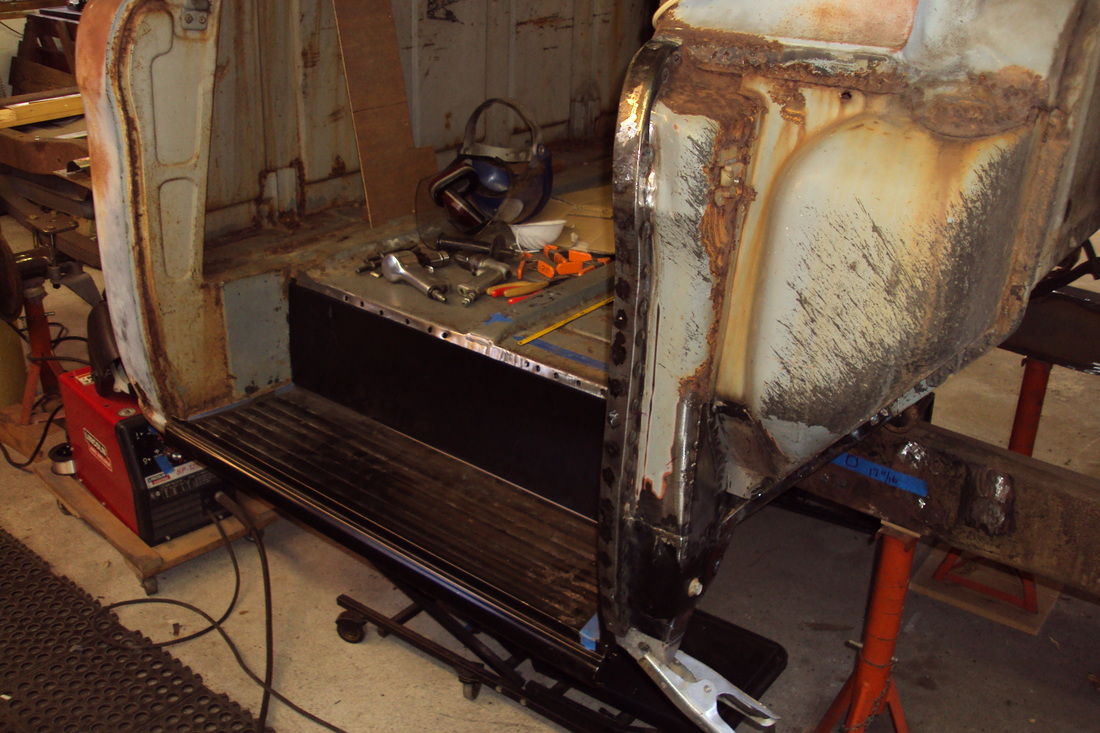

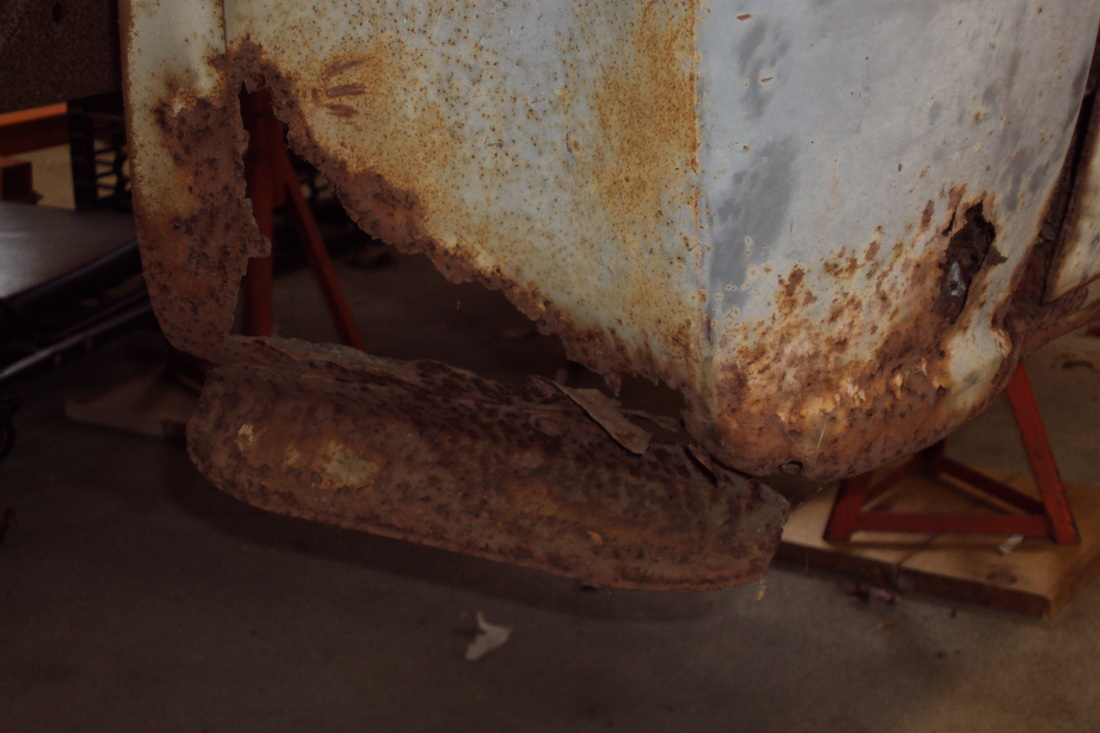
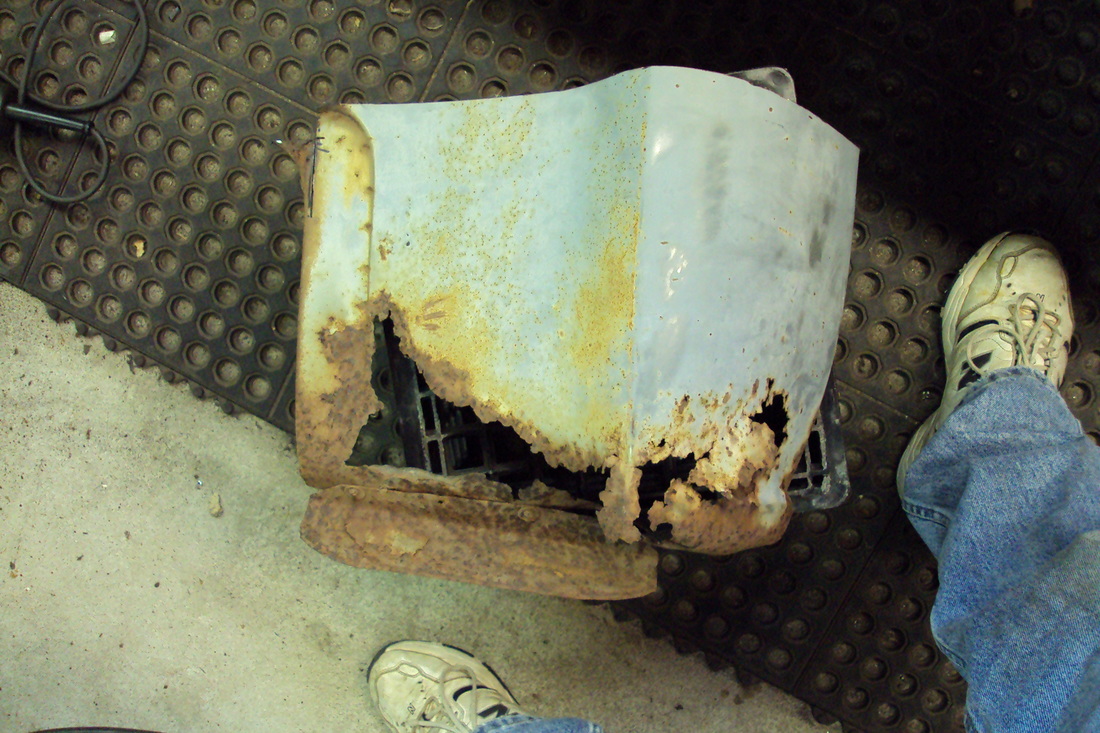
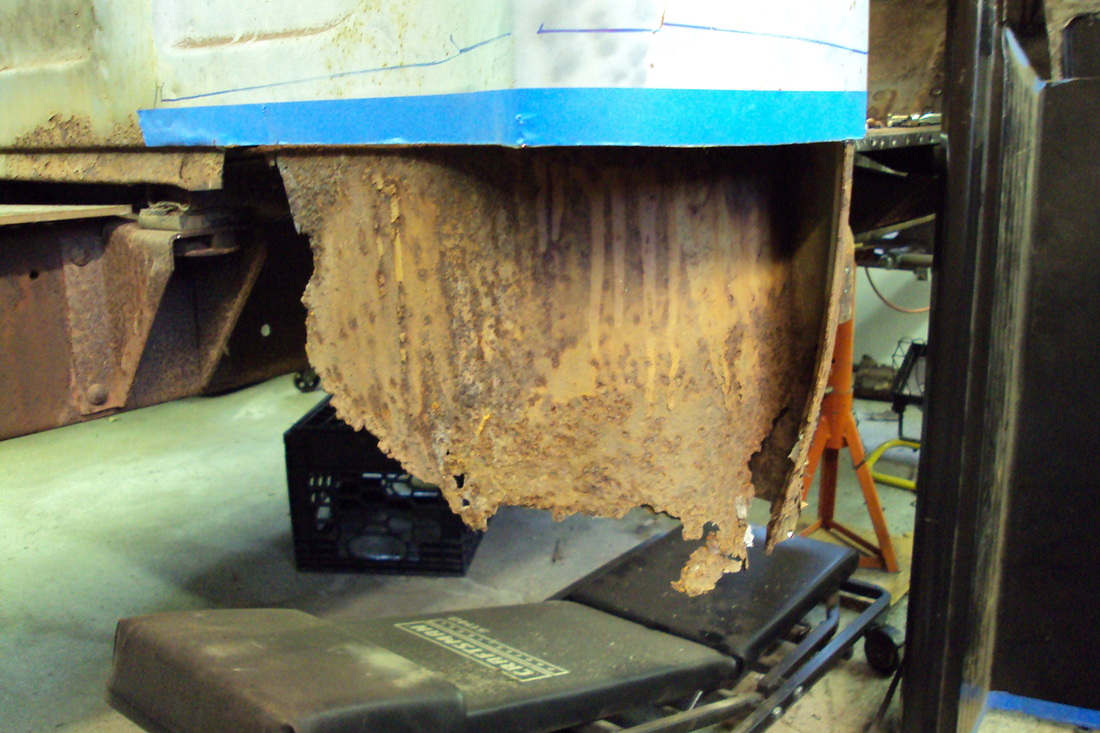
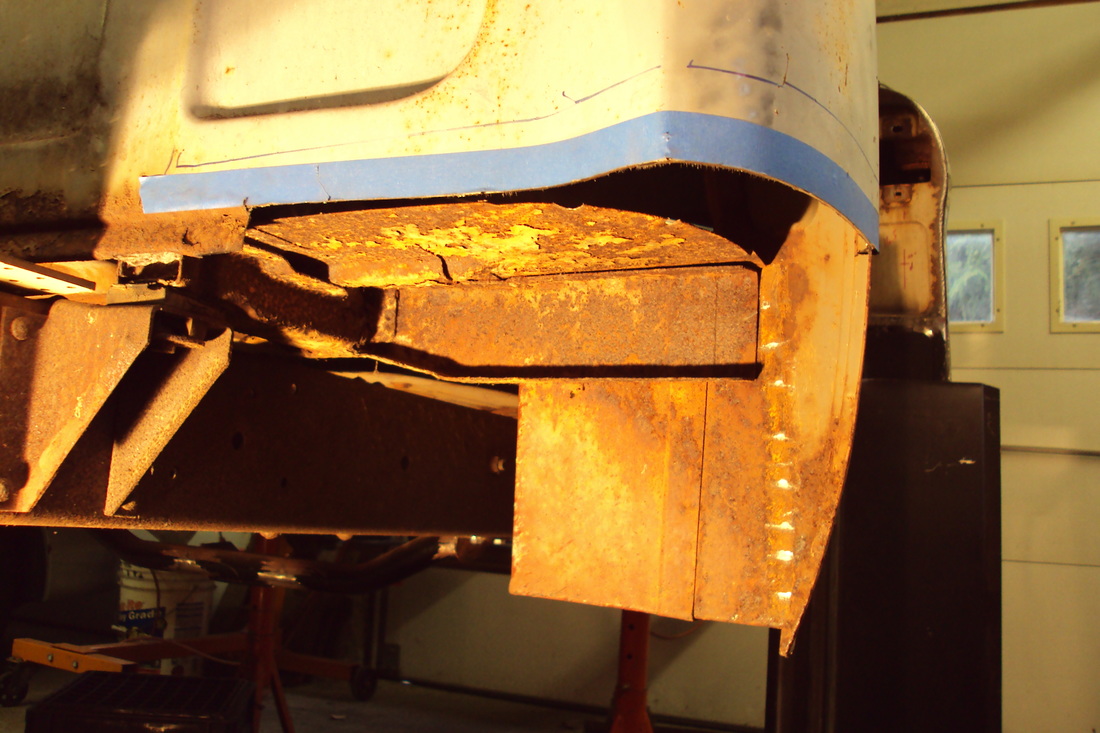
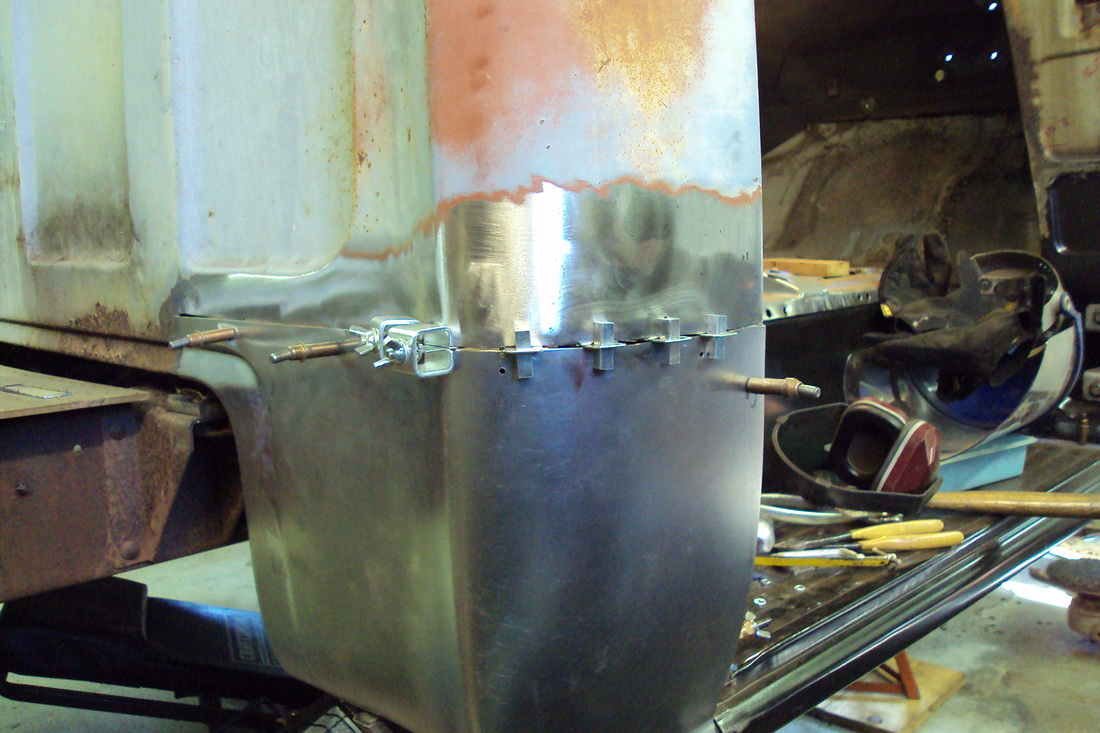
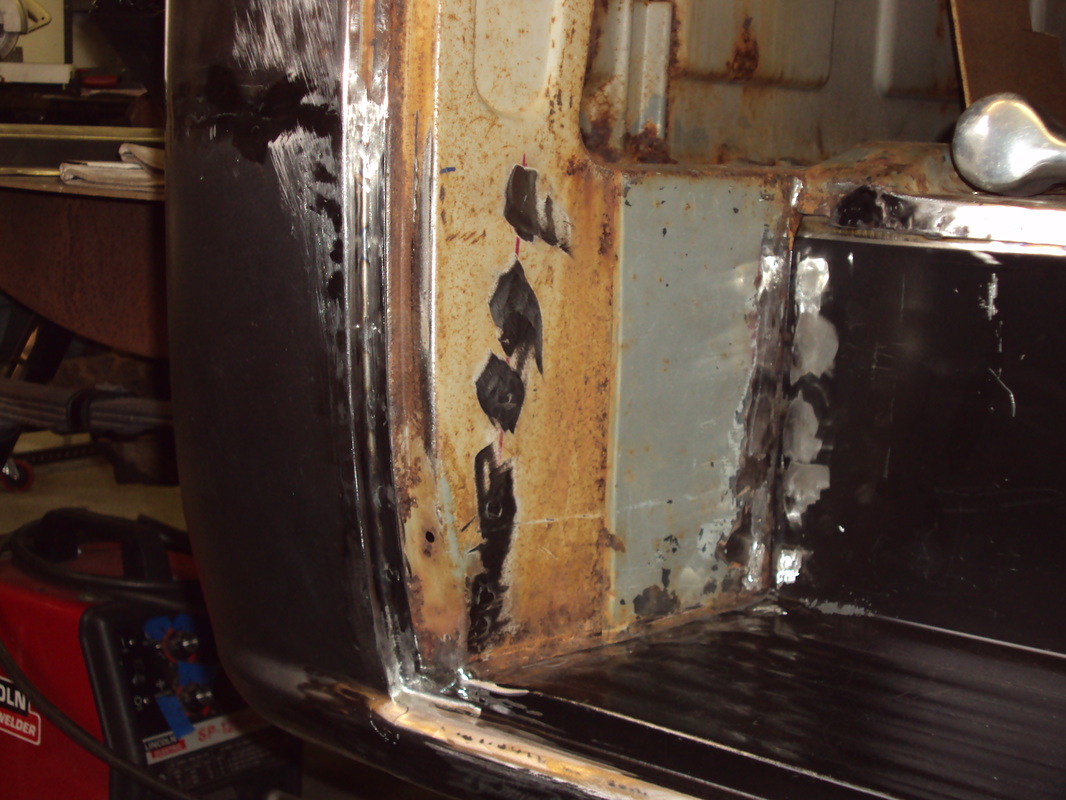
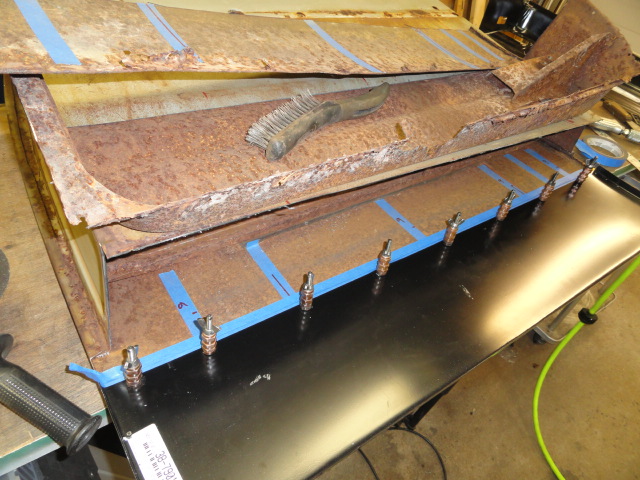
Next came replacing the lower cab corner inside and out as well as finish the cab step. I laid the replacement panel over top the original body and marked where it came to. Then from the inside of the cab, I drilled three holes level with the floor through the outside skin, this gave me a straight level line to lay out my cut line. By using 1" tape, I could lay out a line representing the floor height and the top of the tape would be 1" up and where I would cut. This cut line is below the edge of the patch panel, so there will be plenty to trim and fit. I first cut the old panel off at my lower line to get the outside skin out of the way so I could cut out the inner skin. With that done, the new patch panel could be put into place to check the fit. I then cut the body off at the upper tape line leaving tabs down to the lower cut to use a attach points as the panel is fit. The panel was then put into place using the ends of it to line up with the original body, holding it in place drilled 1/8" holes through the patch panel and into the tabs, using calicos in the holes the panel was held in place. After checking many times the alignment of the patch panel and adjusting the calicos, the patch was marked from the inside along the cut line and was trimmed off. Now with the panel put back into place and again the fit adjusted, the cut line was trimmed to leave a 1/16" gap between the patch and the body.
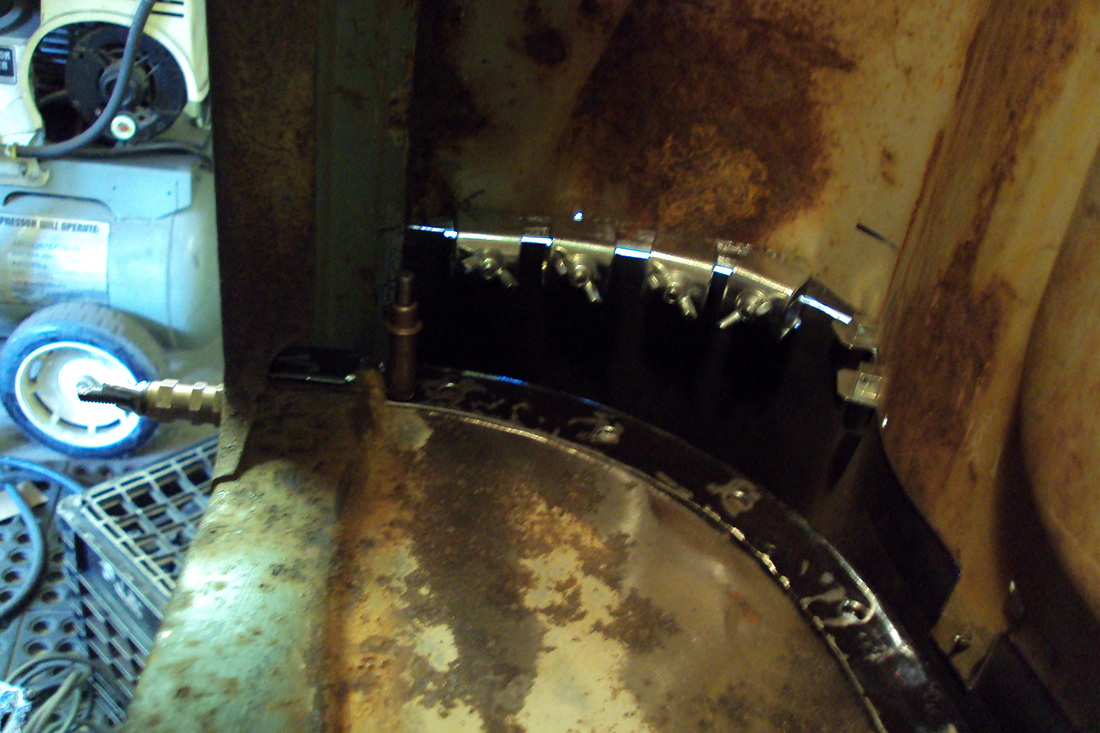
I then started cutting off the tabs one at a time and replaced them body panel claps. This got the patch in perfect fit ready to weld in, but before that, the inner panel had to be fitted. I have seen where some shops leave this inner panel off and I can see why, it was a pain in the ass to fit up. It took most of a day to bend, twist, hammer, cut, bend some more to get the inner and outer panels to line up and fit together. Once that was done the two were welded together out on the bench then the assembly was put into place with all the body clamps in place so the welding could begin.
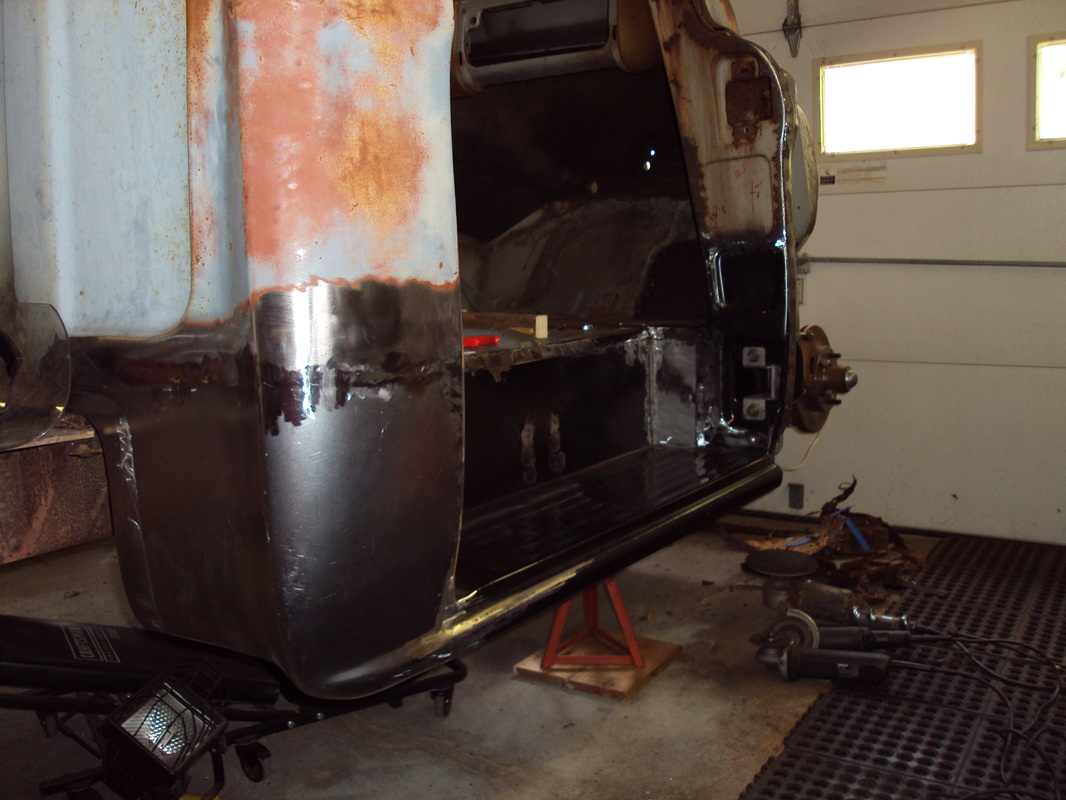
Working slowly, jumping around the panel it slowly got welded into place. I welded the section from the "B" pillar to the sharp corner of the body first, then from the corner to the end of the panel. This allowed for more fitting as I want along. I didn't mention when fitting the patch the edge of it for the "B" pillar was way off, so I cut it off and welded it back on after the rest of the panel was in place. The inner panel was rosette welded into place along the floor and the rear face of the step. The last thing to do was weld in the step / rocker panel then match up the rocker with the cab corner. The two were massaged into fitting which included cutting the lower cab corner open to get it to line up and flow the rocker better. The panel will need some stretching and shrinking to get some lumps out of it from the welding, but for now, it is done; on to the left side.
I then started cutting off the tabs one at a time and replaced them body panel claps. This got the patch in perfect fit ready to weld in, but before that, the inner panel had to be fitted. I have seen where some shops leave this inner panel off and I can see why, it was a pain in the ass to fit up. It took most of a day to bend, twist, hammer, cut, bend some more to get the inner and outer panels to line up and fit together. Once that was done the two were welded together out on the bench then the assembly was put into place with all the body clamps in place so the welding could begin.
Working slowly, jumping around the panel it slowly got welded into place. I welded the section from the "B" pillar to the sharp corner of the body first, then from the corner to the end of the panel. This allowed for more fitting as I want along. I didn't mention when fitting the patch the edge of it for the "B" pillar was way off, so I cut it off and welded it back on after the rest of the panel was in place. The inner panel was rosette welded into place along the floor and the rear face of the step. The last thing to do was weld in the step / rocker panel then match up the rocker with the cab corner. The two were massaged into fitting which included cutting the lower cab corner open to get it to line up and flow the rocker better. The panel will need some stretching and shrinking to get some lumps out of it from the welding, but for now, it is done; on to the left side.


The doors were nothing short of a total challenge. The lower skins, inside and out needing replacement, so patch panels were ordered. Typical patch repair cut off the old and fit in the new, which all went well with repairing the inner structure that supported the lower hinge, then installing the inner door skin. The outer skin was cut and fitted up next which again when well. The better part of a day was spent welding the skin on with making a series of tack welds and jumping back and forth along the weld line. When all was done the door was back together but the outer skin was warped and distorted despite all the effort not to do so. Well not being real happy with the door and the prospect of having to do the same to the other, when I came across a good set of complete doors at the swap meet, I snagged them.


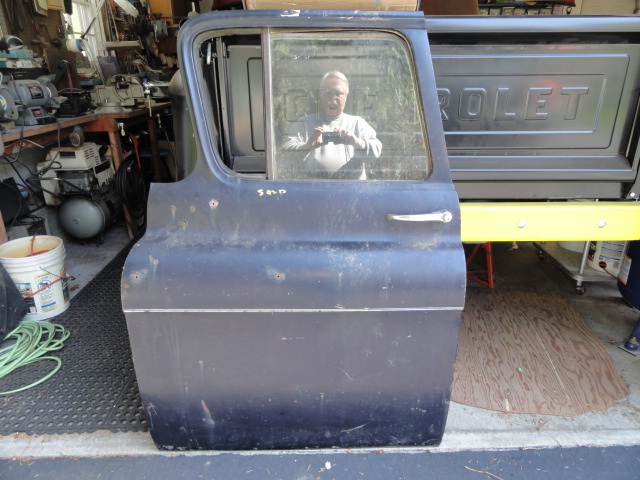
After picking up the set of replacement doors, they were installed and the setting the gaps was started. The left side fit to the front fender was terrible, I credit this to the fender being an aftermarket replacement. I trimmed the aft edge of the fender off and welded a 1/8" steel rod, giving me a finished edge. The fender was reinstalled and I was still not happy with the fit.
At this point the truck sat untouched for 4 years while taking care of other life events. Then the winter of 2016 - 2017 work resumed. The first thing was to cut the steel rod off, trim more of the fender back and re-welded a rod in place. This time around the gap was much better and I had some material to grind away to set the proper gap. The right door front gap only needed to have some MIG weld build up to give me the needed material needed to set the gap. So now both doors have good gaps down the rear, along the top and bottom and up the front matching the fender.
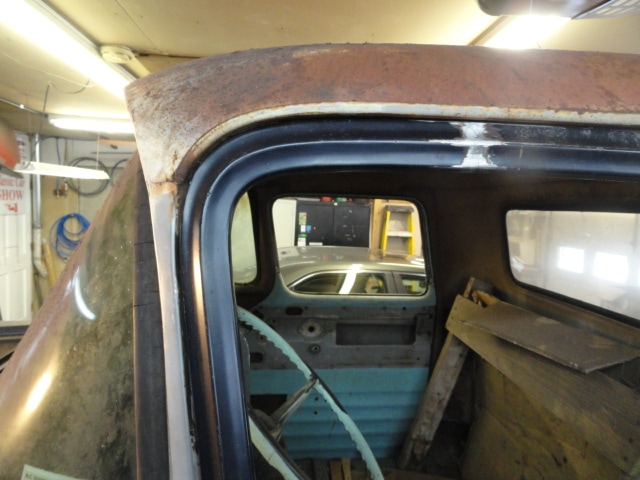
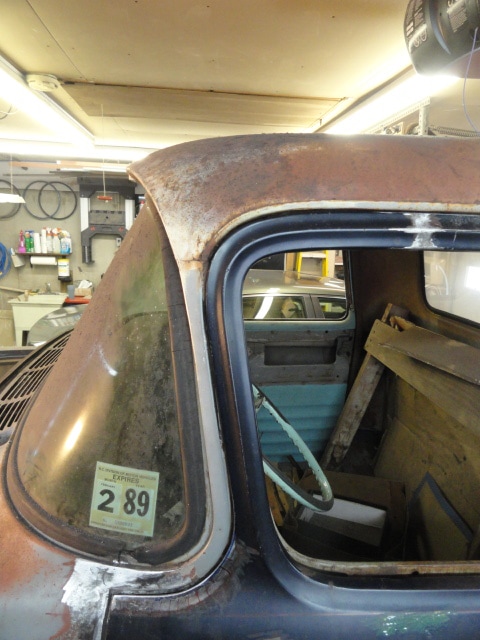
The area adjacent the front cowl needed attention as well as up the windshield post. The cowl area under the windshield I added a wedge shaped piece of 1/8" flat steel to get rid of what always looked like an up-hill slope. Once that was done, I MIG welded the corresponding edges of both doors to get some material to fit up. The end result came out well.
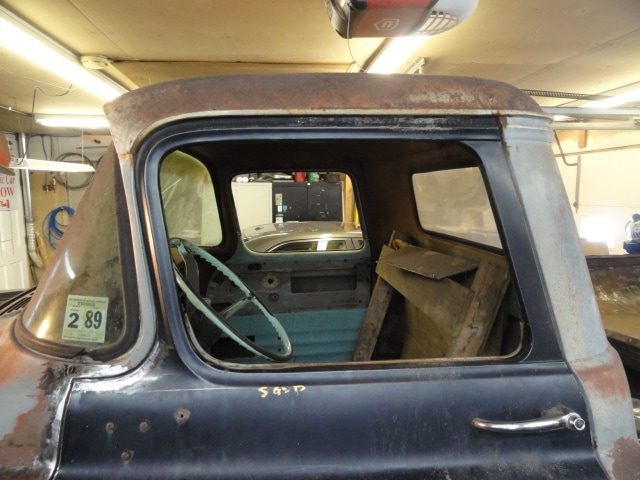
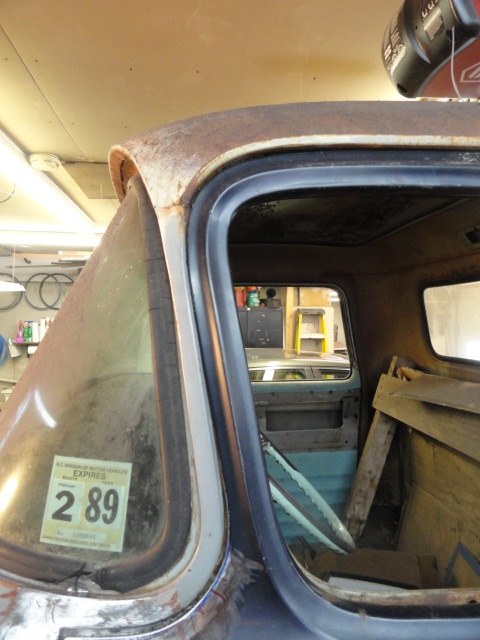
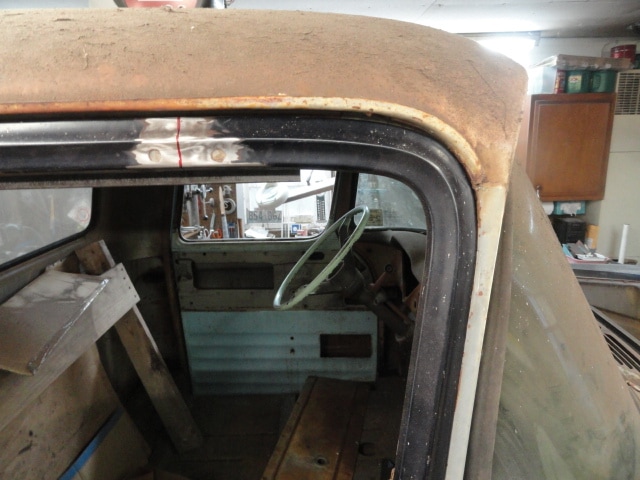
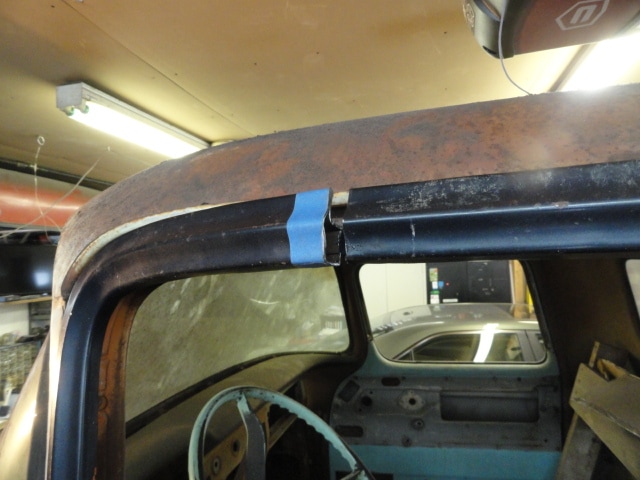
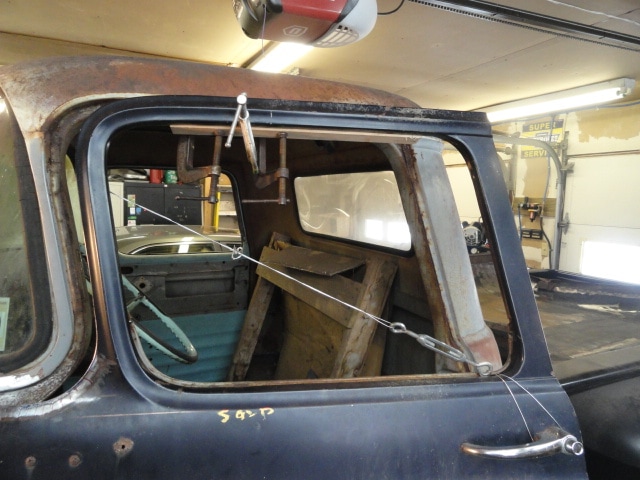
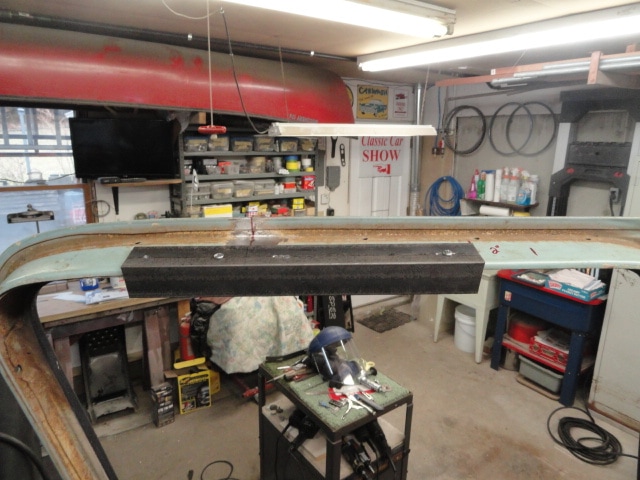
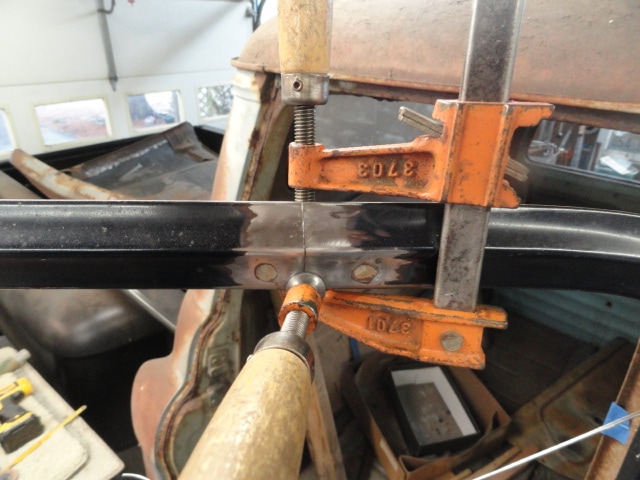
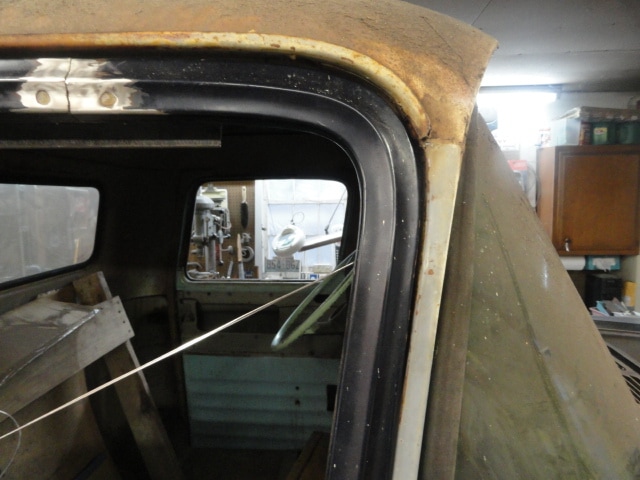
The last part of both doors was up the windshield post. Both doors had no gap and the doors contacted the windshield post. The area of the door isn't wide enough to allow trimming the door back without looking very strange. Instead I cut the top section of the door apart, removing 3/16" and welding the frame back together. I used a turnbuckle mounted on a diagonal to pull the front post back to match the rear and not let the rear move forward. On the left door I screwed around using clamps and wood blocks to clamp the door frame in alignment for welding. On the right side I came up with a much better method utilizing a foot long piece of angle iron, screwed to the inside upper door frame. The 2 screw holes on the aft section was slotted to allow the to frame sections to slide together, then the screws were tightened. The end result was a small gap up the front post, which is proportional with the door frame so it looks good.
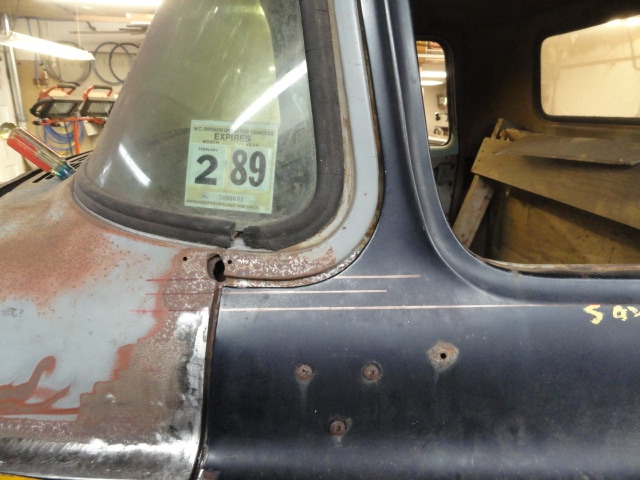
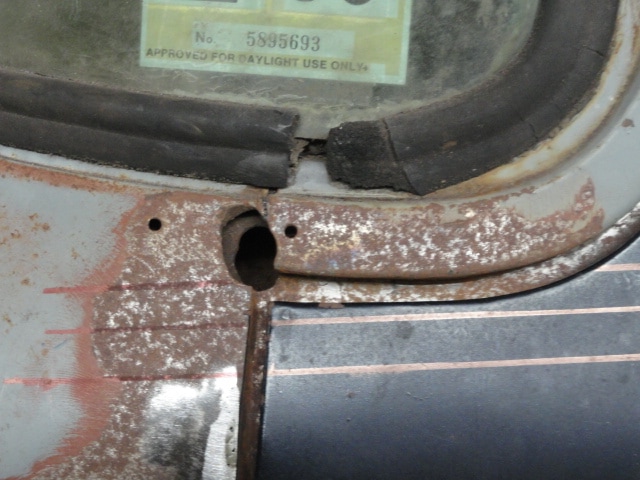
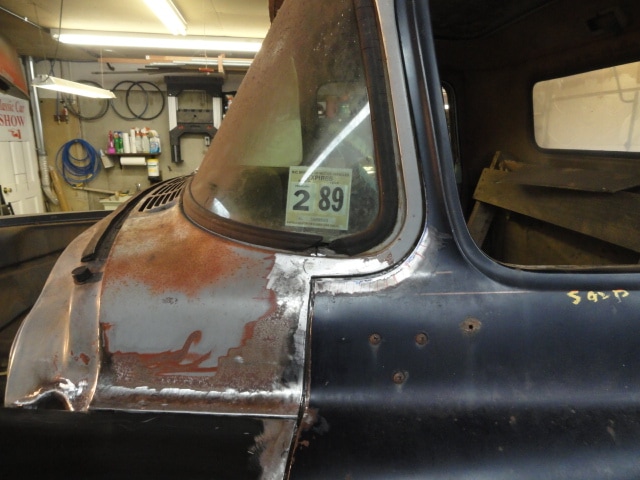
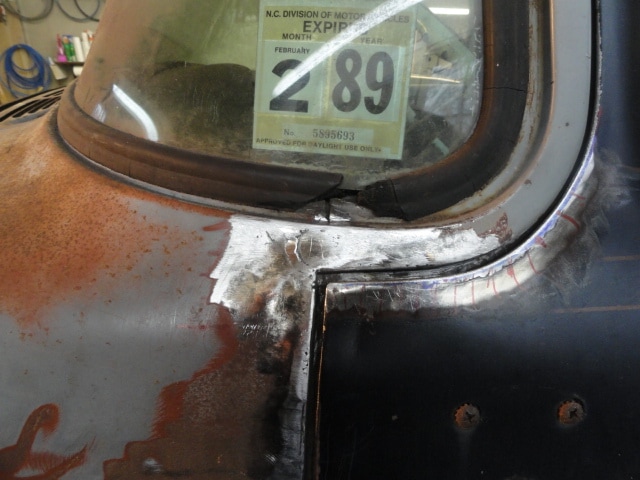
There were several holes in each door from where mirrors had been mounted as well as a large hole in the left cowl from when a spot light had been mounted. I welded up all these holes and ground them back flat. It was interesting that where the holes were in the doors, the door skin was stretched and bulged outward. When welding up the holes, the heat and weld shrank the skin at the same time and was very flat when done, something worked out for a change.
At this point the truck sat untouched for 4 years while taking care of other life events. Then the winter of 2016 - 2017 work resumed. The first thing was to cut the steel rod off, trim more of the fender back and re-welded a rod in place. This time around the gap was much better and I had some material to grind away to set the proper gap. The right door front gap only needed to have some MIG weld build up to give me the needed material needed to set the gap. So now both doors have good gaps down the rear, along the top and bottom and up the front matching the fender.
The area adjacent the front cowl needed attention as well as up the windshield post. The cowl area under the windshield I added a wedge shaped piece of 1/8" flat steel to get rid of what always looked like an up-hill slope. Once that was done, I MIG welded the corresponding edges of both doors to get some material to fit up. The end result came out well.
The last part of both doors was up the windshield post. Both doors had no gap and the doors contacted the windshield post. The area of the door isn't wide enough to allow trimming the door back without looking very strange. Instead I cut the top section of the door apart, removing 3/16" and welding the frame back together. I used a turnbuckle mounted on a diagonal to pull the front post back to match the rear and not let the rear move forward. On the left door I screwed around using clamps and wood blocks to clamp the door frame in alignment for welding. On the right side I came up with a much better method utilizing a foot long piece of angle iron, screwed to the inside upper door frame. The 2 screw holes on the aft section was slotted to allow the to frame sections to slide together, then the screws were tightened. The end result was a small gap up the front post, which is proportional with the door frame so it looks good.
There were several holes in each door from where mirrors had been mounted as well as a large hole in the left cowl from when a spot light had been mounted. I welded up all these holes and ground them back flat. It was interesting that where the holes were in the doors, the door skin was stretched and bulged outward. When welding up the holes, the heat and weld shrank the skin at the same time and was very flat when done, something worked out for a change.