Rear Suspension and Gas Tank
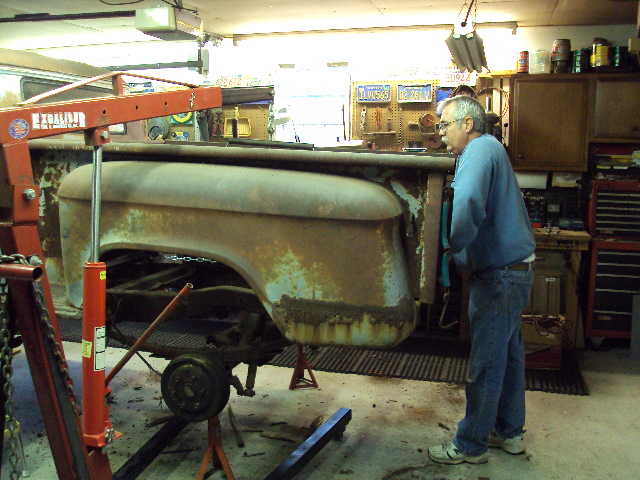
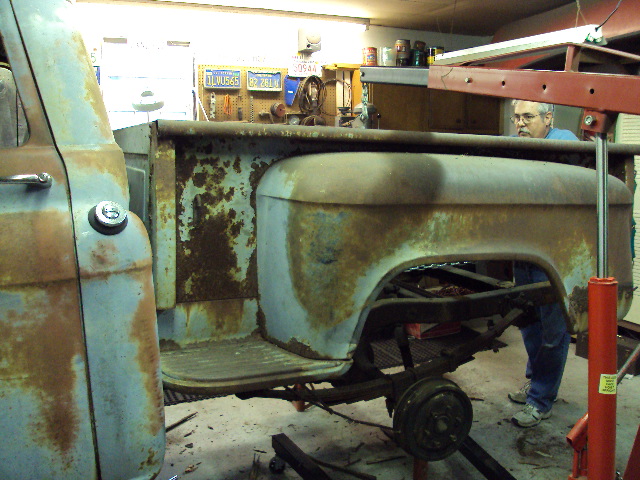
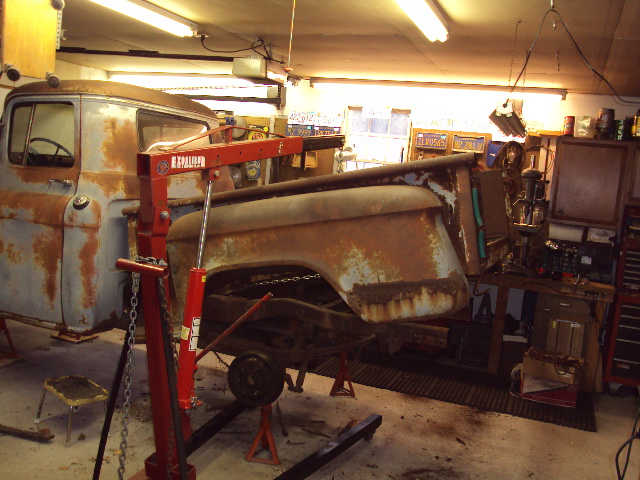
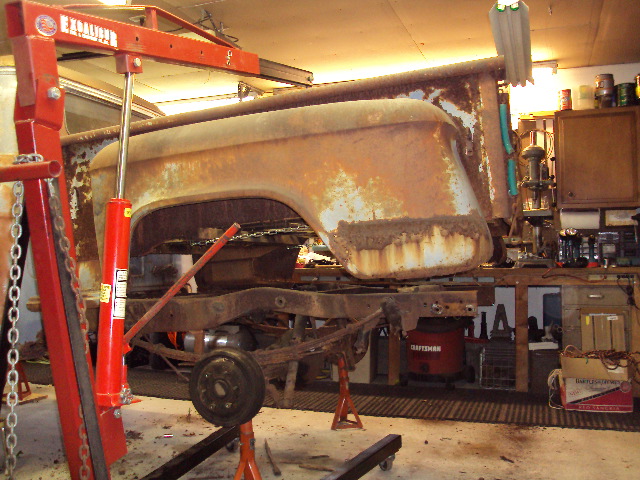
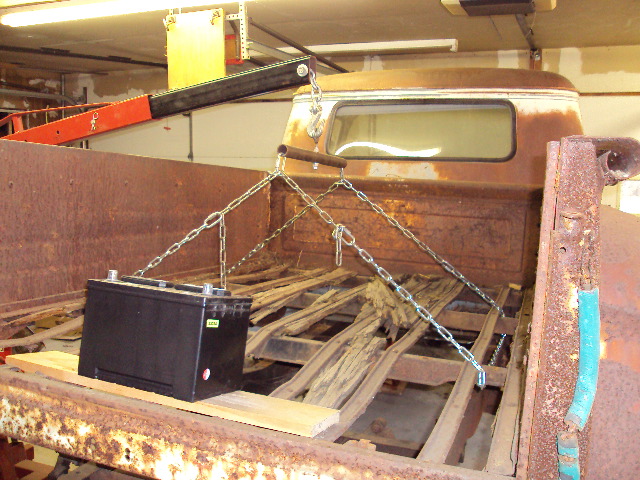
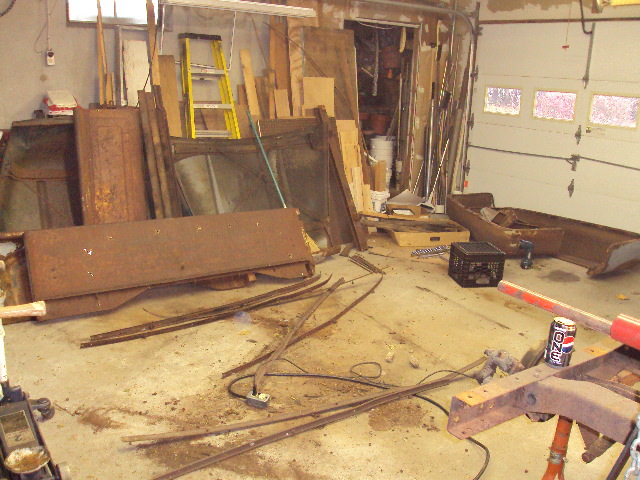
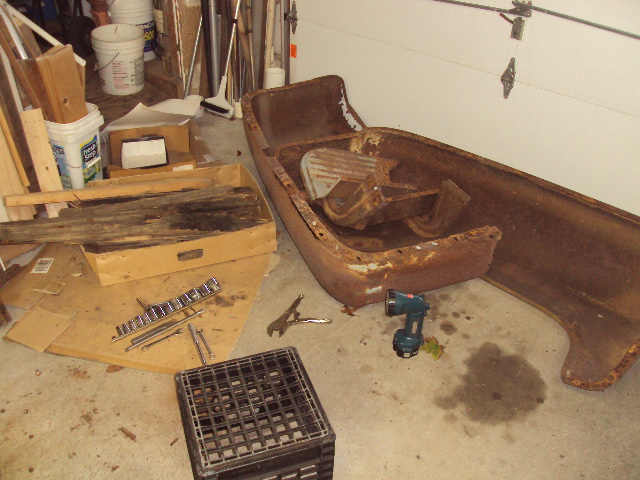
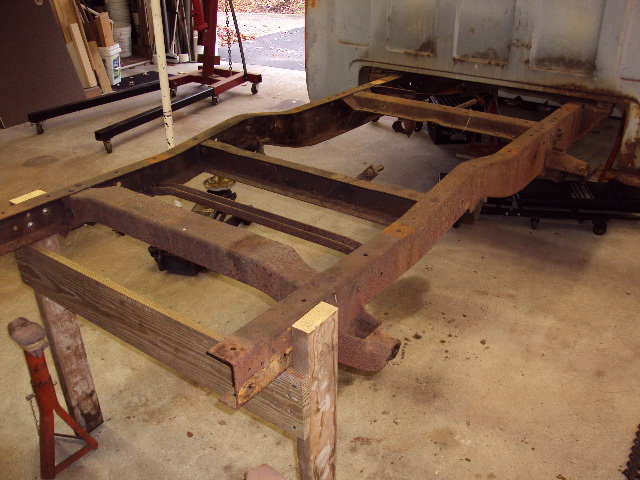
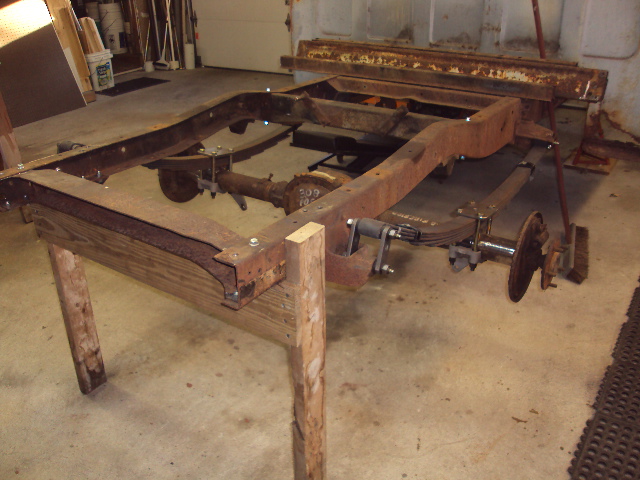
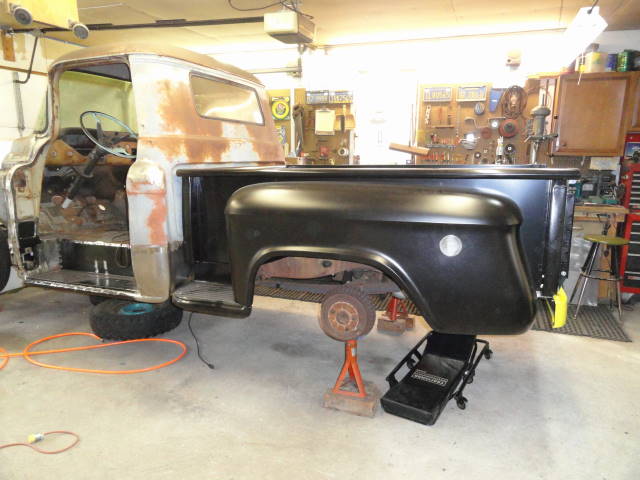
The bed came off easily with the use of our engine hoist to lift it and we ended up using a battery in the rear of the bed to balance it front to back hanging from the hoist. We got the bed and fenders off as a unit in about an hour then we spent 3 hours taking it all apart. Used the cut off wheel a lot cutting rusted bolts.
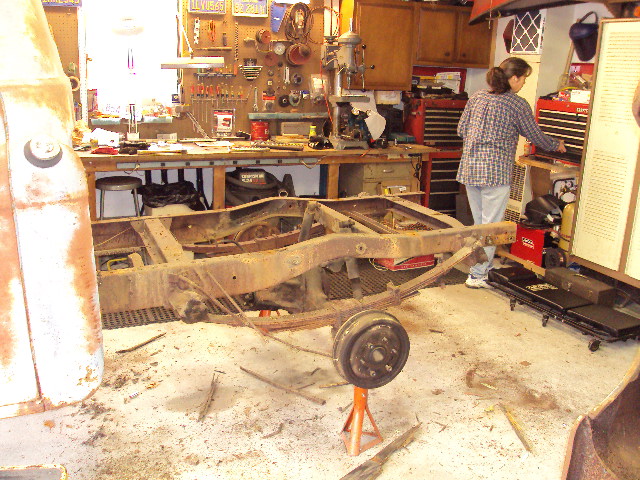
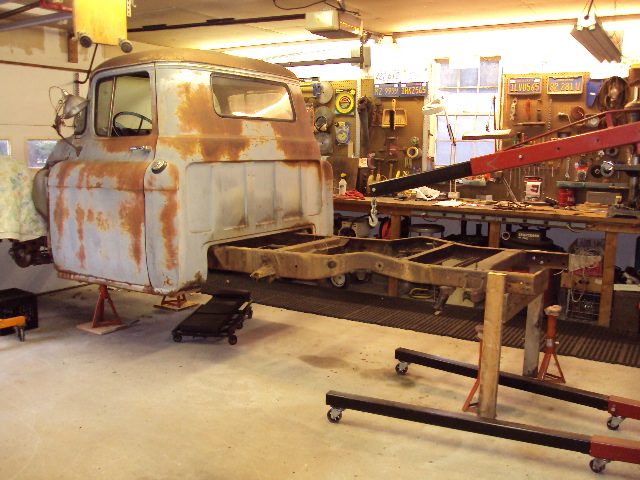
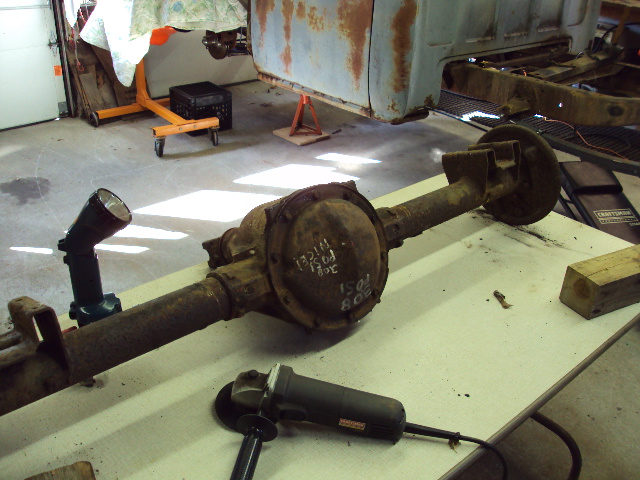
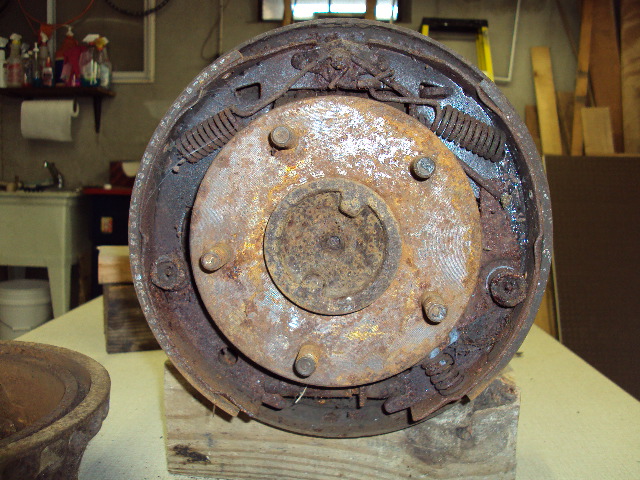
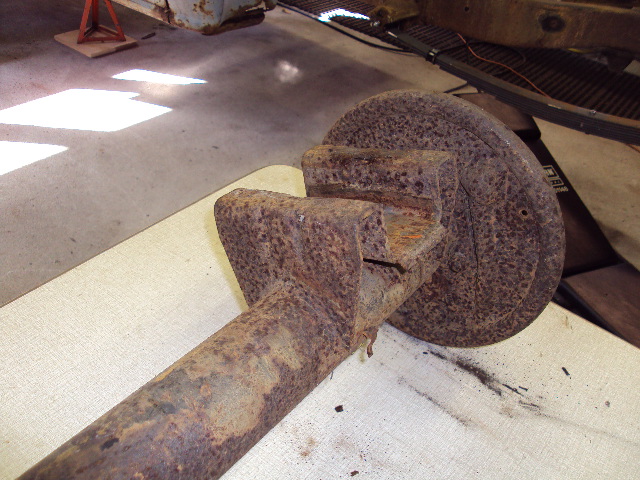
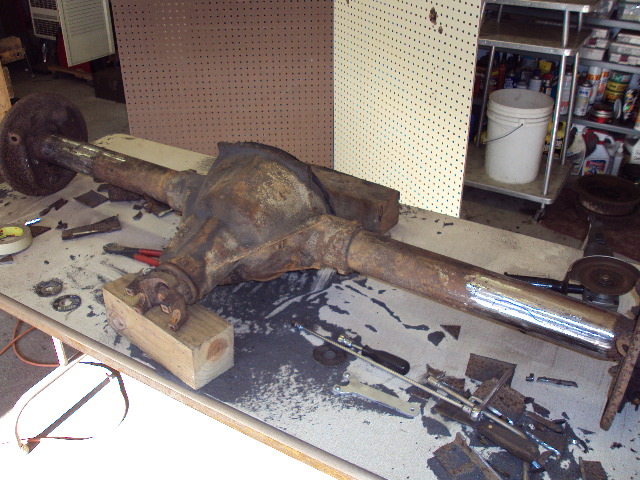
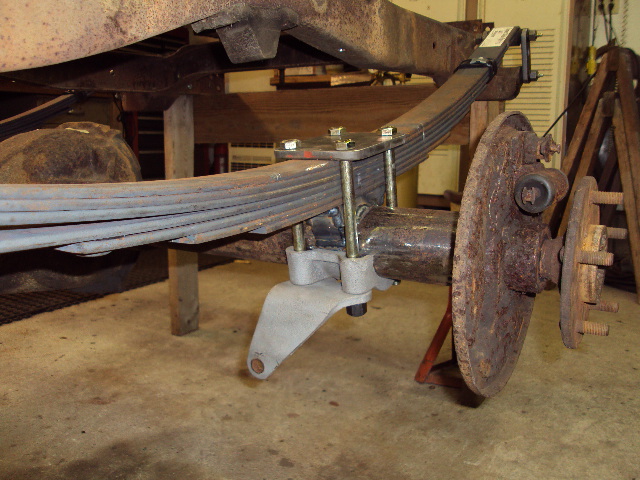
Next was removal of the axle and springs which was straight forward with the use of the cut off wheel. There must have been 5 pounds of caked on grease and dirt on the spring perches that had to be removed with hammer and chisel. Before the axle was removed, the pinion angle was measured so the new axle can be set to the same.
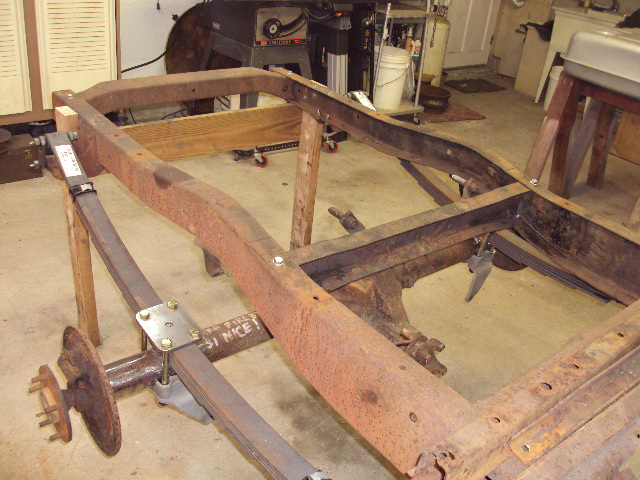
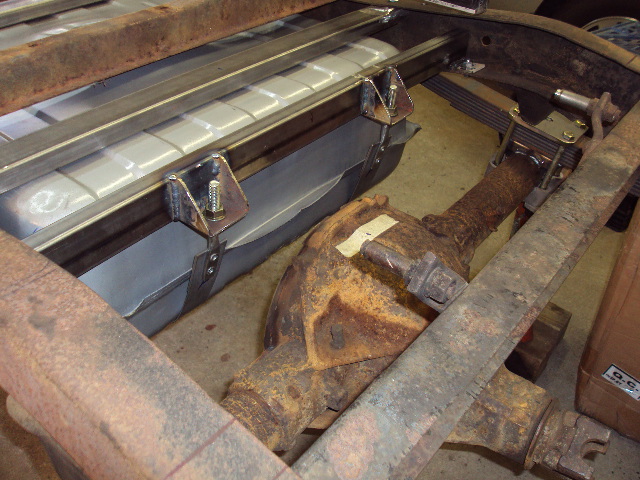
A 79- 81 Camaro rear axle with a 3.08 ratio and is 61 1/2 brake drum face to face which is very close to the same as the truck’s original axle. The 3.08 is the same as what we installed in the Nomad that has worked out well with the transmission and give us a good engine rpm at speed and the real bonus was that it is a posi- traction. The spring perches were cut off which turned out to be difficult using a cut off wheel, but 7 wheels later, the job was done. A plasma cutter would have been a much better tool to use, but you use what you have.
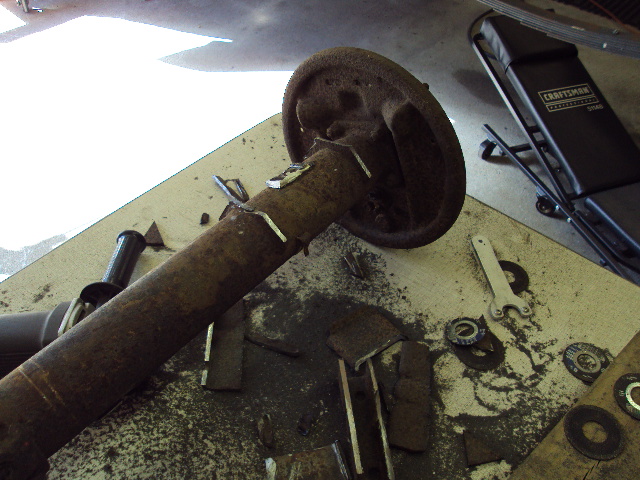
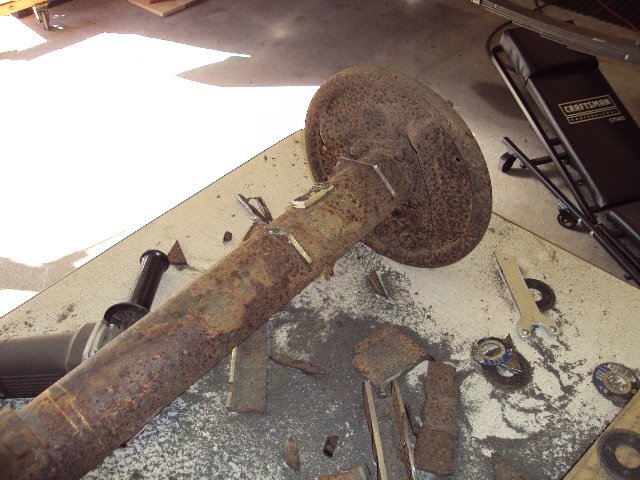
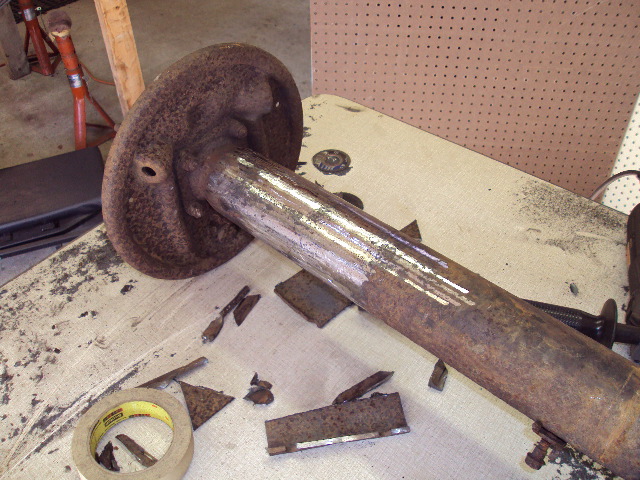
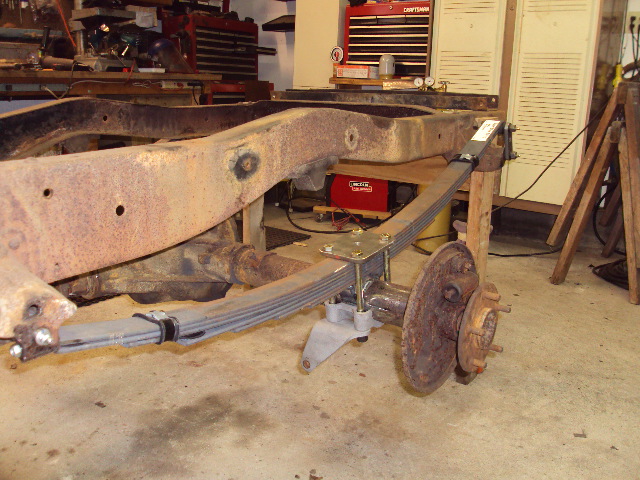
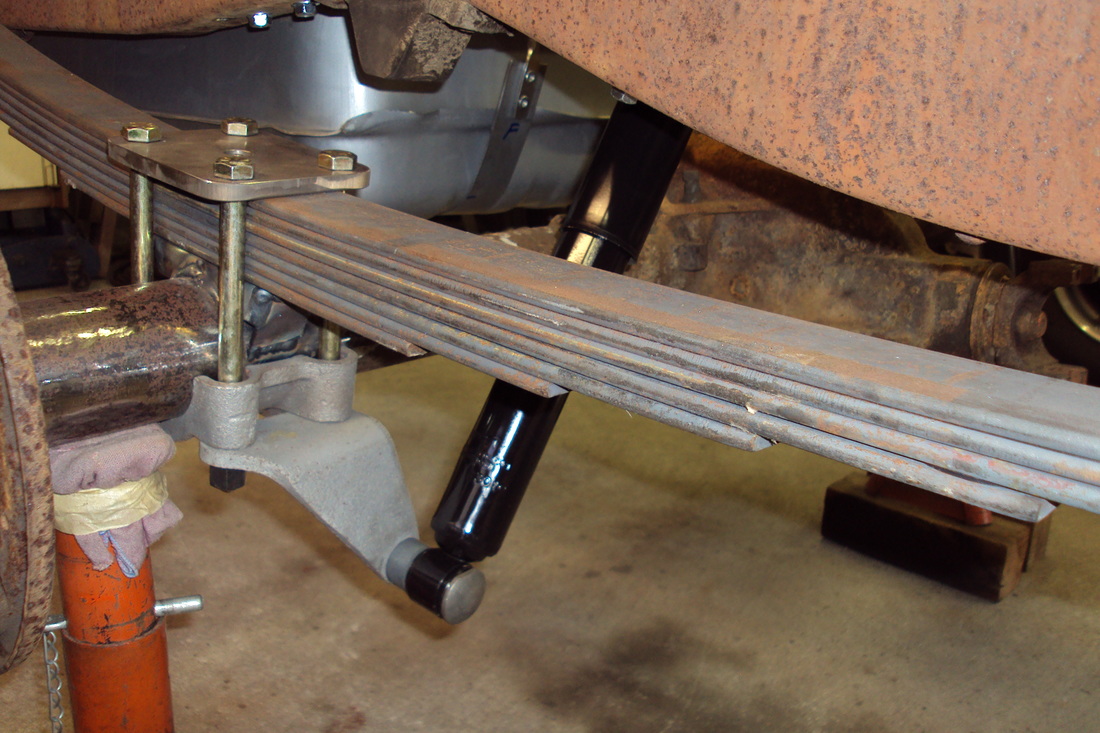
Next the new Posies springs were installed then the axle put into place with new perches. I picked up a set of Posies Super Ride new leaf springs which will lower the rear about 3" to match the drop in the front end. We used the same type of springs in the Nomad and have been happy with them. Once the pinion angle was set the perches were tack welded. I used the original axle caps and lower shock mounts but the reversed so that the shock mounts are now in front of the axle.
Next was removal of the axle and springs which was straight forward with the use of the cut off wheel. There must have been 5 pounds of caked on grease and dirt on the spring perches that had to be removed with hammer and chisel. Before the axle was removed, the pinion angle was measured so the new axle can be set to the same.
A 79- 81 Camaro rear axle with a 3.08 ratio and is 61 1/2 brake drum face to face which is very close to the same as the truck’s original axle. The 3.08 is the same as what we installed in the Nomad that has worked out well with the transmission and give us a good engine rpm at speed and the real bonus was that it is a posi- traction. The spring perches were cut off which turned out to be difficult using a cut off wheel, but 7 wheels later, the job was done. A plasma cutter would have been a much better tool to use, but you use what you have.
Next the new Posies springs were installed then the axle put into place with new perches. I picked up a set of Posies Super Ride new leaf springs which will lower the rear about 3" to match the drop in the front end. We used the same type of springs in the Nomad and have been happy with them. Once the pinion angle was set the perches were tack welded. I used the original axle caps and lower shock mounts but the reversed so that the shock mounts are now in front of the axle.


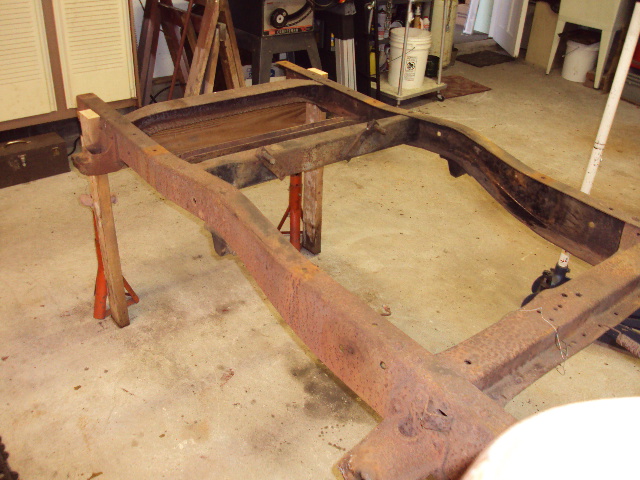

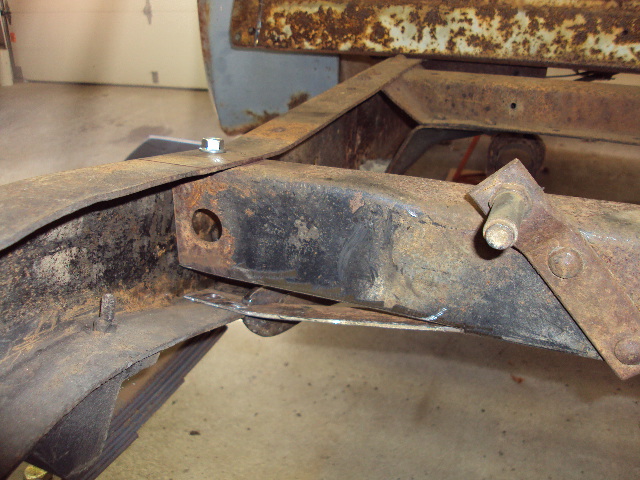
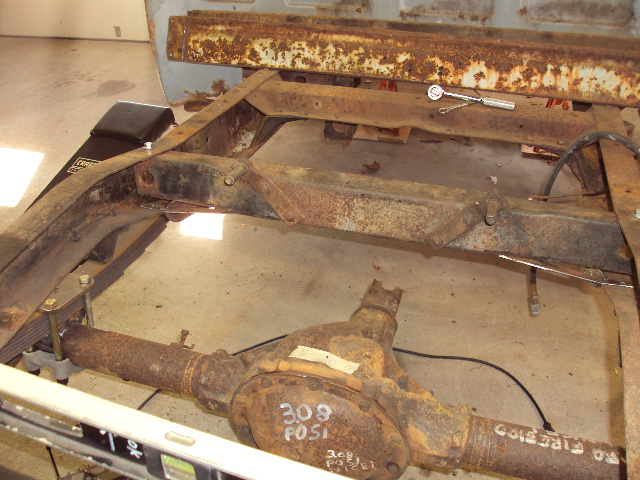
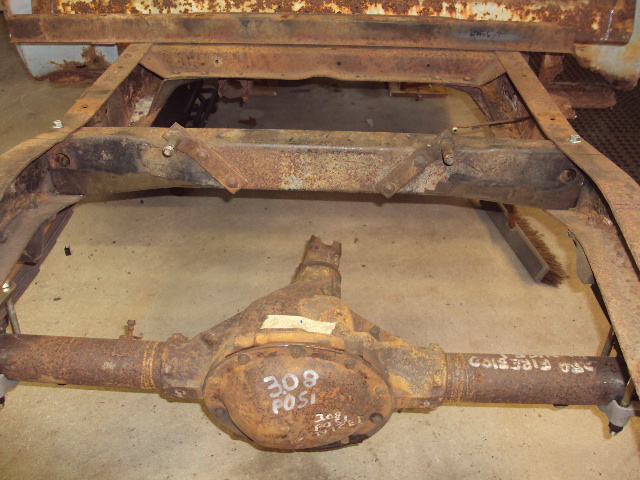

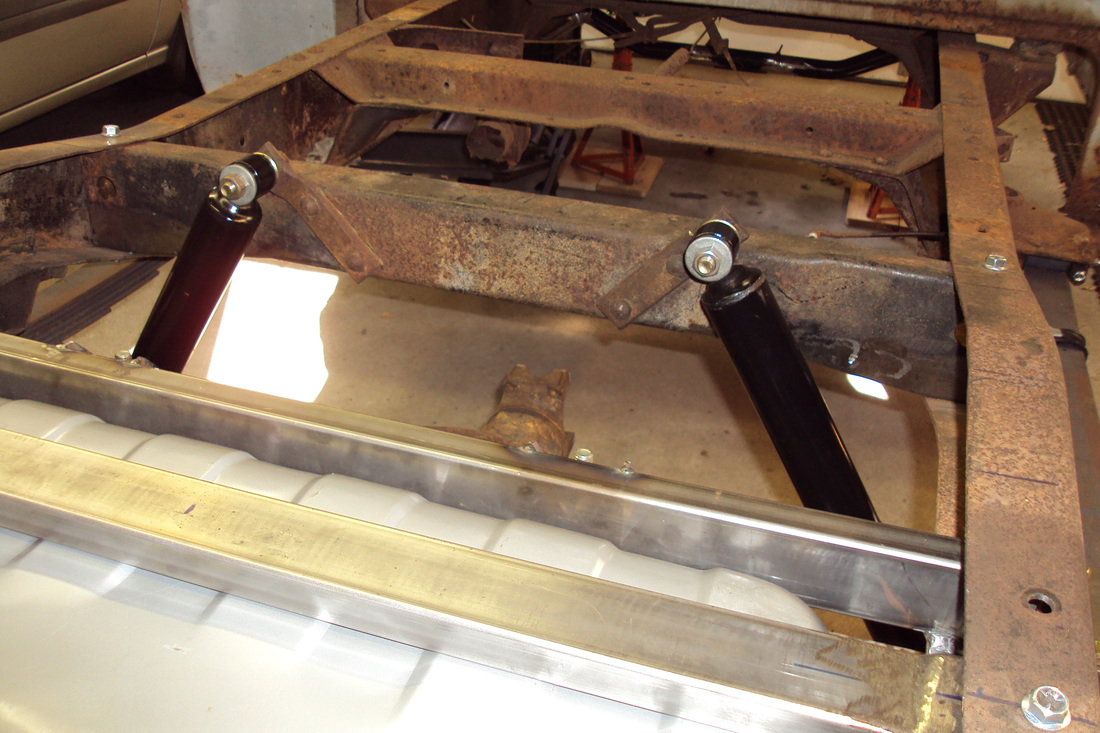
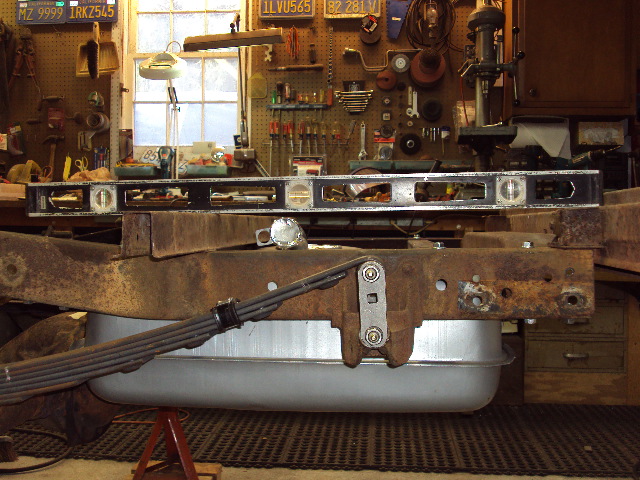
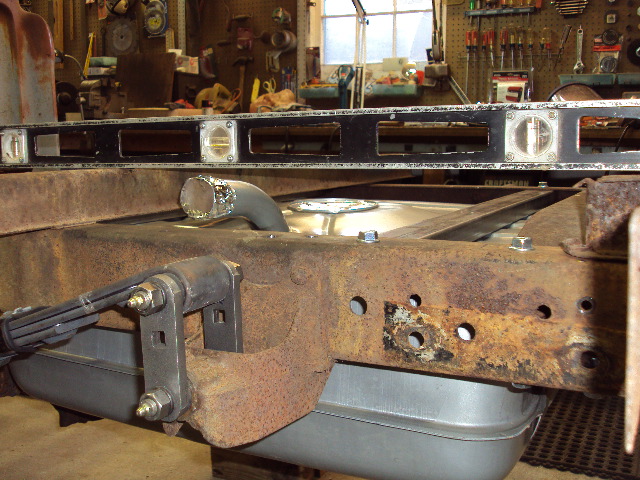
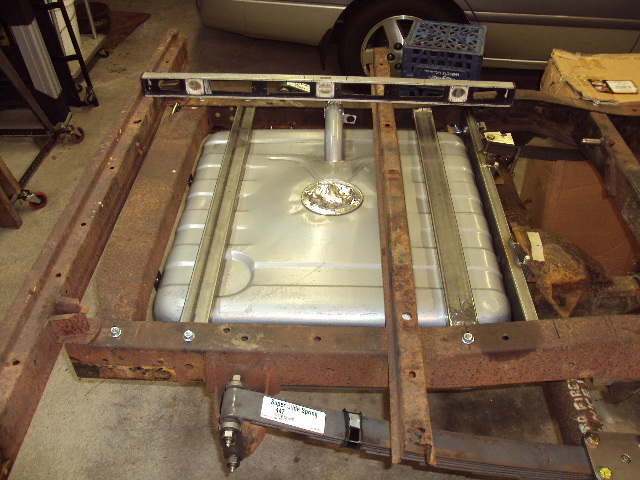
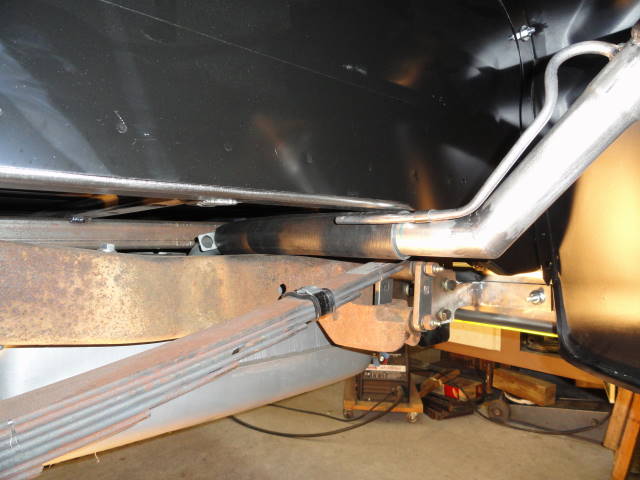
Also researched replacement gas tanks for something that could be used in the rear frame and not in the cab like the original. I came up with an 87 Chevy Blazer tank from Dorman Products (576-321) that worked work well. To make room for the Blazer tank the rear cross members were relocated and the upper shock mount cross member was removed and relocated to in front of the axle. I turned the member around backwards and bolted it to the top frame flange. Then the cross member was split open on the ends and widened to fit to the lower flange. The rear cross member was turn around backward and moved to the rear end of the frame with very little modification needed. By turning the member around so that the opening was toward the rear will make bolting the tank straps in possible once the tank is in place.
Using some 1x2" steel tubing three cross members were made. Two will bolt to the top frame flange for the tank to sit against and one in front of the tank will bolt to the bottom flange and will be the front attach point for the tank straps. With the two cross members above the tank under the frame flange the tank is spaced down by an 1" making room for the filler neck to clear the bottom of the truck bed and still clear the frame. The front cross member fits in just behind the rear axle cover so things have worked out well.
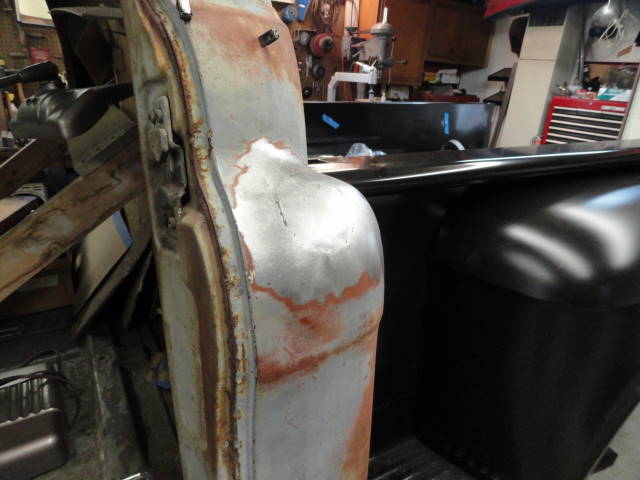
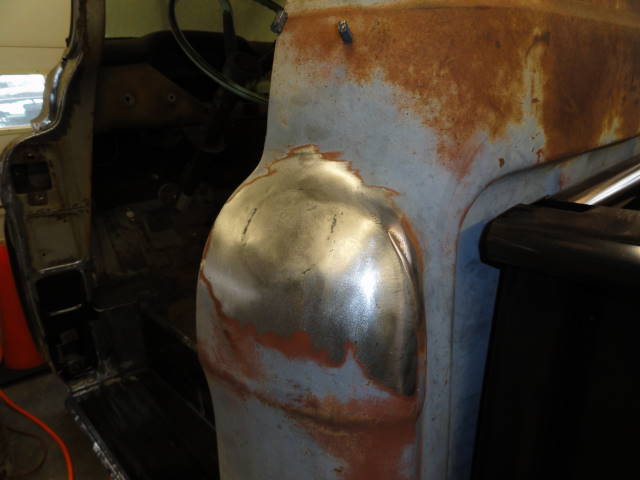
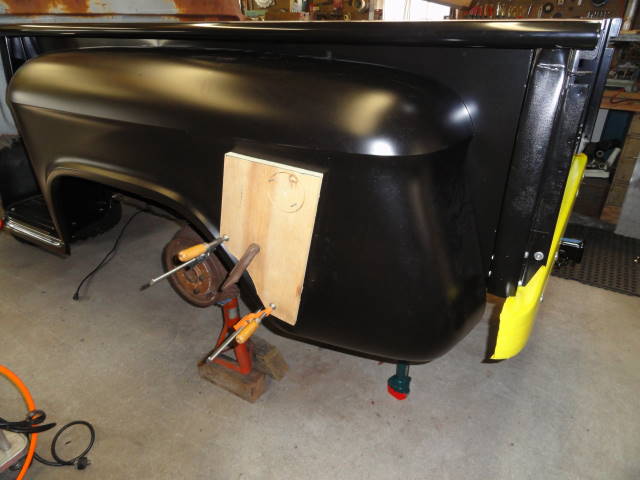
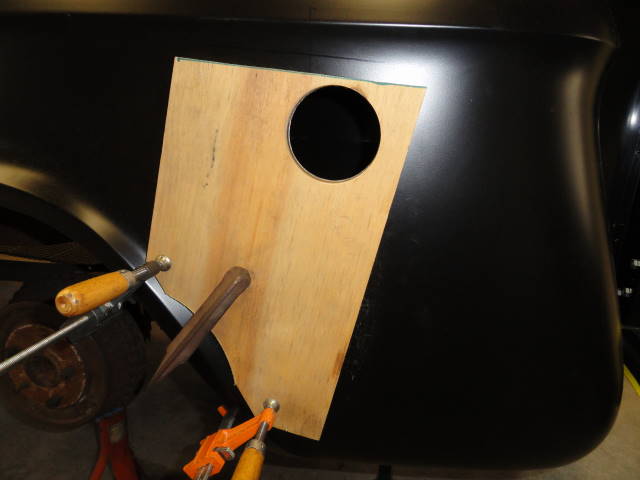
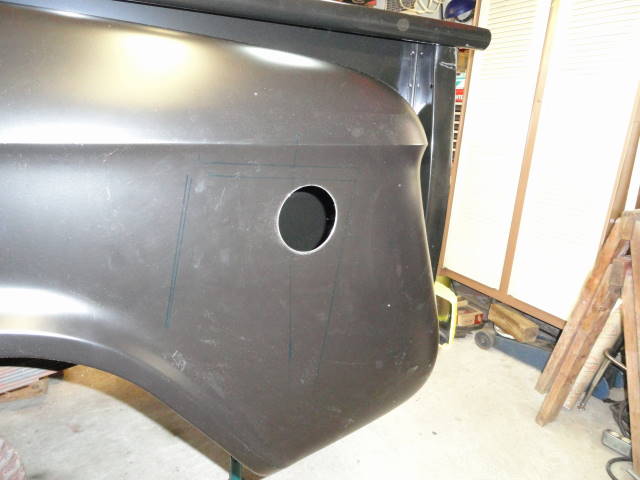
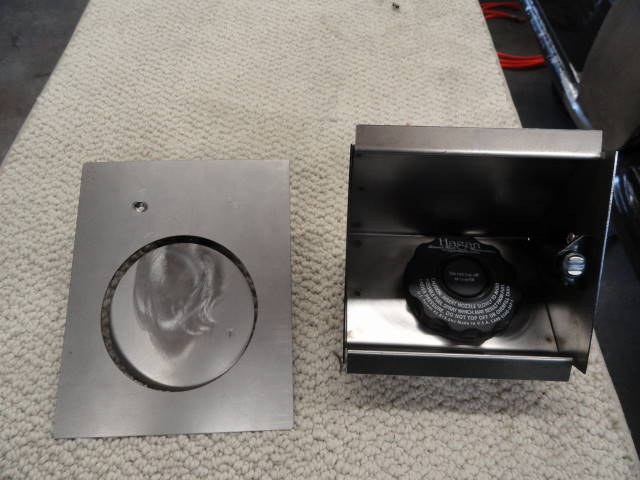
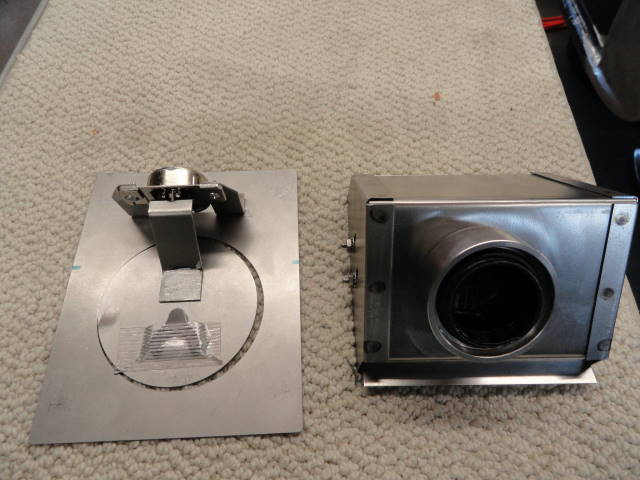
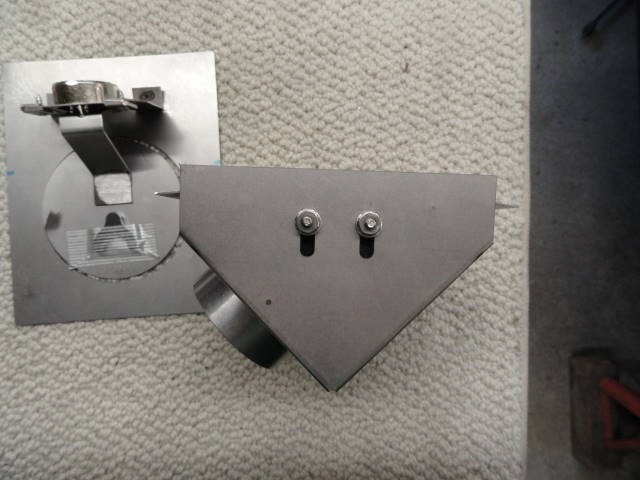
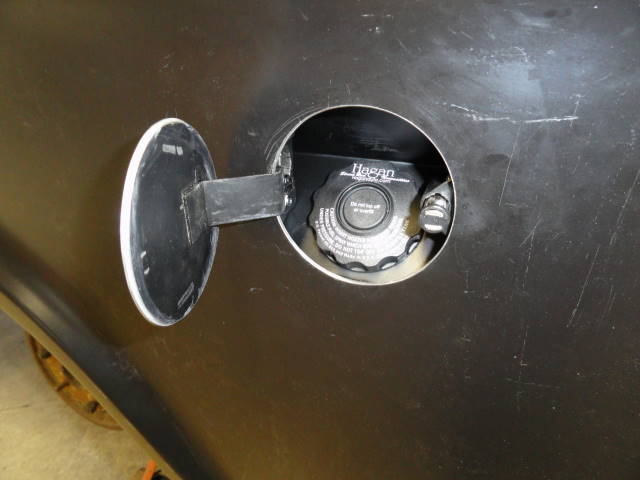
Finished the addition of the gas tank by adding a gas filler door in the left rear fender. I got a Fuel Door assembly from Hagen Products; I chose a 45° slight curve style without looking at the fender and it was the wrong one to use, the 45° flat style would have been better although it wouldn't be a correct fit either. The fender has a slight concave curve top to bottom with a slight convex curve front to back. The stock Hagan door has a convex curve top to bottom. The good thing I did do was to order the door assembly un-welded which means the box is separate from the face plate and door; this allowed me to re-shape the face plate and door to fit the shape of the fender. Once the face plate fit the fender, then I was able to fit to box to the face plate and weld them together.
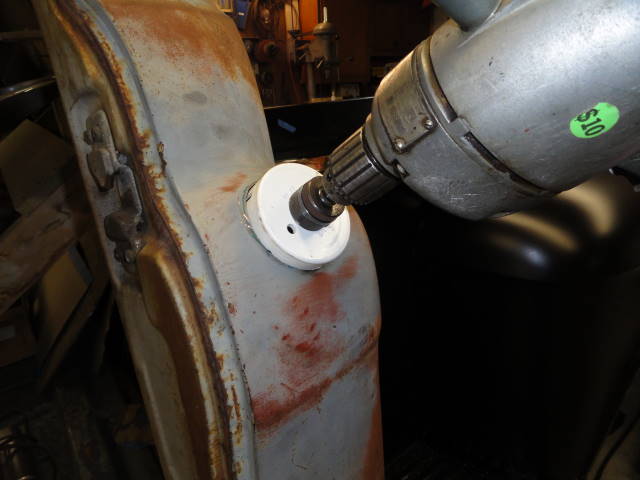
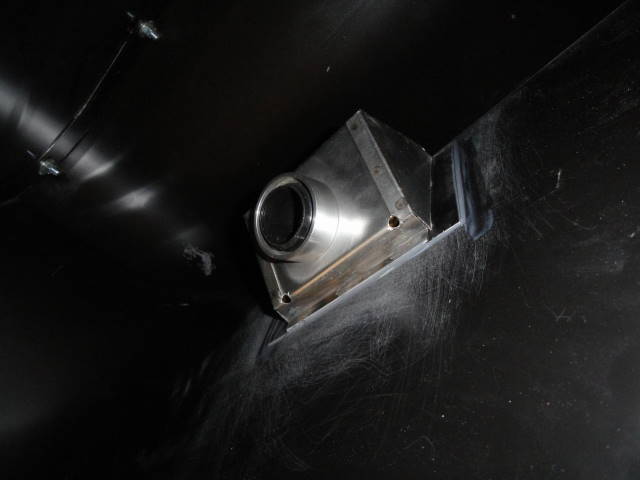
I used a 3 1/2" hole saw to cut the hole in the fender for the filler door. Cutting a hole that large in thin sheet metal can be difficult not to tear out the pilot hole, so I clamped a pine board to the fender to work as a guide which worked well. I then bonded the door assembly to the inside of the fender using some panel adhesive from Eastwood Products. I bonded the parts together for two reasons, one I wanted to have a thicker door and hole lip around the door to look and feel better which was achieved by bonding the two layers together, and second it was much easier keeping the distortion out of the fender that can happen when welding.
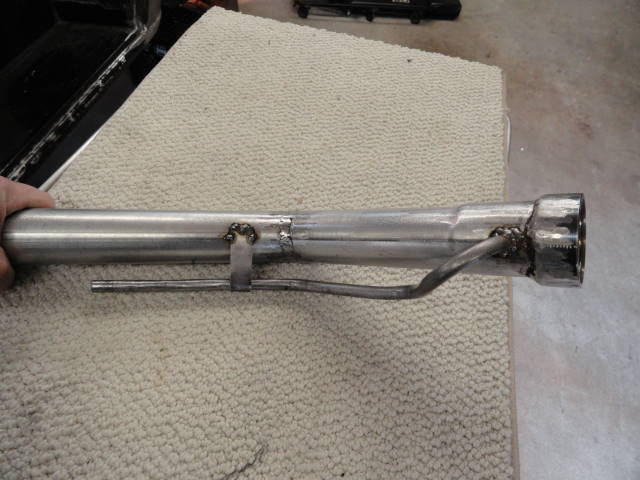
The fill neck extension to connect the tank to the gas door was made from 1 3/4" exhaust pipe cut and welded on a 45° angle. I couldn't find any pre-bent tube, the muffler shops were closed on Sunday and got tired of shopping around for it, so I went with this method. A vent tube was added by bending up some 3/8" fuel line. The local Napa dealer had the 1 3/4" gas fill hose used as a connecter. When it gets installed for good, I'll clamp it to the bottom of the bed for added support.
Using some 1x2" steel tubing three cross members were made. Two will bolt to the top frame flange for the tank to sit against and one in front of the tank will bolt to the bottom flange and will be the front attach point for the tank straps. With the two cross members above the tank under the frame flange the tank is spaced down by an 1" making room for the filler neck to clear the bottom of the truck bed and still clear the frame. The front cross member fits in just behind the rear axle cover so things have worked out well.
Finished the addition of the gas tank by adding a gas filler door in the left rear fender. I got a Fuel Door assembly from Hagen Products; I chose a 45° slight curve style without looking at the fender and it was the wrong one to use, the 45° flat style would have been better although it wouldn't be a correct fit either. The fender has a slight concave curve top to bottom with a slight convex curve front to back. The stock Hagan door has a convex curve top to bottom. The good thing I did do was to order the door assembly un-welded which means the box is separate from the face plate and door; this allowed me to re-shape the face plate and door to fit the shape of the fender. Once the face plate fit the fender, then I was able to fit to box to the face plate and weld them together.
I used a 3 1/2" hole saw to cut the hole in the fender for the filler door. Cutting a hole that large in thin sheet metal can be difficult not to tear out the pilot hole, so I clamped a pine board to the fender to work as a guide which worked well. I then bonded the door assembly to the inside of the fender using some panel adhesive from Eastwood Products. I bonded the parts together for two reasons, one I wanted to have a thicker door and hole lip around the door to look and feel better which was achieved by bonding the two layers together, and second it was much easier keeping the distortion out of the fender that can happen when welding.
The fill neck extension to connect the tank to the gas door was made from 1 3/4" exhaust pipe cut and welded on a 45° angle. I couldn't find any pre-bent tube, the muffler shops were closed on Sunday and got tired of shopping around for it, so I went with this method. A vent tube was added by bending up some 3/8" fuel line. The local Napa dealer had the 1 3/4" gas fill hose used as a connecter. When it gets installed for good, I'll clamp it to the bottom of the bed for added support.


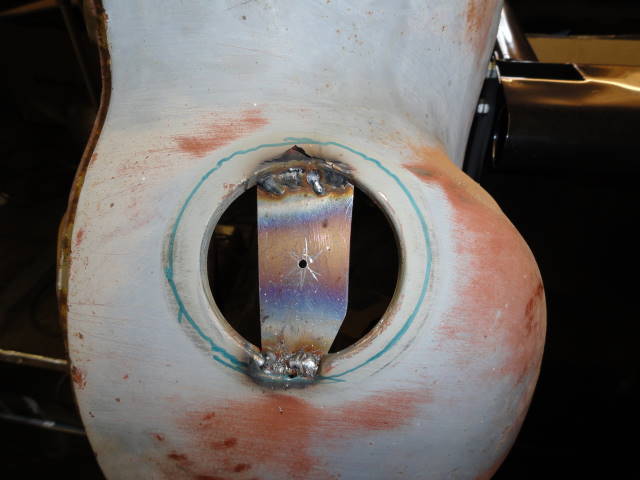
The last thing done was to remove the original gas filler from the cab corner and fill in the hole with a patch panel. I used my 3 1/2" hole saw again to cut out the original filler hole flanges. This was done by welding a 1/4" plate across the hole to give me a point for a pilot hole. I then made the patch panel using almost all of my sheet metal tools: multitude of hammers, dollies, shot bag, shrinker, planishing hammer and band saw. There are a few lumps and bumps, but it is plenty good and can be made better with a little more hammer work, but I going to stop for now while ahead.