Front Suspension and Drive Train
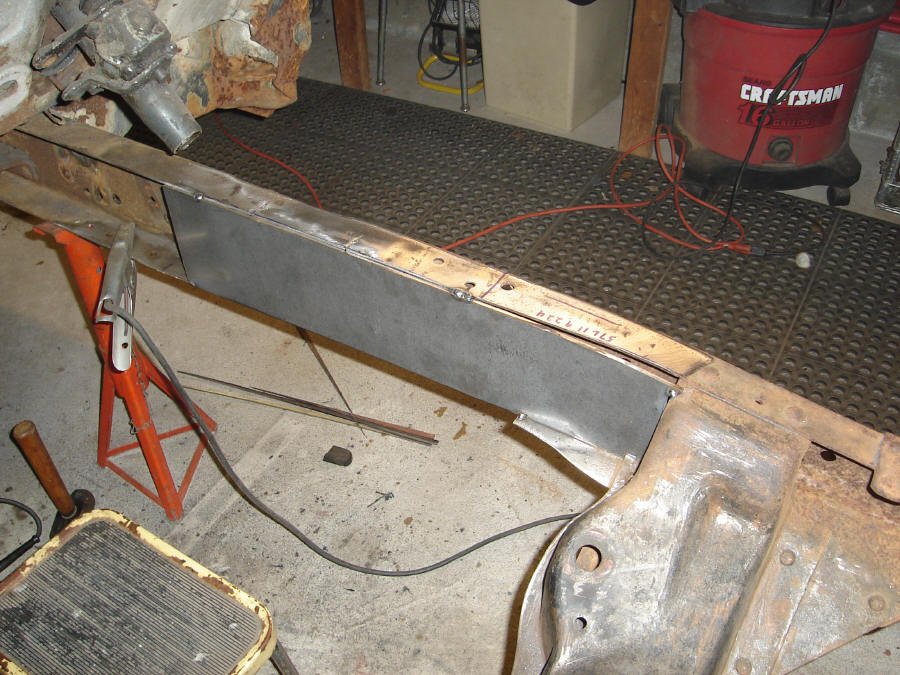
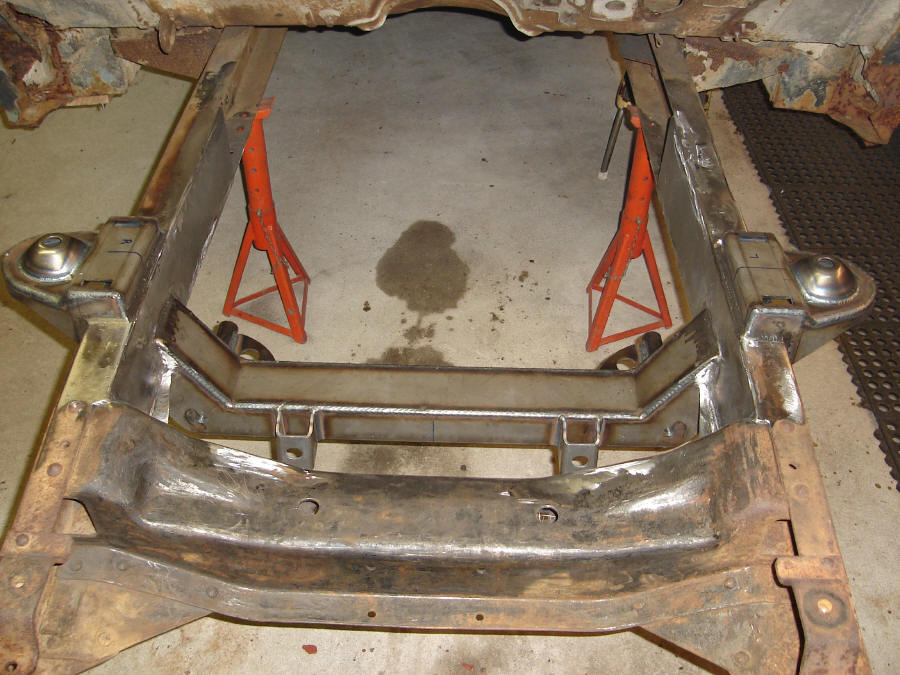
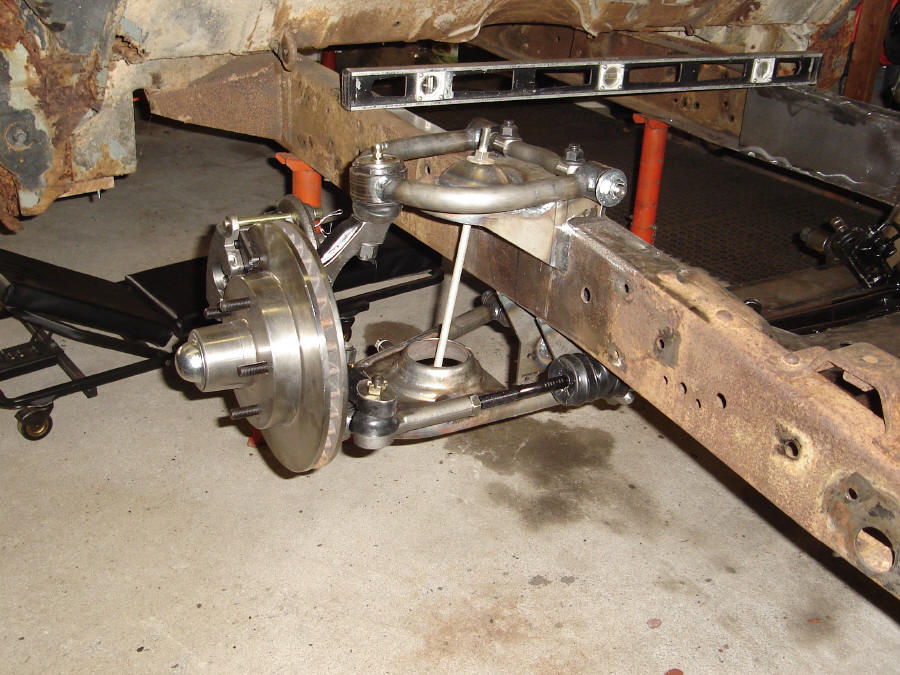
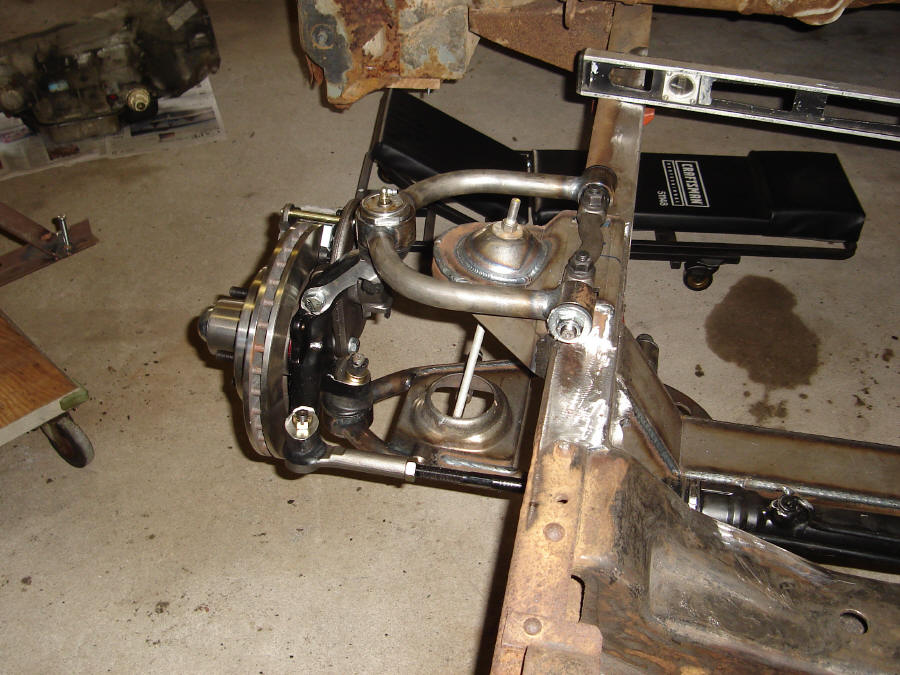
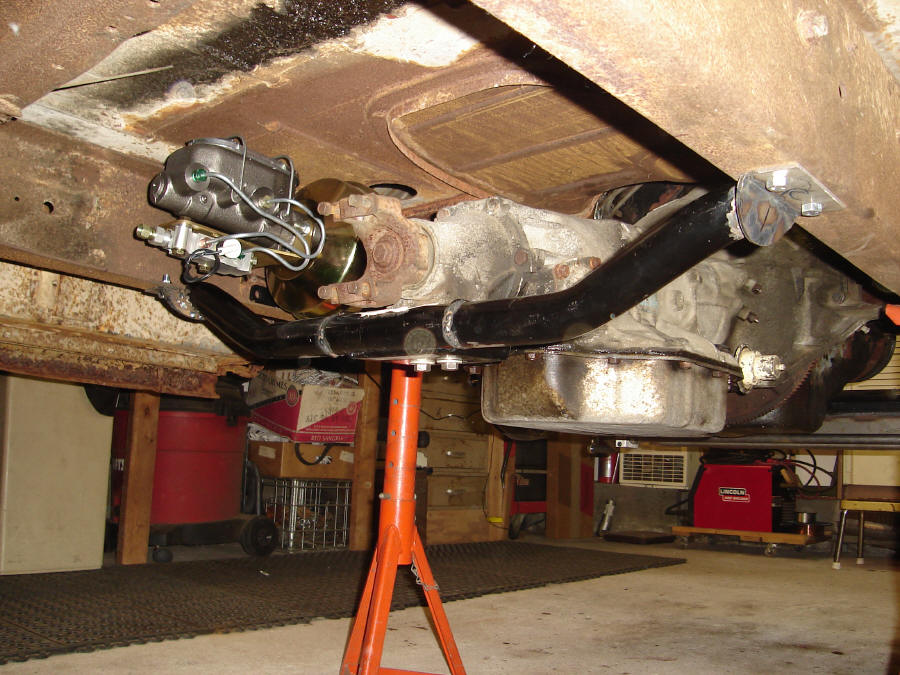
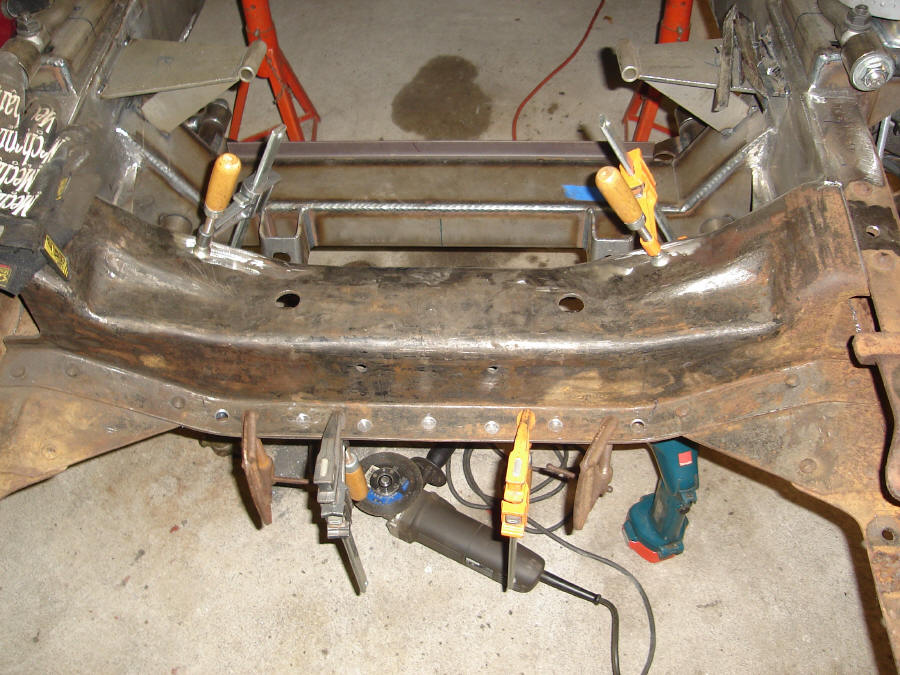
Installation of the new suspension and drive train has begun by adding the Mustang II IFS with power rack and pinion and power disc brakes all from Classic Performance Products (CPP) and made by Total Cost Involved (TCI). The frame has boxing plates added, the stock front cross member is modified by removing the humps that used to be the engine mounting points, than the new cross member is added.
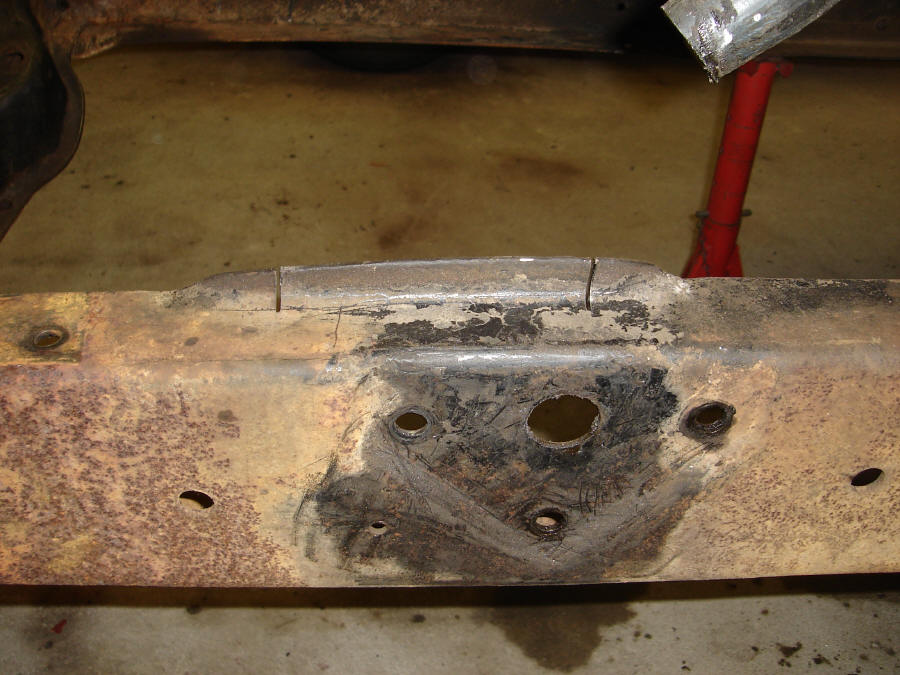
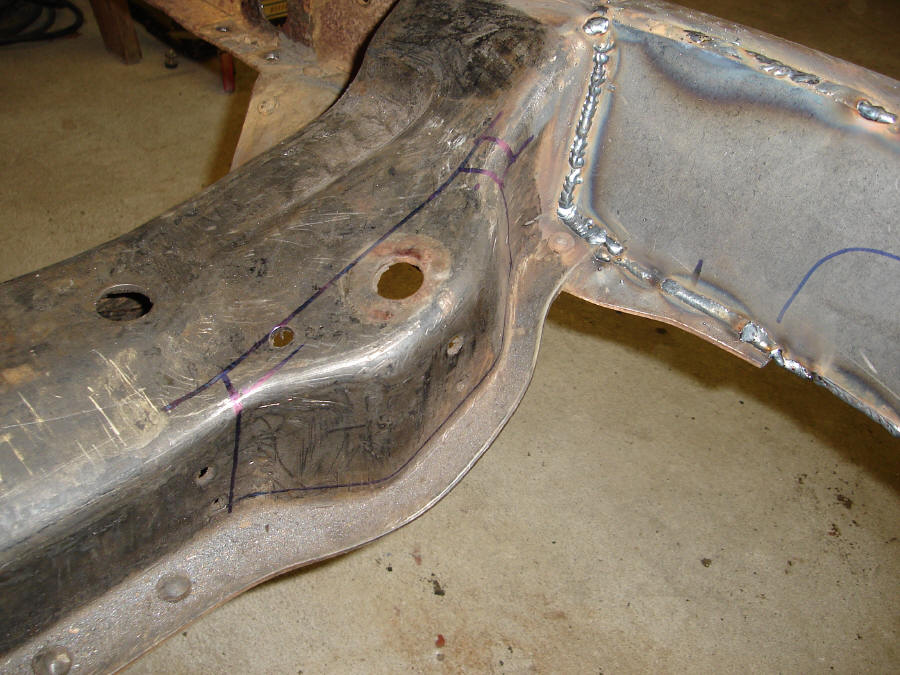
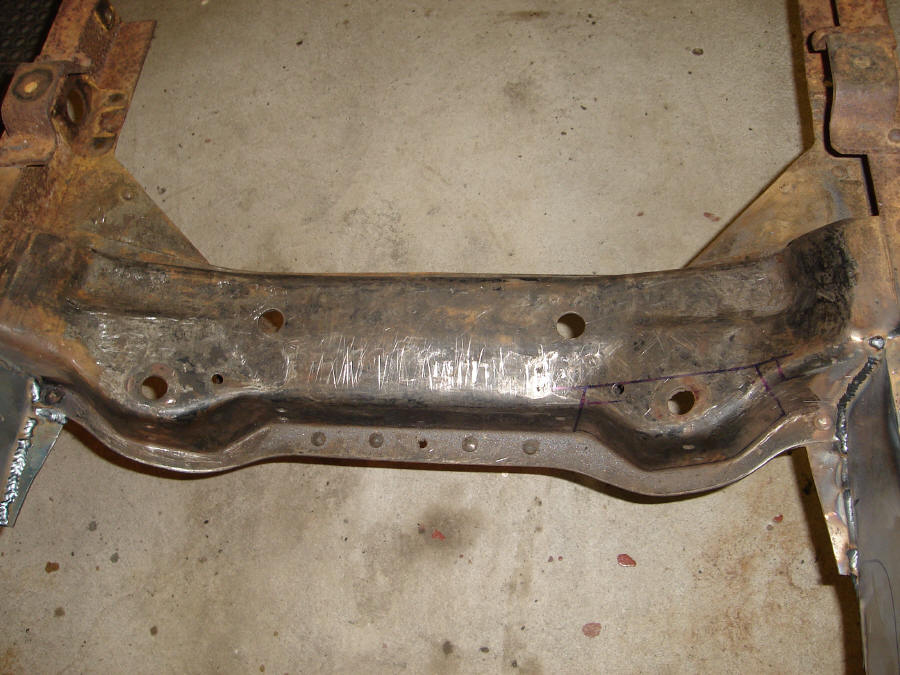
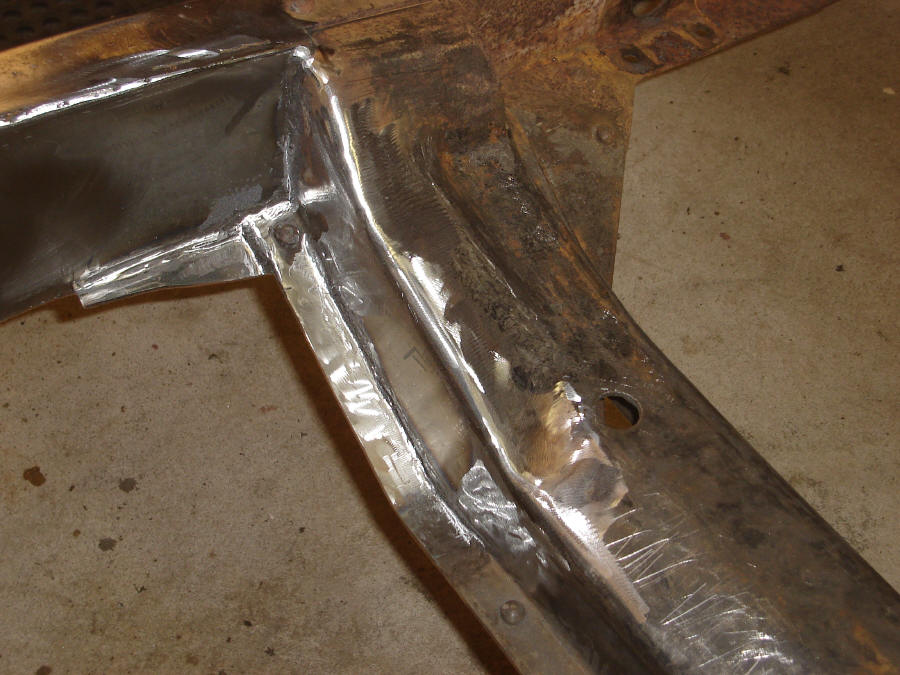
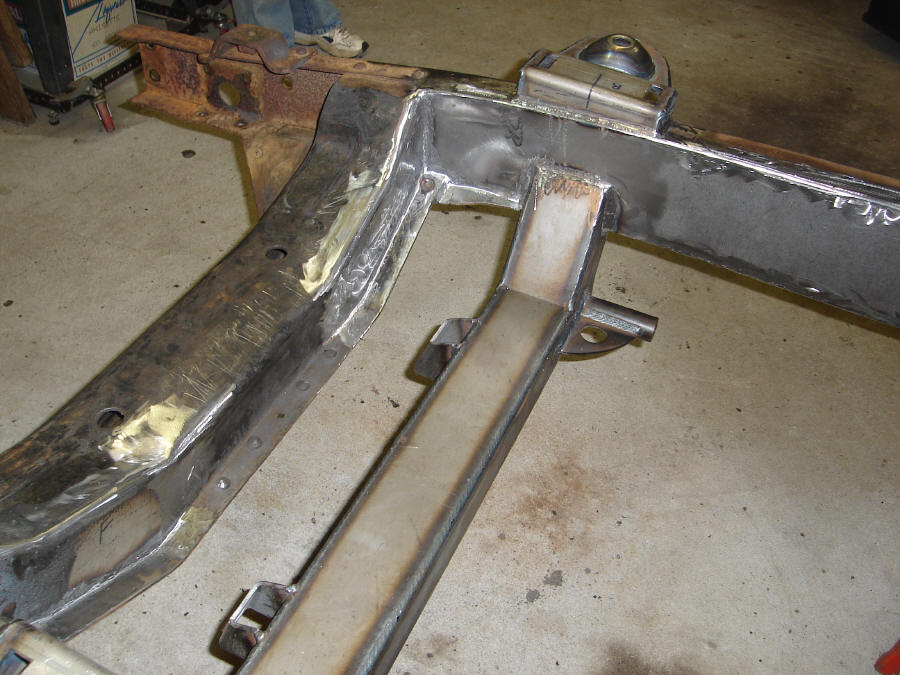
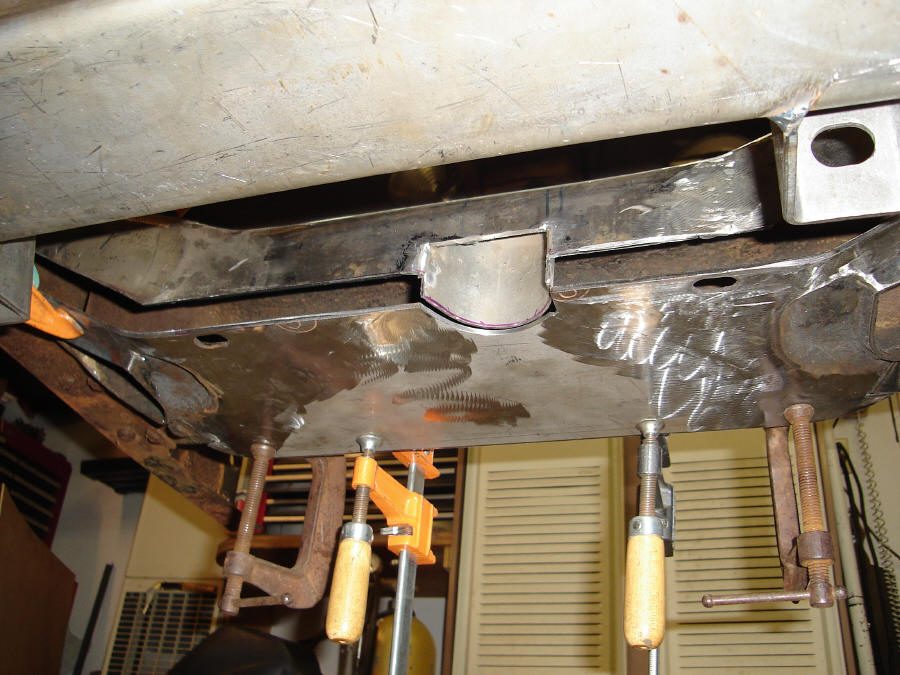
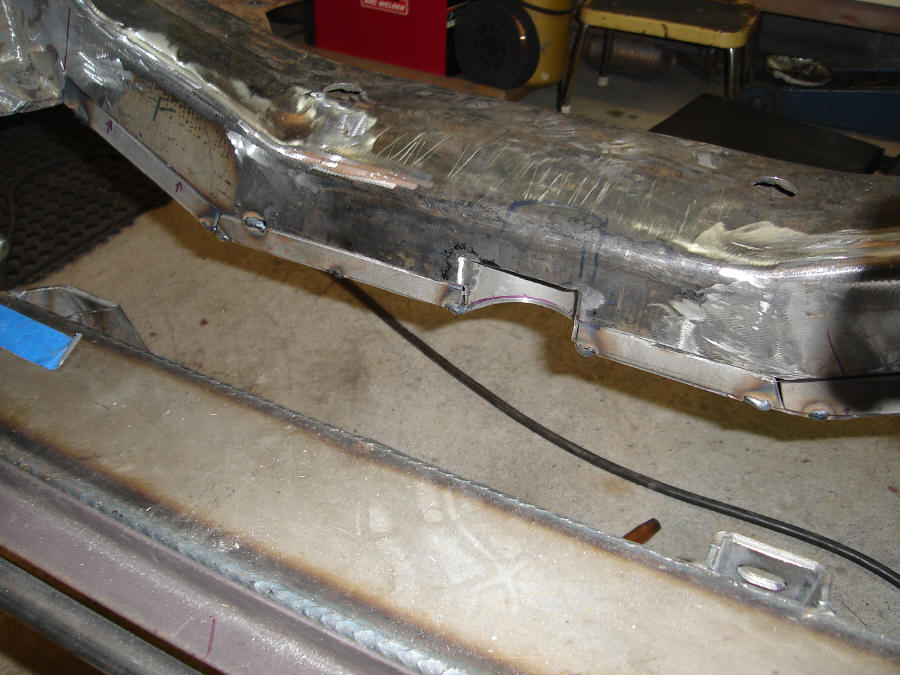
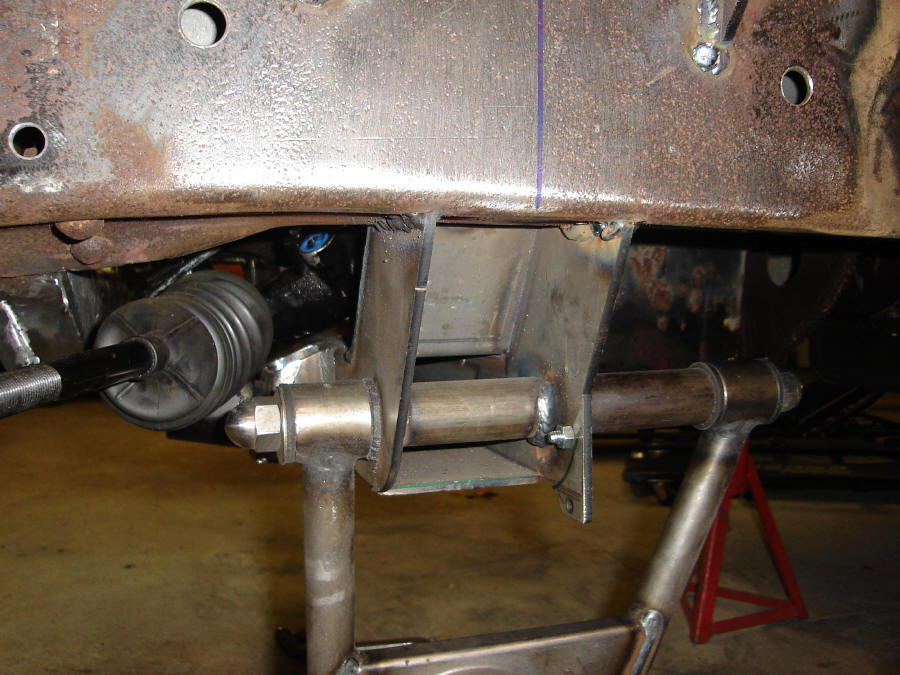
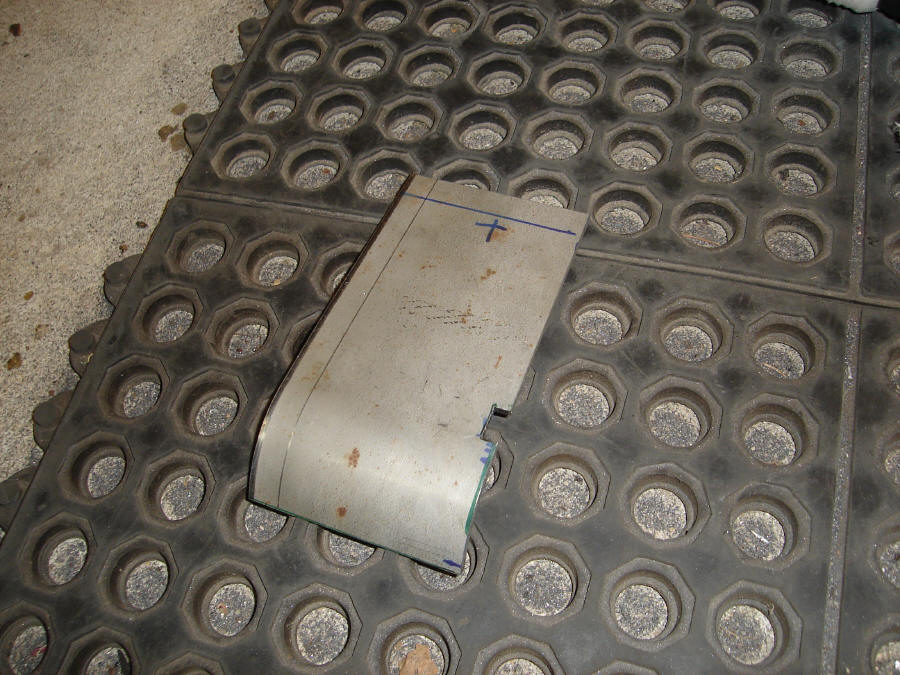
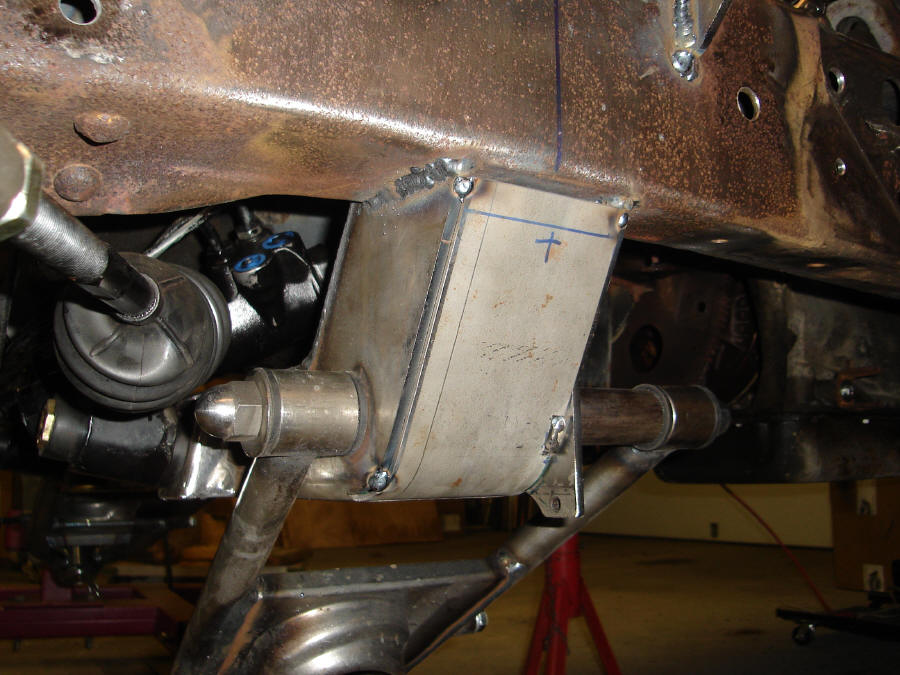
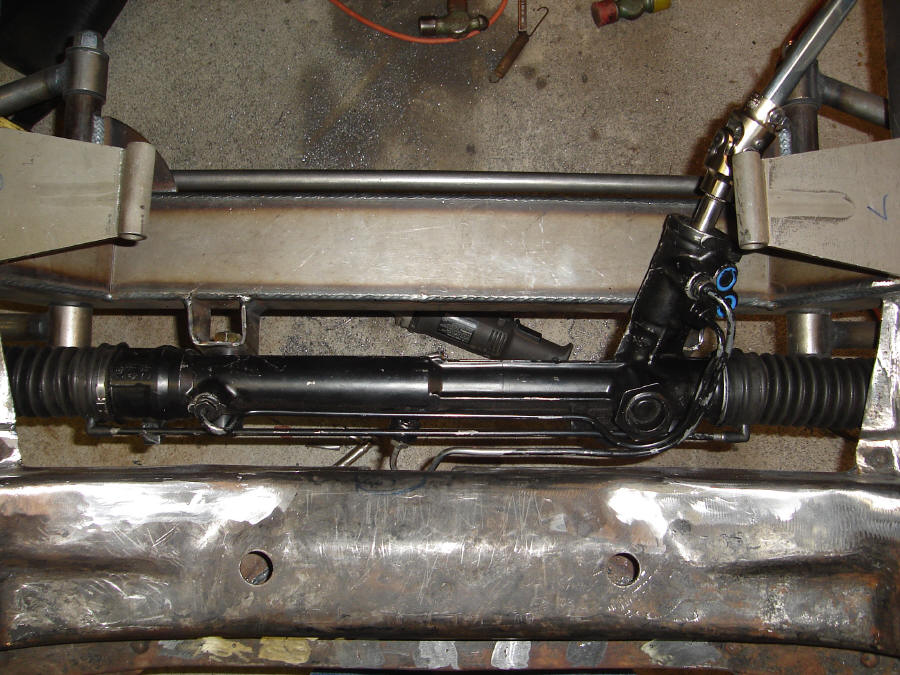
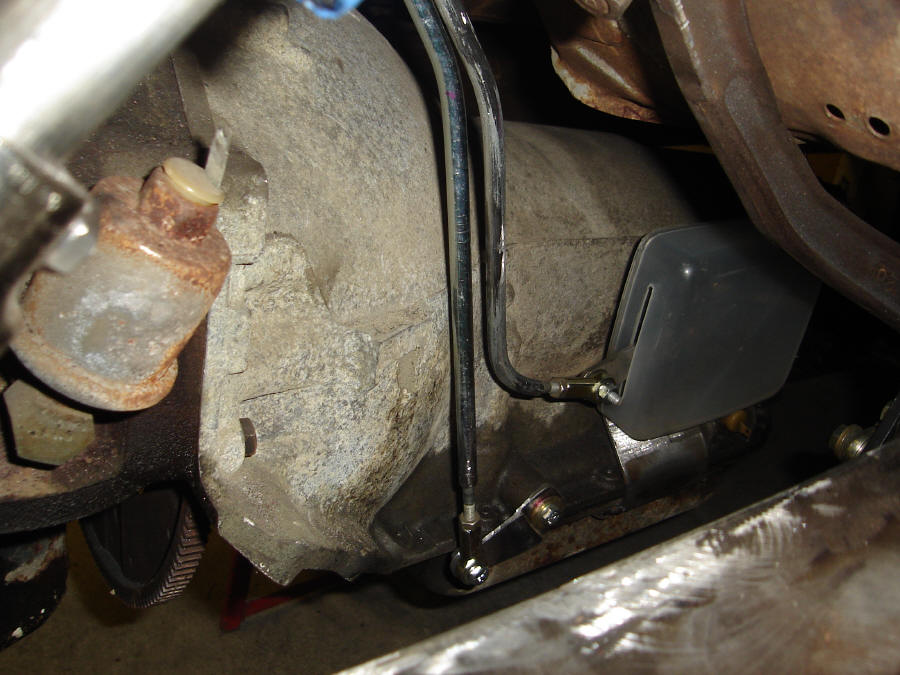
Mocked up the suspension and found there wasn't enough room for the power rack to clear the flange on the original cross member when trying to R&R the rack from under the truck with the engine installed. So the complete aft flange from the cross member was removed and we added a "C" notch to clear the hydraulic line on the rack. It was decided to completely box the cross member and have fitted a plate to fill in the center portion of the bottom of the cross member originally left open.
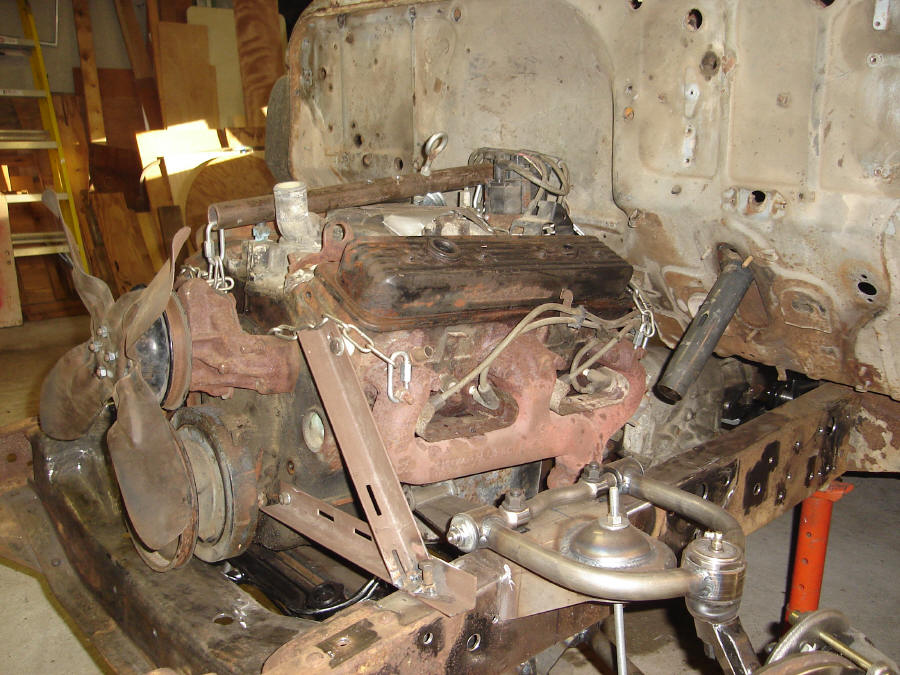
The engine and transmission was then mounted with the engine mounts fitted and tack welded in place. I didn't like the transmission cross brace we got from CPP so we cut it apart and modified it to what we wanted. It has now been installed.
Mocked up the suspension and found there wasn't enough room for the power rack to clear the flange on the original cross member when trying to R&R the rack from under the truck with the engine installed. So the complete aft flange from the cross member was removed and we added a "C" notch to clear the hydraulic line on the rack. It was decided to completely box the cross member and have fitted a plate to fill in the center portion of the bottom of the cross member originally left open.
The engine and transmission was then mounted with the engine mounts fitted and tack welded in place. I didn't like the transmission cross brace we got from CPP so we cut it apart and modified it to what we wanted. It has now been installed.


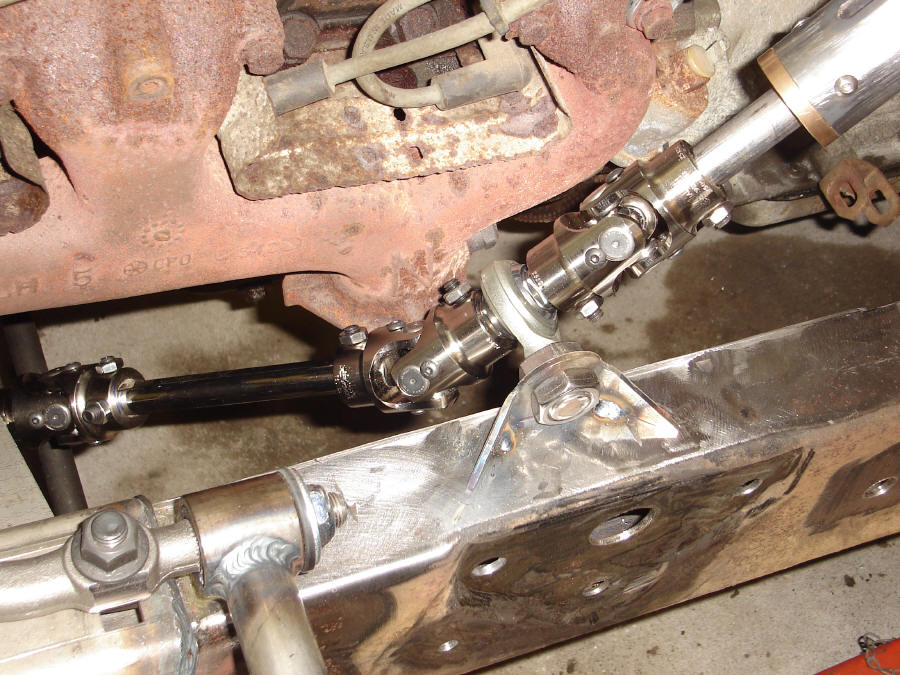
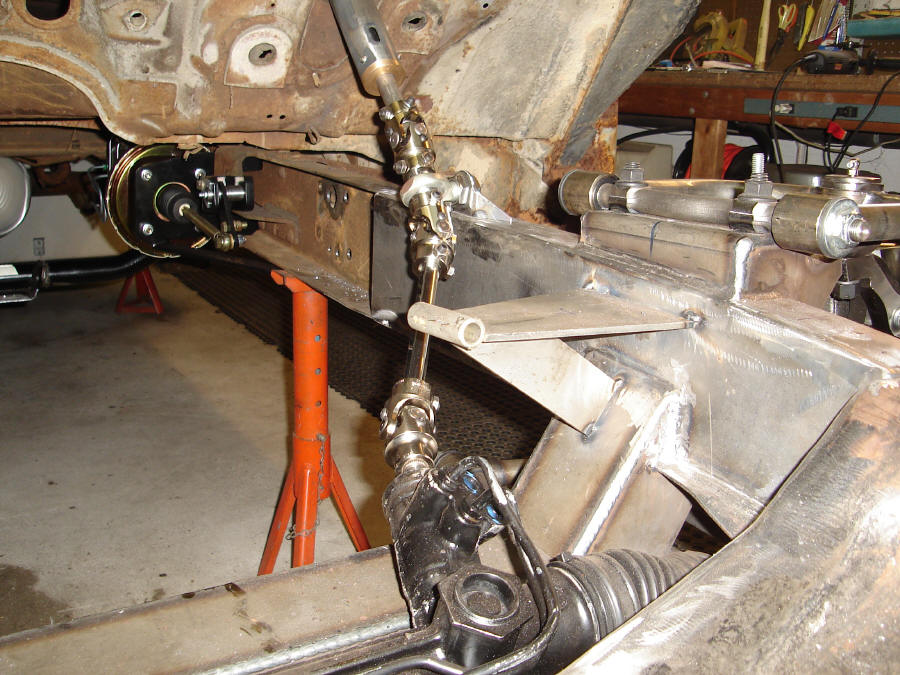
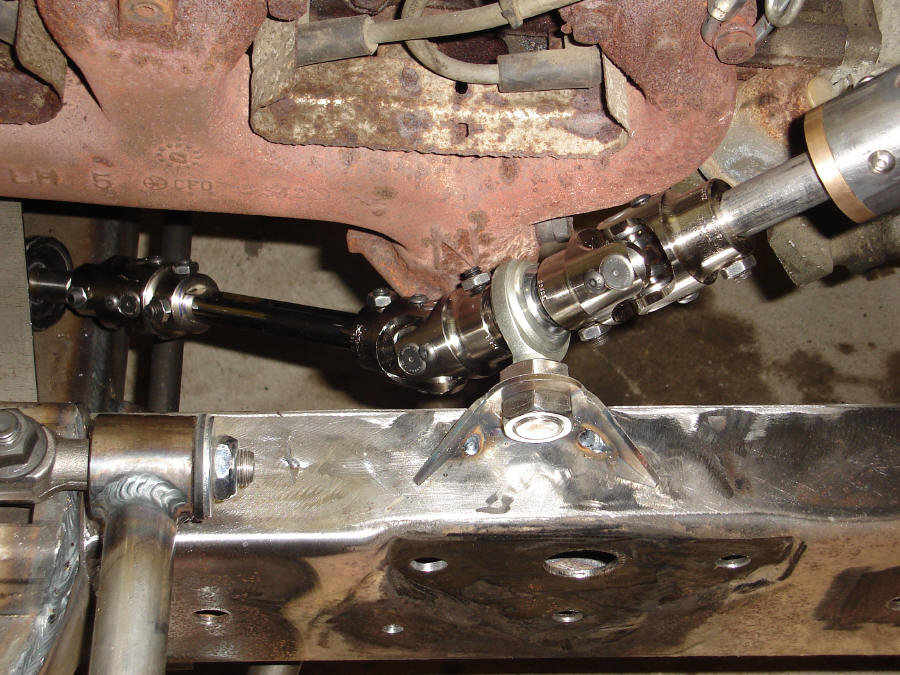
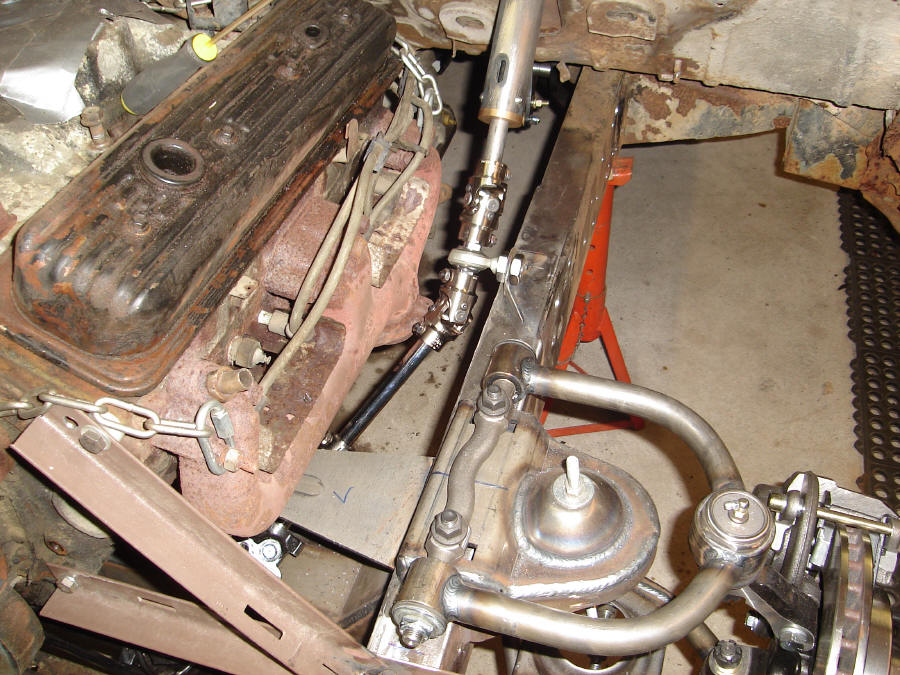
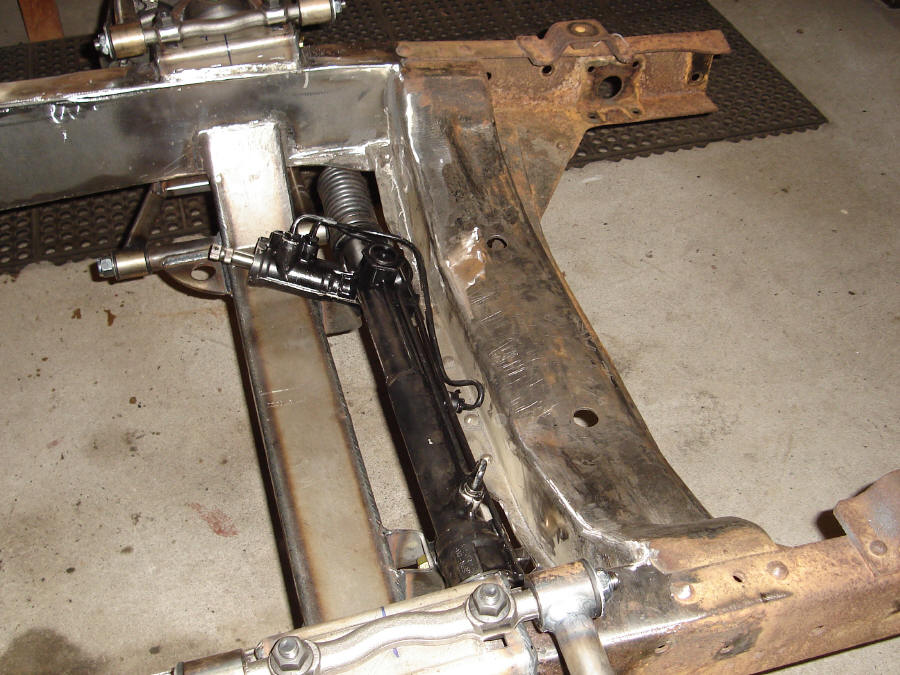
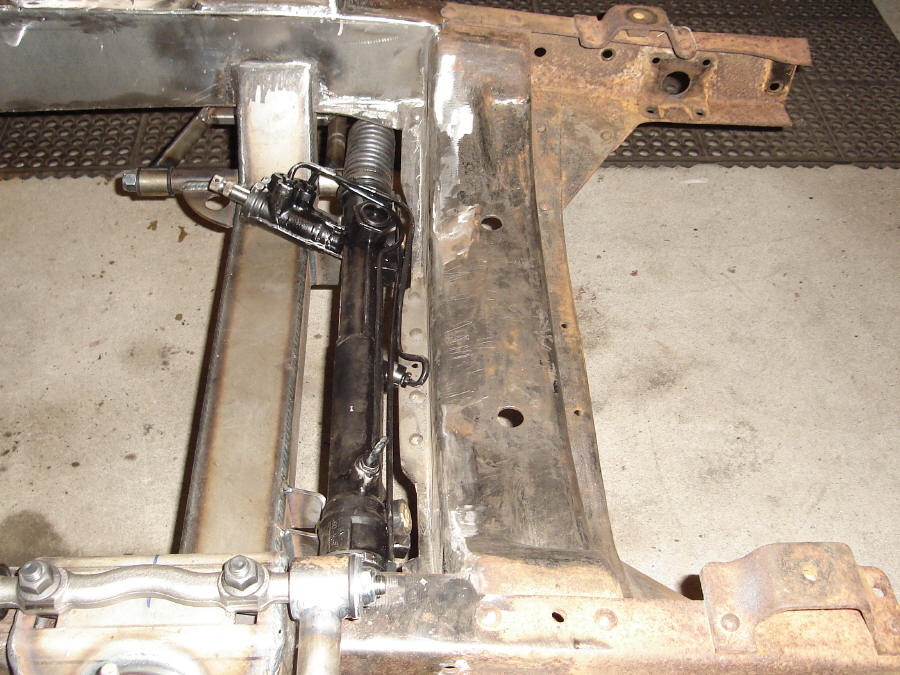

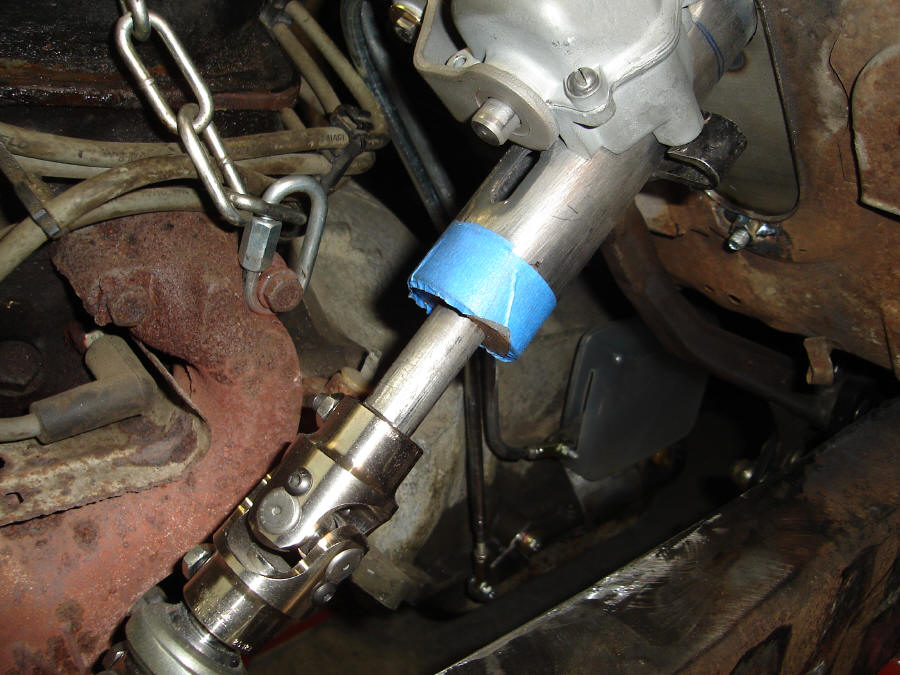
We plan to use the stock steering column and have cut the column and shaft from the original steering box. Then it was cut shorter and made a bushing to support the steering shaft. The column has been re-installed and moved closer to the firewall by an inch. I used 3 universal joints from Flaming River, with a center support and double "D" shaft to tie the column to the power rack.
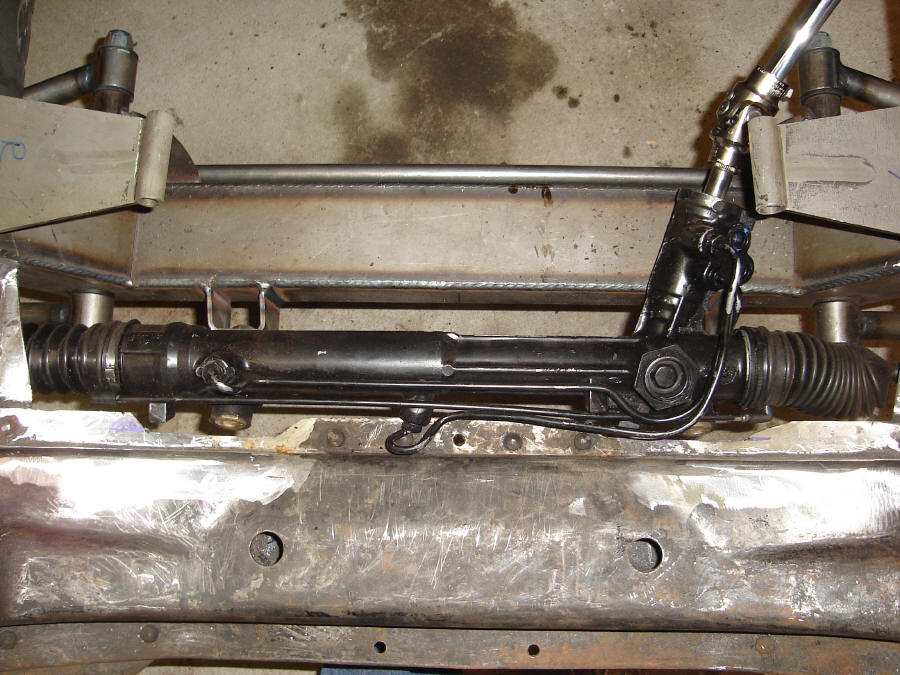
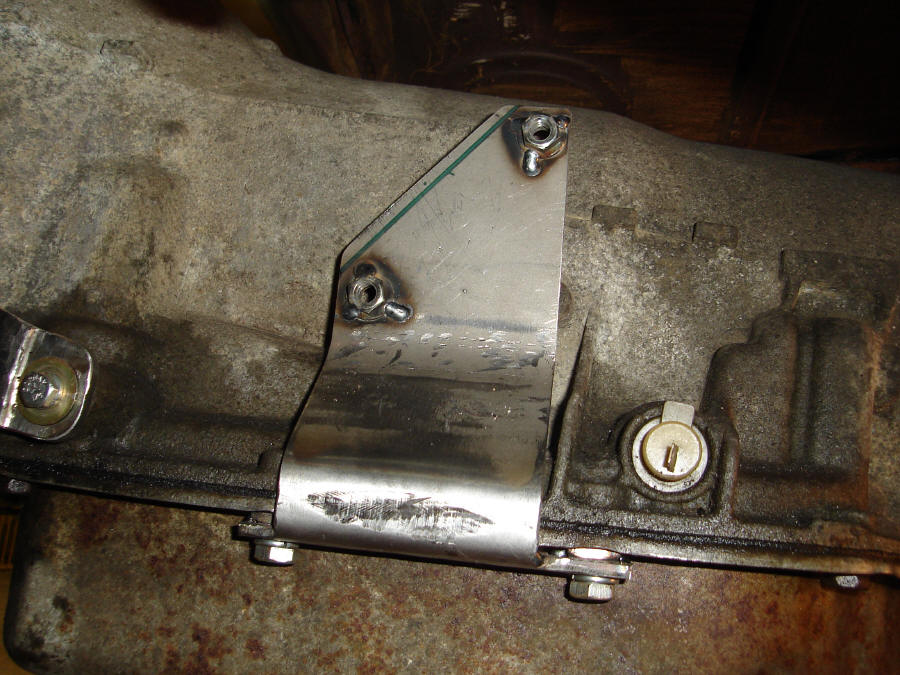
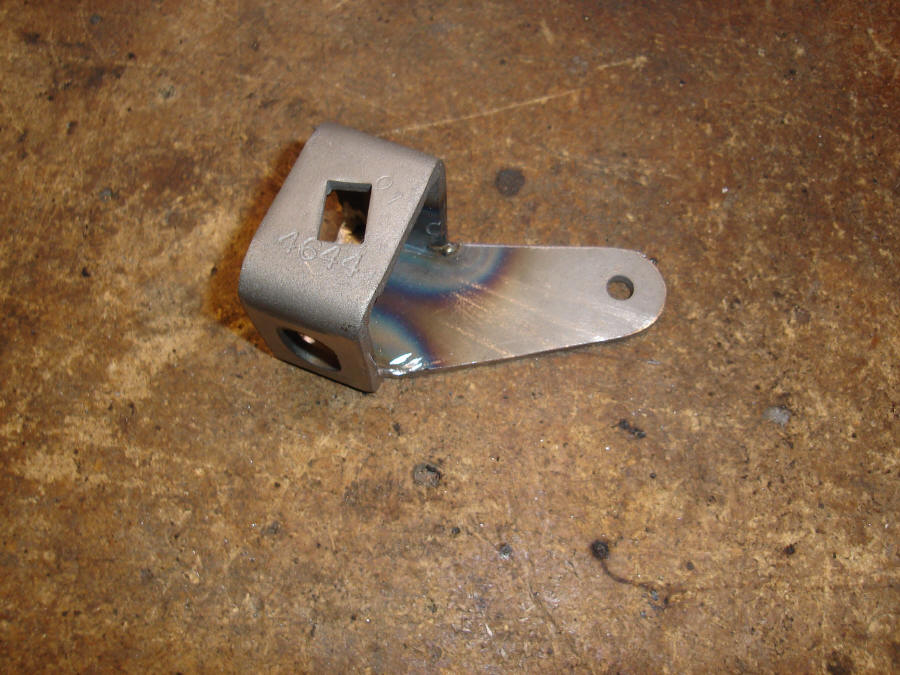
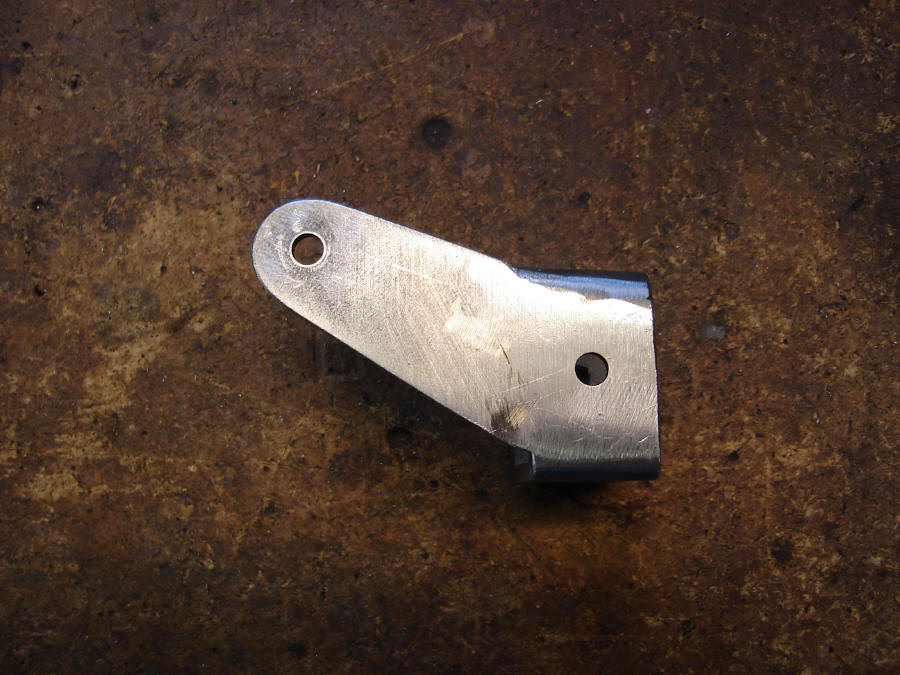
Looking at the steering shaft we noticed there was an excessive angle where the shaft meet up with the rack. So I decided to roll the rack forward to lessen that angle and figured out 10 degrees would work well. The mounting brackets were cut and leaned back and welded back together. Looking at the steering shaft now shows a much straighter shaft.
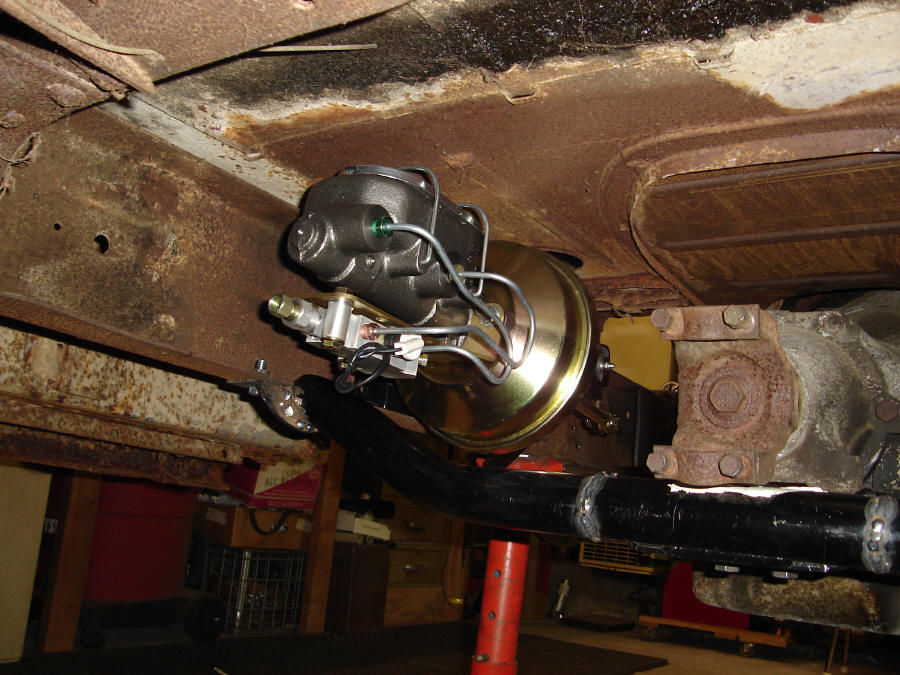
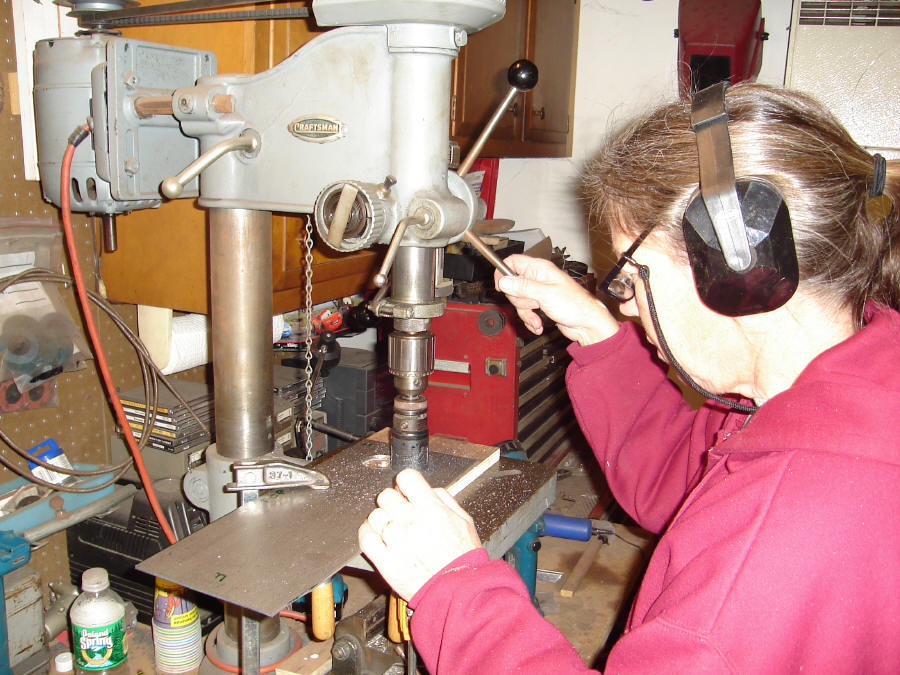
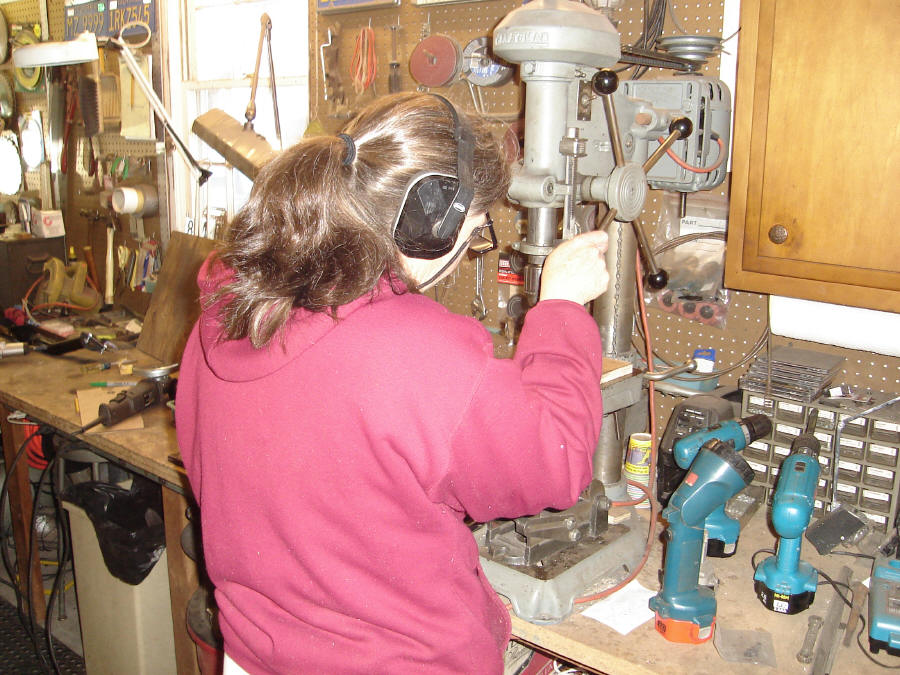
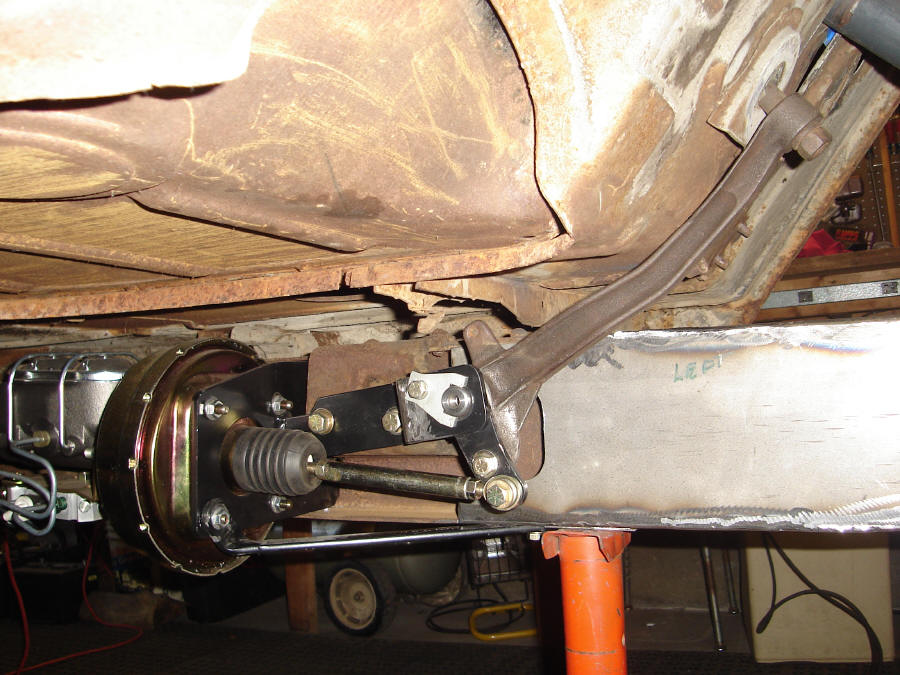
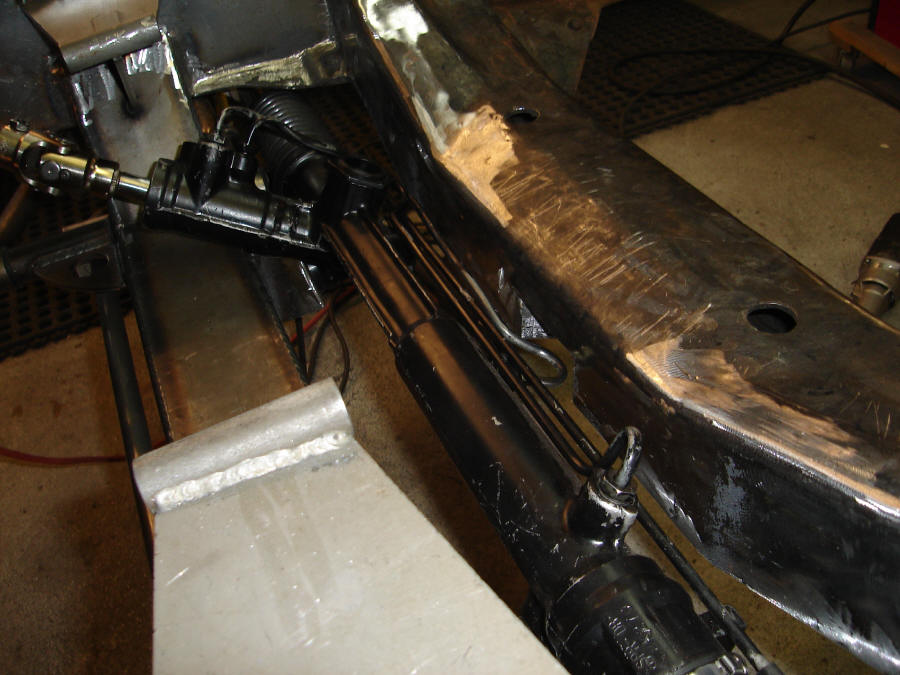
Audrey went to work mounting the brake booster under the truck. The bracket bolts to the original master cylinder mounting bracket, then there are two bolts through the frame side and a support brace bolted to the bottom of the frame. She did a good job of getting the holes drilled and bolted down. Then she installed the brake pedal and arm, this is when things went downhill. The new pivot shaft for the brake arm wouldn't fit and we had to ream the arm bushing.
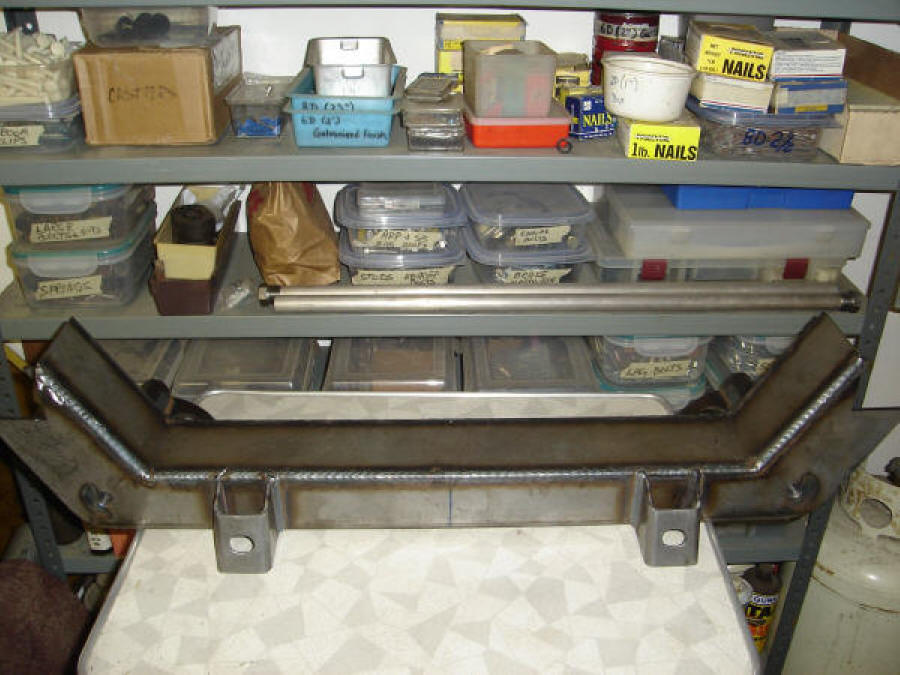
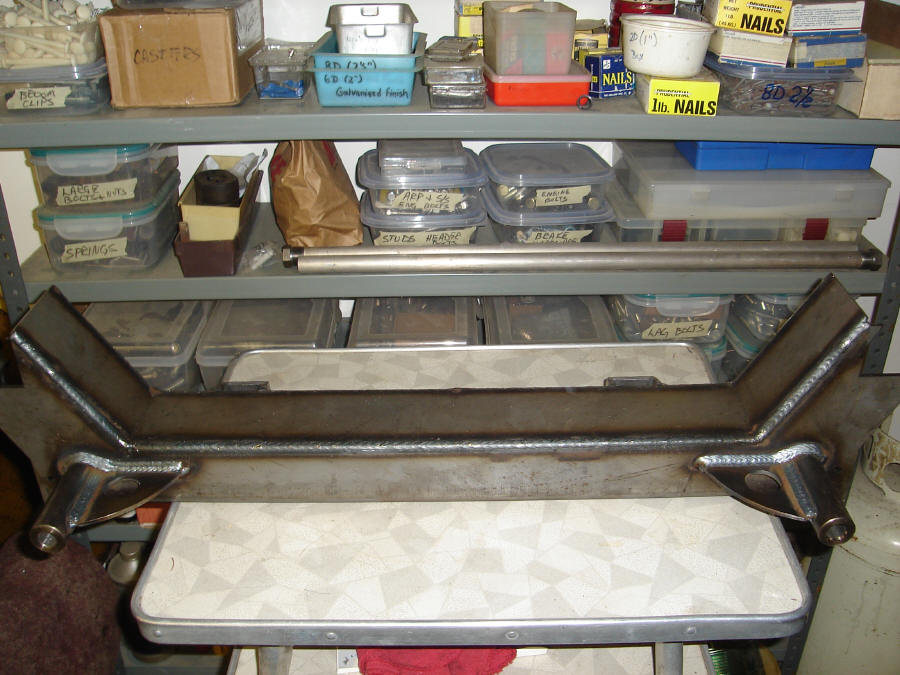
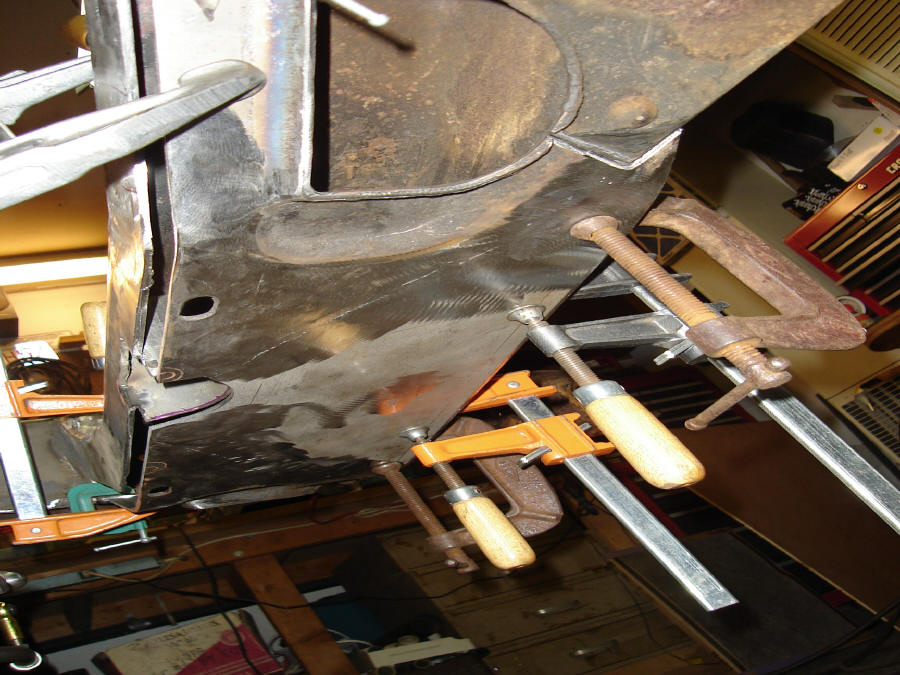
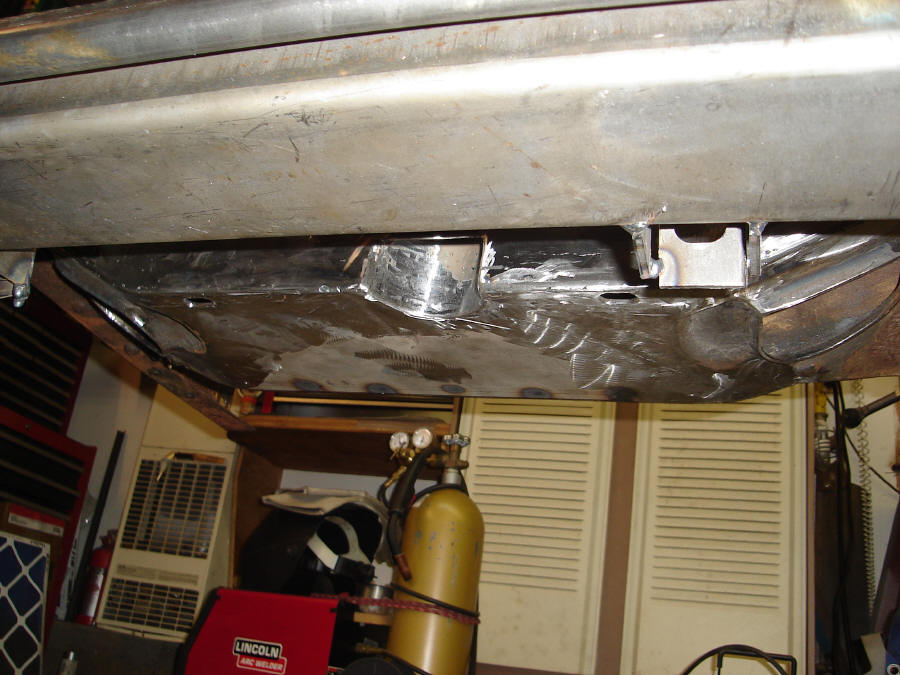
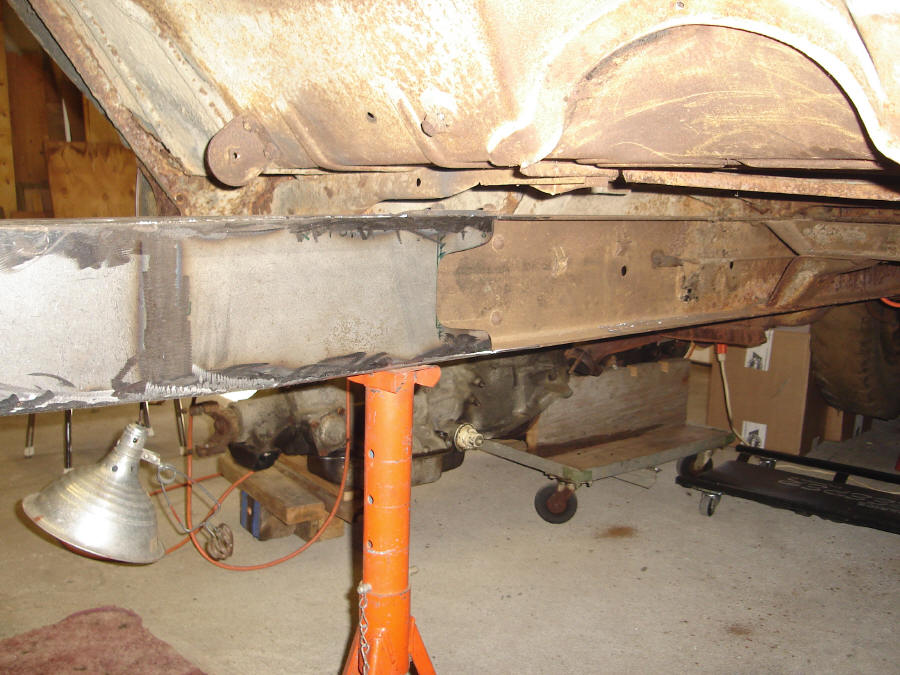
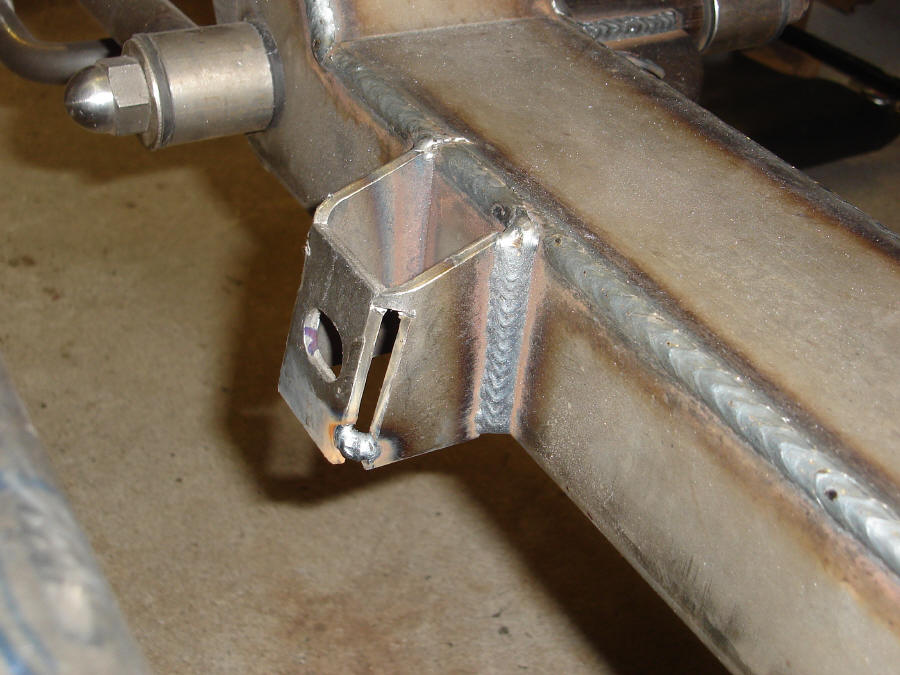
Still having problems with the brake bracket and the alignment of the pivot shaft wasn’t square causing the brake arm to bind. We cut the support from the main bracket and welded back on with the pivot in alignment so now the brake arm is free to move without binding Made up boxing plates for the frame to add to the ones that came with the front end kit. This brought the boxed section back to under the cab by the front cab mounts. Also boxed in the ends of the new cross member to add some strength but more to give a finished look.
Looking at the steering shaft we noticed there was an excessive angle where the shaft meet up with the rack. So I decided to roll the rack forward to lessen that angle and figured out 10 degrees would work well. The mounting brackets were cut and leaned back and welded back together. Looking at the steering shaft now shows a much straighter shaft.
Audrey went to work mounting the brake booster under the truck. The bracket bolts to the original master cylinder mounting bracket, then there are two bolts through the frame side and a support brace bolted to the bottom of the frame. She did a good job of getting the holes drilled and bolted down. Then she installed the brake pedal and arm, this is when things went downhill. The new pivot shaft for the brake arm wouldn't fit and we had to ream the arm bushing.
Still having problems with the brake bracket and the alignment of the pivot shaft wasn’t square causing the brake arm to bind. We cut the support from the main bracket and welded back on with the pivot in alignment so now the brake arm is free to move without binding Made up boxing plates for the frame to add to the ones that came with the front end kit. This brought the boxed section back to under the cab by the front cab mounts. Also boxed in the ends of the new cross member to add some strength but more to give a finished look.


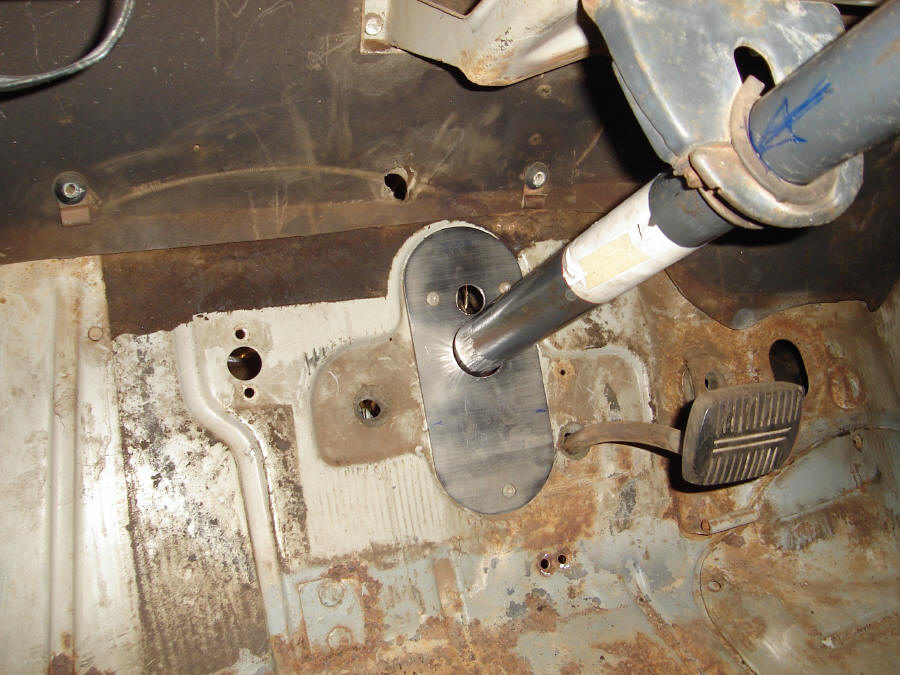


Made up a mounting for the bottom end of the steering column to attach it to the firewall. Decided to make it large enough to cover the complete access hole in the firewall and to do away with the stock rubberized cover. This plate will be welded to the column and bolted to the firewall, holding the column in position in all directions.
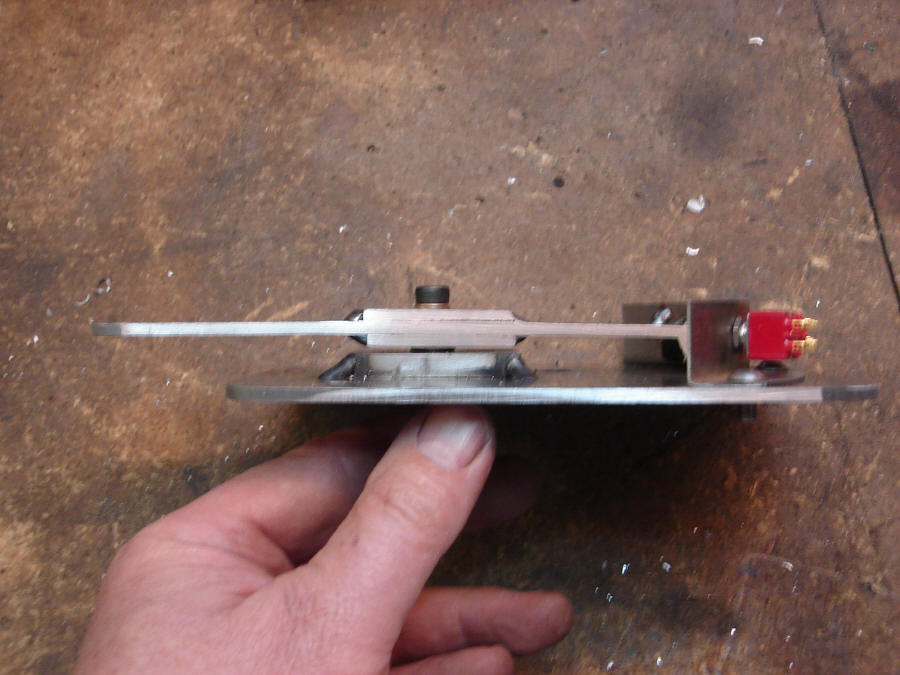
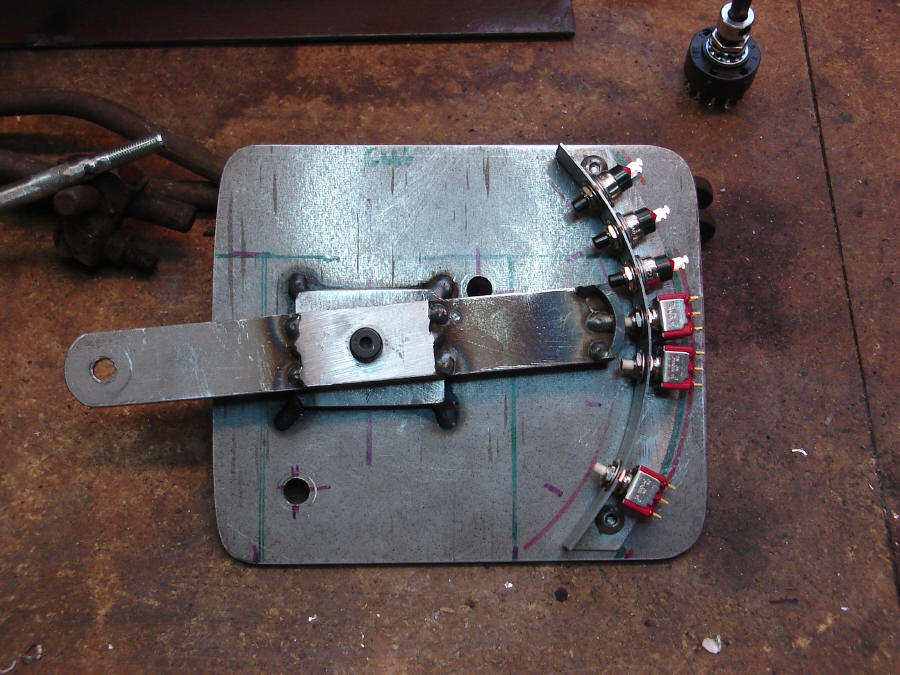
With the theme of keeping the truck original appearing, I kept the original shift mechanism which has presented a multitude of mechanical problems. I came up with a way to incorporate a transmission lock-out into the shift box, then came up with some linkage to connect to the transmission that has the appearance of the original linkage with heim joints at each end for some flexibility and provides adjustment. Next we needed a way to have a gear indicator and after several different ideas didn't work out like I wanted or have the right appearance, I came up with a switch box. Simply, it is a metal plate with a pivot arm, which is connected to the shift box at one end and a set of switches at the other end. Single poll switches were used for the 3 drive gears and double pole for park, reverse and natural. The single pole switches will simply light a position indicator light and the double pole switches will control position indicator lights, as well as provide for a starting circuit in park and neutral and back up lights in reverse. Then there is a plastic cover that we came up with at the store that was a storage box lid. Time will tell if all this will work out.
With the theme of keeping the truck original appearing, I kept the original shift mechanism which has presented a multitude of mechanical problems. I came up with a way to incorporate a transmission lock-out into the shift box, then came up with some linkage to connect to the transmission that has the appearance of the original linkage with heim joints at each end for some flexibility and provides adjustment. Next we needed a way to have a gear indicator and after several different ideas didn't work out like I wanted or have the right appearance, I came up with a switch box. Simply, it is a metal plate with a pivot arm, which is connected to the shift box at one end and a set of switches at the other end. Single poll switches were used for the 3 drive gears and double pole for park, reverse and natural. The single pole switches will simply light a position indicator light and the double pole switches will control position indicator lights, as well as provide for a starting circuit in park and neutral and back up lights in reverse. Then there is a plastic cover that we came up with at the store that was a storage box lid. Time will tell if all this will work out.