Reassembly
Reassembly began with the installation of the body
onto the frame using new rubber bushings and hardware, followed by the engine,
transmission, exhaust and all related parts. The suspension has been
up-graded using an IFS with power rack and pinion steering, power disc brakes
from Myers Racing Products. See the Engine and Frame pages for details on
that work. The steering column has been shortened 2 ½” to match up to the rack
better and the steering wheel has had the diameter reduced from 18” to 16 ½”,
see the Services page for details. The safety lock out switch has been
replaced with one that will work with the new transmission and a cover was
fabricated to give the installation a "clean" look.
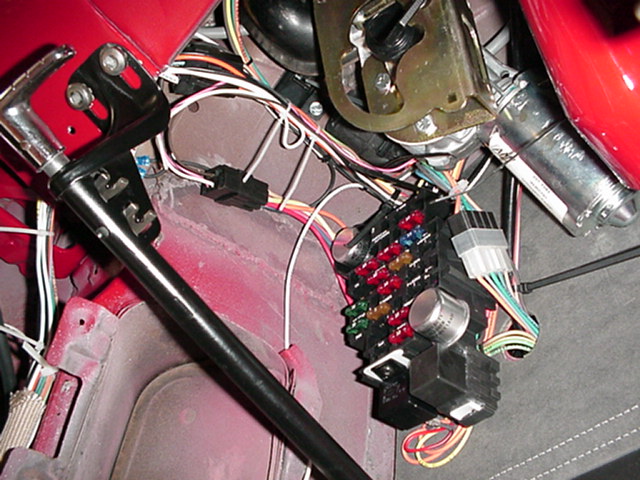
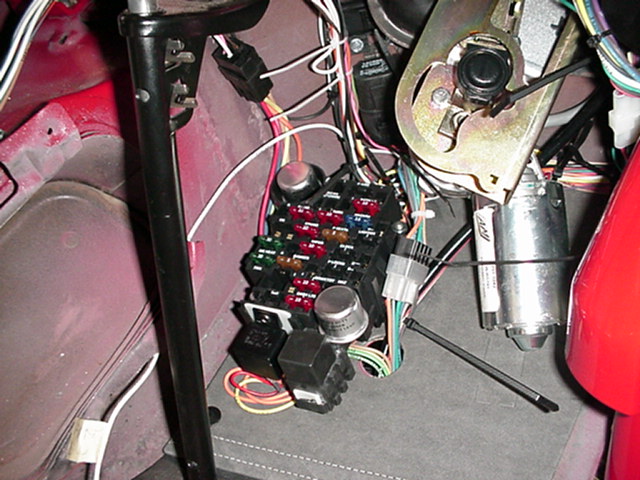
The electrical system has been completely removed and replaced with an American Autowire kit and integrated with the Edelbrock EFI engine harness. With electric windshield wipers, cruise control, electric engine fan, power windows, power door locks all thrown into the mix.
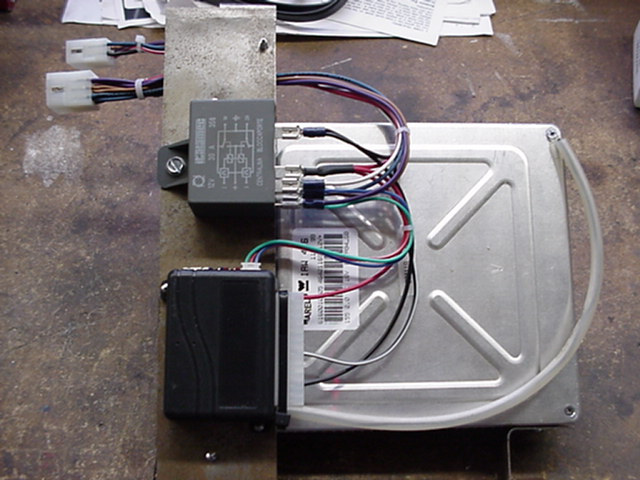
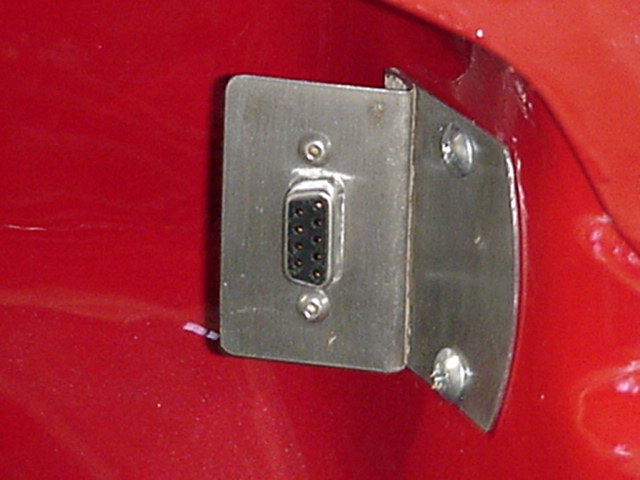
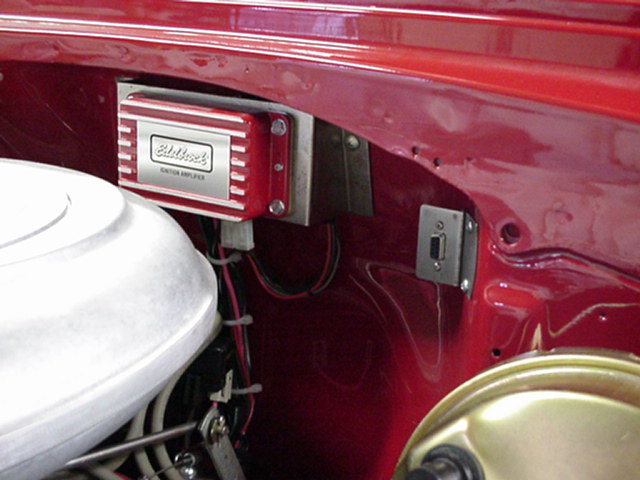
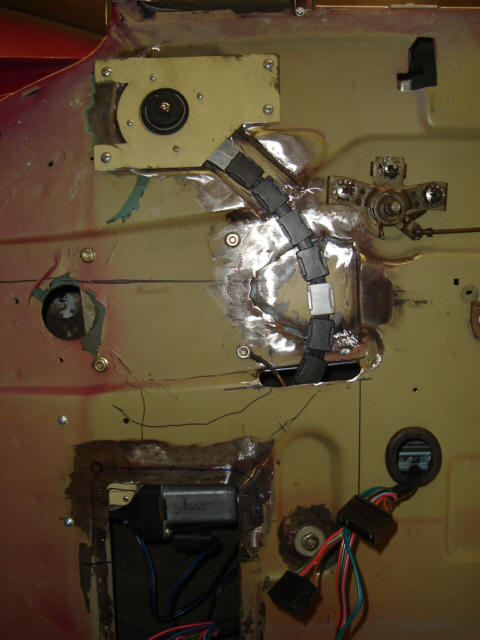
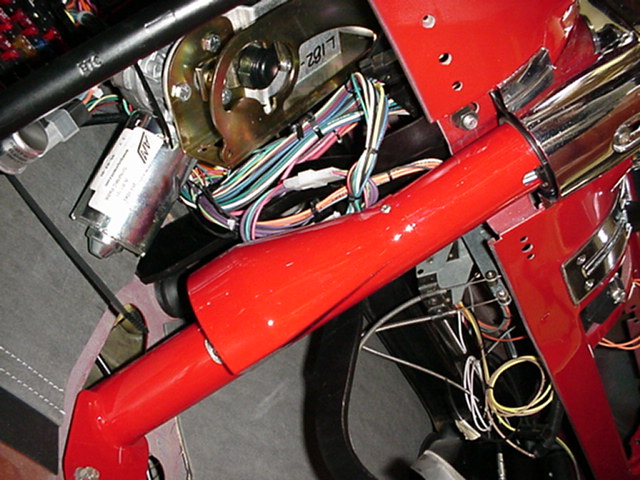
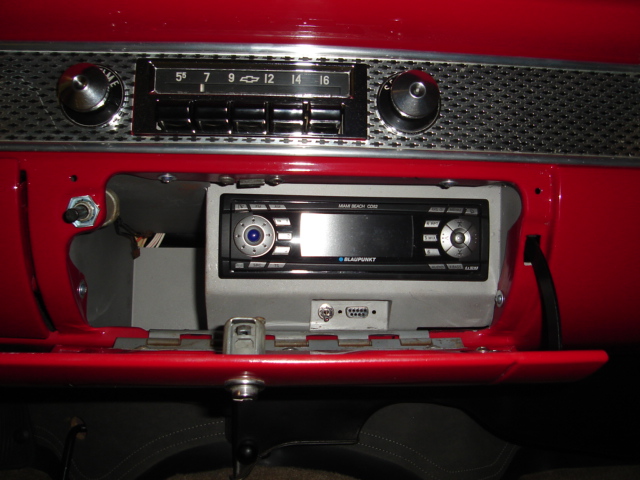
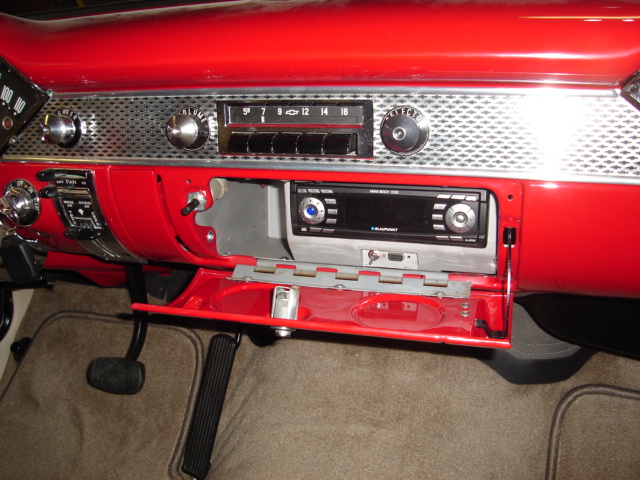
The Engine ECU was installed under the dash where the old radio power supply used to live with the engine harness was running through the firewall where the old windshield wiper motor was mounted. The ignition amp was mounted on a fabricated bracket that covers the hole and harness. The ECU test port will be mounted in the glove box for easy access during the road test and set-up. A second port was added and mounted on the firewall where the old engine wiring came through. This port is used during engine testing when under the hood.
The electrical system has been completely removed and replaced with an American Autowire kit and integrated with the Edelbrock EFI engine harness. With electric windshield wipers, cruise control, electric engine fan, power windows, power door locks all thrown into the mix.
The Engine ECU was installed under the dash where the old radio power supply used to live with the engine harness was running through the firewall where the old windshield wiper motor was mounted. The ignition amp was mounted on a fabricated bracket that covers the hole and harness. The ECU test port will be mounted in the glove box for easy access during the road test and set-up. A second port was added and mounted on the firewall where the old engine wiring came through. This port is used during engine testing when under the hood.

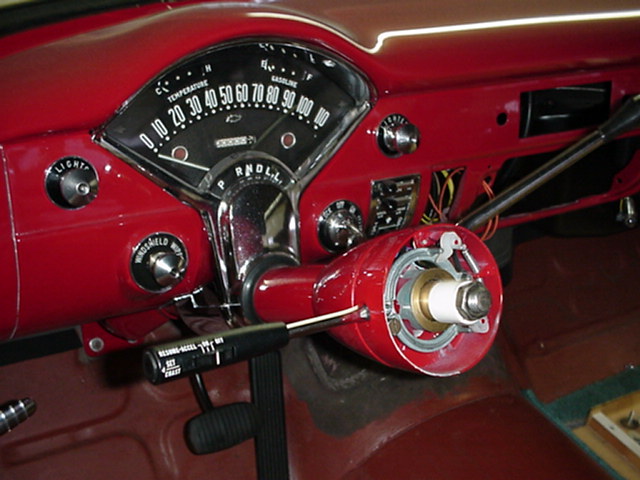
The temp gauge is an electric one from a 56 Chevy in place of the direct
reading one from the original 55. I used the sender from the 56 as well,
but the new 350 engine runs hotter than the old 265 and the gauge was paged out
all the time. I first tried using a sender that was originally in the
350, but it caused the gauge to sit just above the cold line. I placed
both senders in water on the stove and with the use of an ohm meter, I watched
the readings as the water was raised to a boil (212 degrees). With this
info, I determined that a 15 ohm resister in line with the 56 sender would
cause the gauge to read almost full hot at 212 degrees. The resister was
soldered into the lead from the sending unit and so far looks to be a good
match.
The electric windshield wipers are by Rain Gear and the optional delay switch was also purchased and installed. This switch is large and squire, in order to make it fit in the round dash mounting area, the lower corners where carefully cut off on a diagonal.
The cruise control is from Dakota Digital with the servo mounted on the firewall below the left hood hinge. An integrated turn switch control was easy to install in the stock steering column although the wiring harness had to be lengthened.

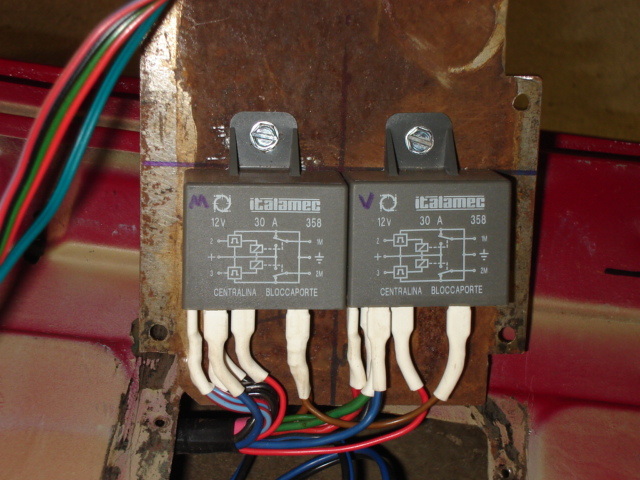

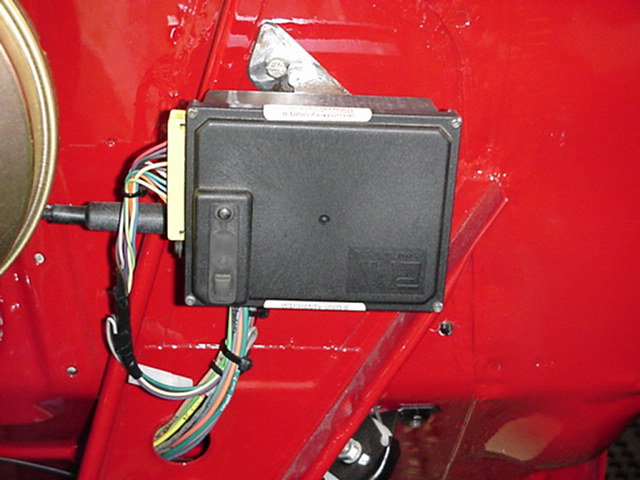
The power windows and door locks are from Electric-Life with the optional
remote entry added to the door locks and was mounted to the back of the ECU
mounting bracket. The 5 wire locks were used so that when one lock is
actuated the other locks work in sync. I was also able to reconfigure the
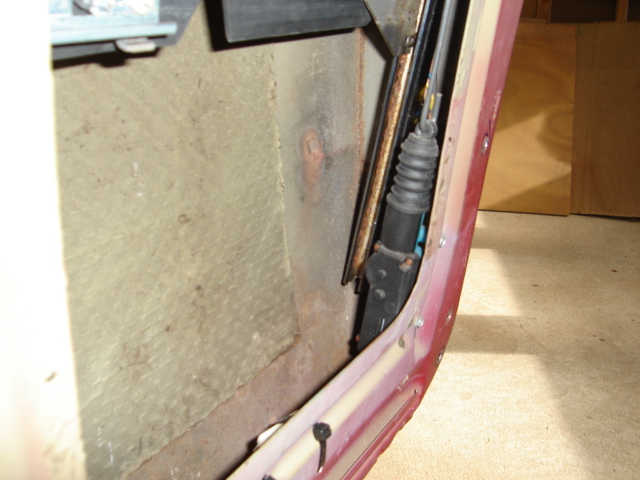
tail gate latch to accommodate a power lock as well. The power main windows was a very easy bolt
in installation, however vent windows was a different story with a universal
power window kit from Electric-life being used. This kit installs a drive
gear in place of the hand crank and has a remote drive motor to turn it; the
trick was being able to hide it all in the door.
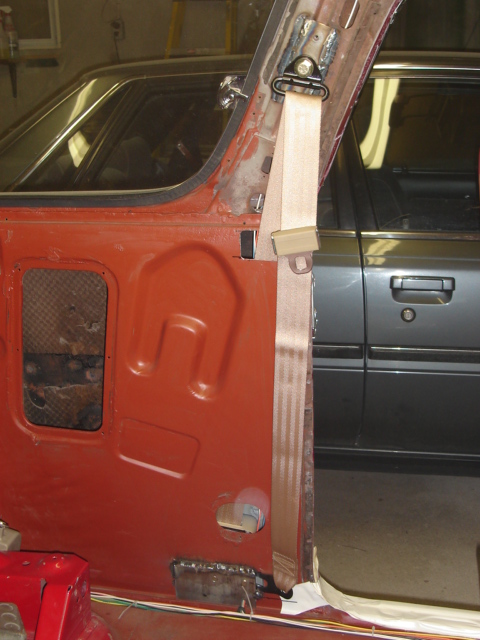
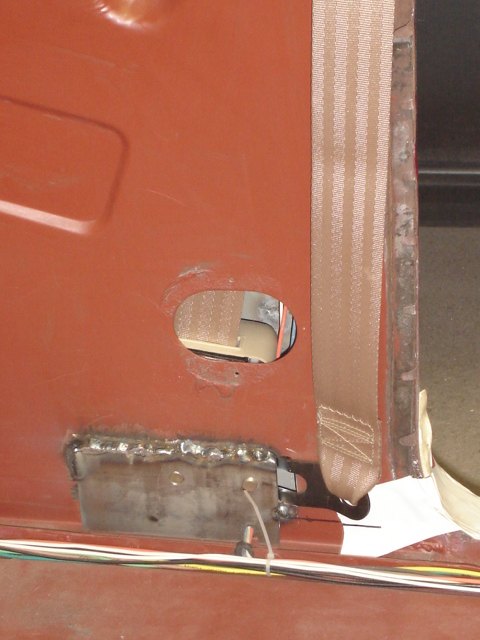
Seat belts are a must, but I hate it when they just lay on the seat. I also like the idea of having shoulder harness type belts in the front. I picked up the belts from Juliano’s, 3 point in front and 2 point rear. I have seen a few Nomads with shoulder harness but they didn't look "factory" with the retractors mounted to the side walls. After a lot of head scratching, I came up with a way to mount the retractors inside the side walls with the belts exiting the side wall at the belt line of the car; looks clean and factory!
Armrests had to be made to hold the switches for the windows and door locks. I also wanted the speakers to be in the door and not under the dash in the kick panels next to the air vents. So I made the armrests to mimic the originals and be big enough to hold everything. These were made these out of hard foam board insulation and wood with the completed armrest being covered with fiberglass to give them a hard shell, then upholstered.


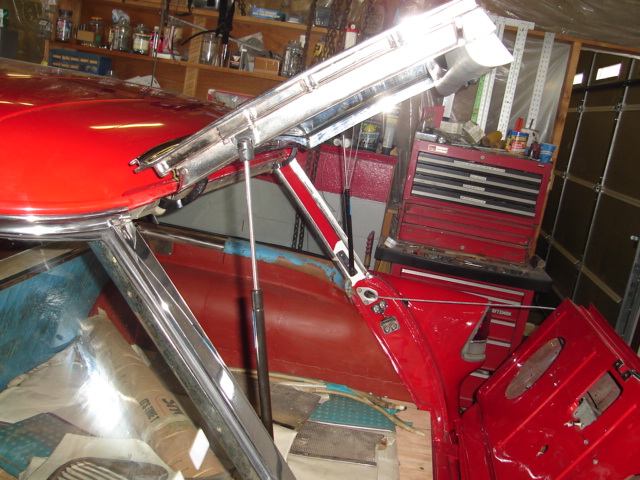
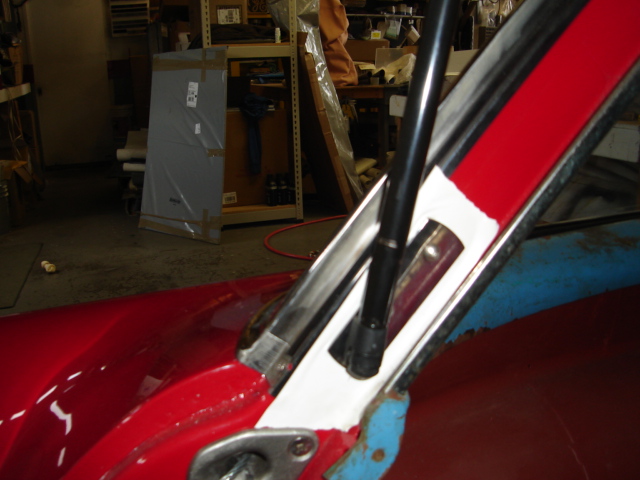
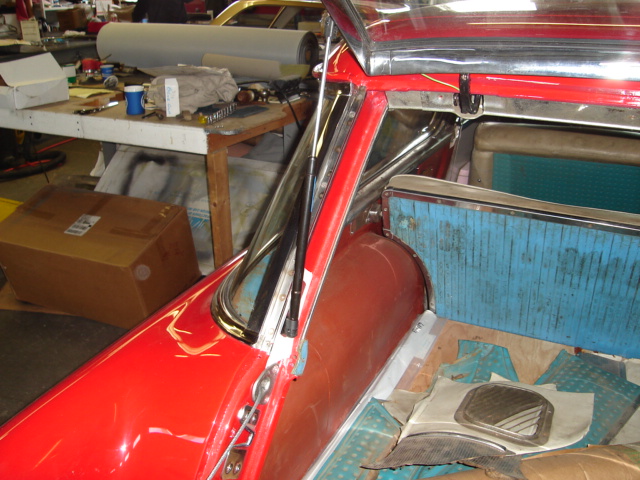
I did away with the lift gate
supports in favor of the new style gas struts. By replacing the supports
with gas struts, the torque rods can be removed which should keep the gate from
twisting again. This was a fairly easy job once suitable struts were
located which I found that McMaster-Carr sells them in all kinds of
sizes. Attaching brackets were made to replace the original support's
brackets and were chromed to look original.
Specialized Automotive Services in Hyannis, MA. did the upholstery work with carpets, headliner, door and side panels and all new seat covers over the original frames.
The new eyebrows and side spears are single piece units from Bill Hunt in Colorado.
Specialized Automotive Services in Hyannis, MA. did the upholstery work with carpets, headliner, door and side panels and all new seat covers over the original frames.
The new eyebrows and side spears are single piece units from Bill Hunt in Colorado.